
Structuring in Scrivener: Controlling the appearance of chapter titles
 Controlling the appearance of chapter titles is another one of those situations…
where it seems Scrivener expects you to make too many decisions.
If fact, the defaults are set up so that you need to make no decisions at all – unless you want to do something different.
In the blog post Structuring in Scrivener: Chapter titles and numbering, I explained how the automatic numbering works – if you want Scrivener to do that for you – and the implications of that decision on what you should use for chapter titles in your binder.
In this post, I’ll go deeper, and look at the second and third panes of the Section Layout… which allow you to control the appearance of the chapter title.
First though: let’s recap on the Title Prefix and Suffix pane.
The Title Prefix and Suffix pane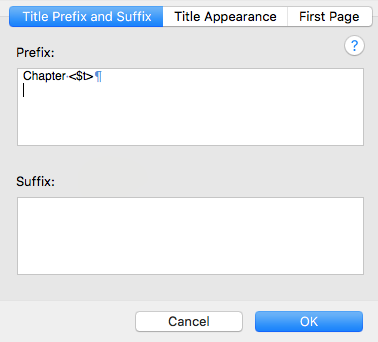
In the Title Prefix and Suffix pane, the prefix is used to announce it’s CHAPTER ONE or Chapter 1, etc. That’s followed (maybe) by your chapter title as entered in the folder in the Binder.
What is the Title Suffix used for?
A prefix comes before and a suffix comes after. What on earth might you want to appear after the chapter title?
Well, when you are at the editing stage and maybe want to output a proof copy, it might be useful to include – as a suffix – the text PROOF COPY – NOT FOR DISTRIBUTION.
It’s also possible to include, after the chapter title information, that chapter’s metadata – who has the POV, what’s the location, … – by ticking the meta data box for the formatting level. More on that another time.
Need a reminder on metadata? Read my blog post series starting with Harnessing the power of metadata.
The Title Appearance pane
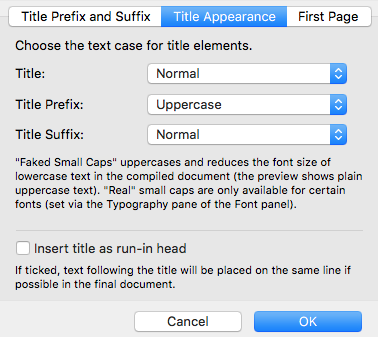
In the Title Appearance pane, there are the same four options for Title, Title Prefix and Title Suffix:
- Normal
- Uppercase
- Faked Small Caps
- Lowercase
You also have the option of inserting the title as a run-in head.
Whatever you decide, this formatting will apply to all text at the same level. In this way, your book will have a consistency of layout. So, although it might seem like you are making lots of decisions, at least they apply throughout your manuscript. And, you can make different decisions for the different levels.
The First Page pane
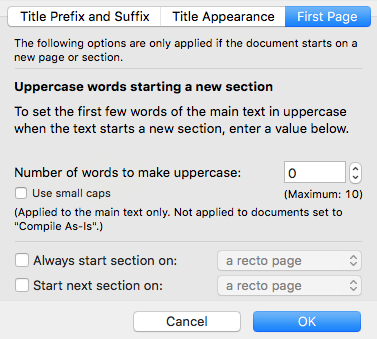
In the First Page pane, the introductory text stresses that this only applies if you have ticked the appropriate Pg Break Before box in the Content pane.
You then have the option of using uppercase lettering to start the text of the chapter, and also to determine whether you want every chapter to start on a right-hand page (recto).
(The left-hand page is called verso – it appears on the reverse of the recto page before it.)
If you have a look at a few books, similar to the one you are writing, you might discover that all chapters start on a recto, and sometimes this means there’s a blank recto before it.
This tends to be the case for non-fiction books where there might be a complicated design for the opening page of a chapter, and to have to design a verso version as well as a recto version can add significantly to the design costs. But in fiction, why waste a page?
If you’d like to see a demonstration of any of the features discussed in this blog post, book a Simply Scrivener Special.
The ScrivenerVirgin blog is a journey of discovery:
a step-by-step exploration of how Scrivener can change how a writer writes.
To subscribe to this blog, click here.
Also … check out the Scrivener Tips
on my ScrivenerVirgin Facebook page.
No Comments