
10 reasons why I’ll write my NaNo2017 novel using Scrivener
I use Scrivener – for all my writing projects.
Why? Because it makes me feel I am in control. Correction: I am in control!
Why use Scrivener for NaNo2017?
(NaNo is short for NaNoWriMo which stands for National Novel Writing Month, and that’s November – the month I set aside each year to write, write, write.)
Why use Scrivener for NaNo2017? A good question! There are four quick answers:
- Scrivener will make the planning of my novel, ahead of 1 November, easier.
- The planning that I do will make the writing during NaNo2017 a doddle. Enjoyable. An indulgence!
- Editing – beginning next February/March – will be a breeze, using Scrivener.
- Self-publishing, when I am ready, via the Compile option, is set up for a multitude of exporting options: eBook, Kindle, paperback. Easy, peasy!
And there’s a longer answer … read on.
Why use Scrivener to write a novel?
I choose to use Scrivener to write each novel, because Scrivener lets me see my manuscript from the top down, from the bottom up, from each character’s point of view, and from the reader’s perspective too.
(Another post will tell you why Scrivener is also so good when it’s time to edit that novel.)
Here are my 10 reasons why Scrivener is my choice for writing a novel.
1: All in one place
 I have just one file for each writing project, be it a novel or a series of blogposts, or a marketing campaign. So, for NaNo2017, I’m starting a new project file called Lucinda’s Legacy. Within that one file, everything relating to this new novel will be stored.
- The manuscript itself, conveniently separated into scenes, later to be bundled into chapters
- My character sketches, complete with images of actors I’ve chosen to play the part – when my novel’s a best seller and heading for the big screen …
- My locations, complete with maps and photos
- All my research notes as links to webpages
2: I choose my workspace
On my main screen, Scrivener offers an overview of the project.
- The Binder panel sits to the left of my screen, the main folder being the Manuscript and below that, my Research folder.
- In the middle, I have my Editing pane with a choice of three options: Scrivenings, Corkboard and Outliner.
- To the right, I have the Inspector.
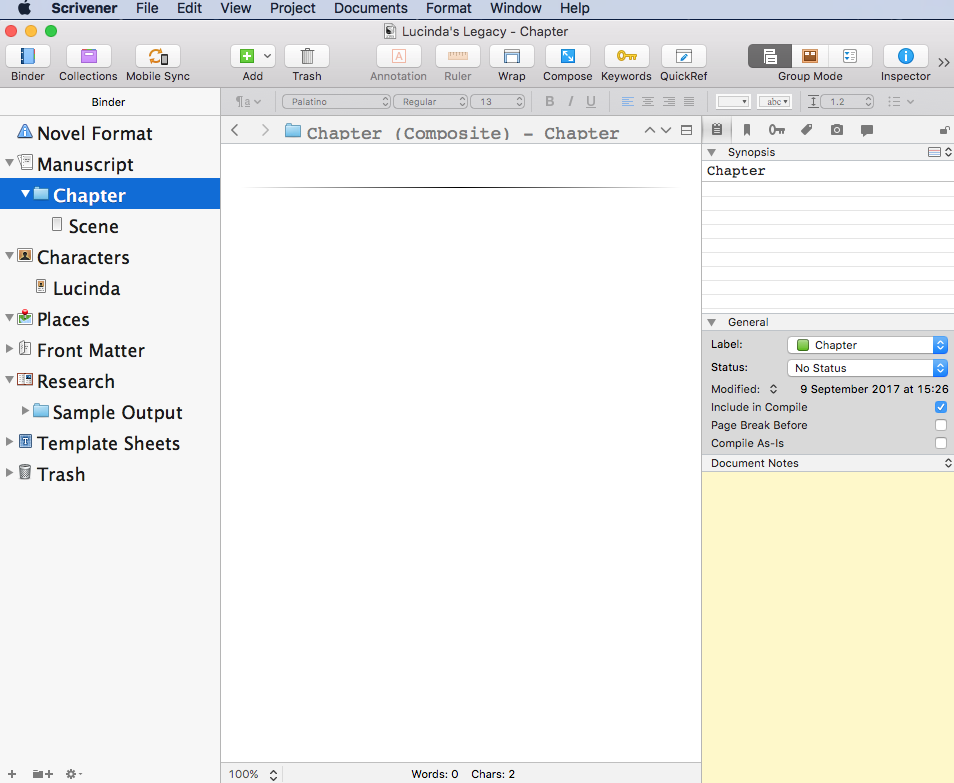
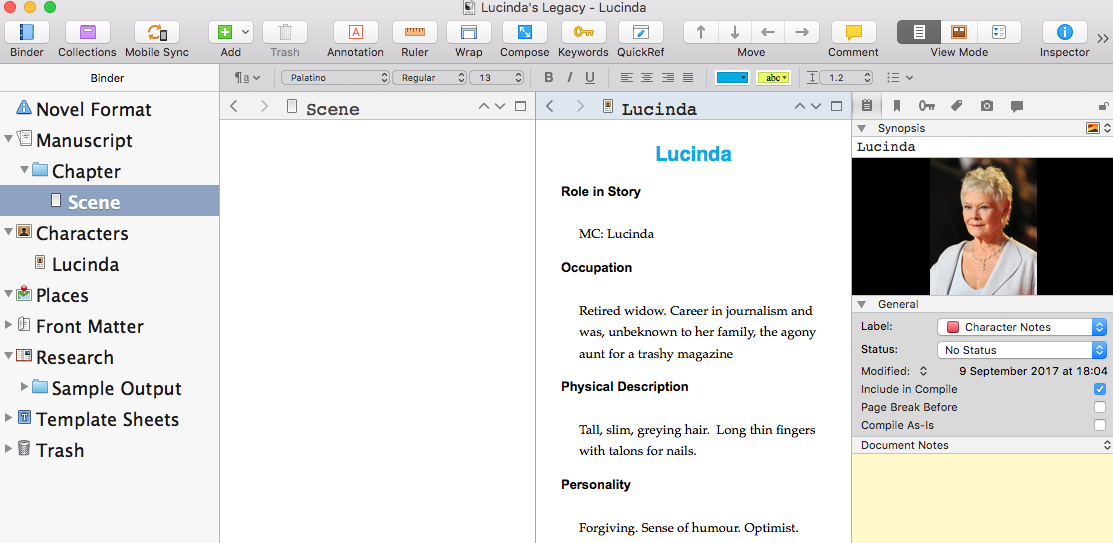
I can split the Editing pane so that I can view the chapter I’m working on, at the same time as a character sketch or a scene, or a page on a website. Right now, I have no text (and won’t have any until 1 November) but, already, I have identified my main character. I’ve started writing her character sketch – and I’ve chosen Judi Dench to play the lead (when I sell the movie rights for this best selling novel!).
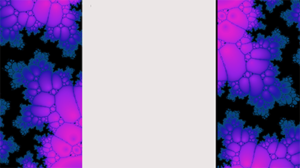
Composition mode, with a background of your choice!
If I want, I can dive into composition mode, which clears the screen of everything but the piece I am writing. No distractions. Perfect NaNoWriMo conditions.
3: I can write / mind map my outline ahead of time
The synopsis cards provides a simple way to throw ideas onto the corkboard and let my novel structure evolve – without writing a single word of the novel itself.
All the planning can be done in advance, so November is left for pure writing.
4: I am free to write how I like
Once writing commences for real, I never write a novel, starting at the beginning and ending at THE END.
Having set up my outline, I choose what to work on next, which scenes to focus on today. That frees up my creativity. I am not chained to a schedule of writing: scene 1 followed by scene 2 followed by scene 3.
Often, I will write ‘the story’ from one person’s POV, and then go back and write the intervening scenes, maybe from a third person’s POV.
If I feel I’m drying up, I can abandon that scene, turn tail and dive in somewhere else.
Whatever comes into my mind I can type it up, and slot the scene in where it belongs straightaway, or let it rest in the ‘to-be-fitted-in-later’ folder.
5: I can leave myself notes
While I’m writing, I can leave myself notes. When it comes to editing – which will not happen until sometime in 2018 – I’ll work my way through these notes.
So, when my internal editor makes irritating comments, like ‘I thought Joanna was called Joanne’, I just make a note to check this detail later. There’s no break in the flow of my writing.
6: I can go deep
Scrivener provide ways of labelling scenes, setting a status, colour coding, and creating meta data (data about data).
So, I can keep track of what’s still to be done, which scenes are from whose point of view, and a load else besides.
7: I can change my mind
The corkboard gives me an overview of scenes, one by one. If I want to alter the order, or slip in an extra scene, it is so easy. So easy!
8: I can write on the go
Scrivener is also available on my iPad, so I can write wherever I am …
No need to lug about a laptop. No potential writing moment need ever be wasted.
9: I set my goals and I achieve them
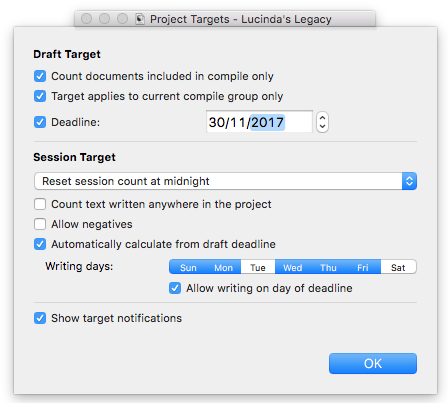 Knowing that I want to write at least 50K words during NaNo2017, when I created my new project file, I set a project target. Select Project / Show Project Targets.
First, I have to set the deadline date. It’s the last day of November and I tick the box to allow words written on that last day to be included.
I start writing at midnight on October 31 so I’ve opted to reset the daily target at midnight. There are other options: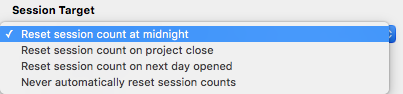
Notice also that I’ve declared Tuesdays and Saturdays as non-writing days. This is because I know, from experience, that makes sense to build in a couple of days a week for ‘other stuff’.
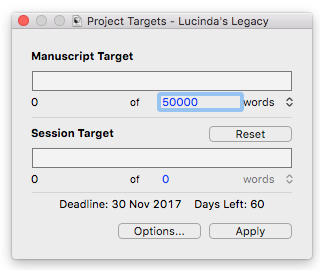 Then, I click on OK and Edit, and set the target of 50K.
Notice that I set this target on Saturday (9 September) and Scrivener knows that there are 60 writing days till the deadline. (5 x 12 weeks)
There will be no excuses for falling behind schedule!
10: Loads of support
Learning how to use a sophisticated piece of software like Scrivener takes time and energy and, if you are like me, both can be in short supply!
It’s not just knowing what every item on every menu does, it’s also appreciating how this magnificent software, with all its buttons and bells, might help a writer – like you and me – to achieve what we need to do: write that novel.
There’s an abundance of support:
- Literature & Latte’s support options and their Scrivener Manual
- Online videos and tutorials
- Courses from experts: The ScrivenerCoach Joseph Michael, Gwen Hernandez (author of the Dummies Guide), Karen Prince and Steve Shipley (expert in iOS).
So, if you are not yet using Scrivener, get your copy now?
All the material on my website is free, and the RedPen Newsletters too. But, ScrivenerVirgin / RedPen is also a business and my livelihood. So, for some – not all – of the stars mentioned in my blog posts, and on my Recommendations page, I am an affiliate. That means, if you purchase a product having clicked a link through my site, I may earn a commission on any sales that follow. You pay no more than you normally would! And, you help me to offset the costs in providing my free webinars. I only share links – and direct you to them – if I believe these guys can really deliver, and they do.
The ScrivenerVirgin blog is a journey of discovery:
a step-by-step exploration of how Scrivener can change how a writer writes.
To subscribe to this blog, click here.
Also … checkout the Scrivener Tips
on my ScrivenerVirgin Facebook page.
No Comments