
NaNoWriMo 2016: Using the split screen option
Never tried the split screen option?
Or have – and got into a pickle – read on. All is explained!
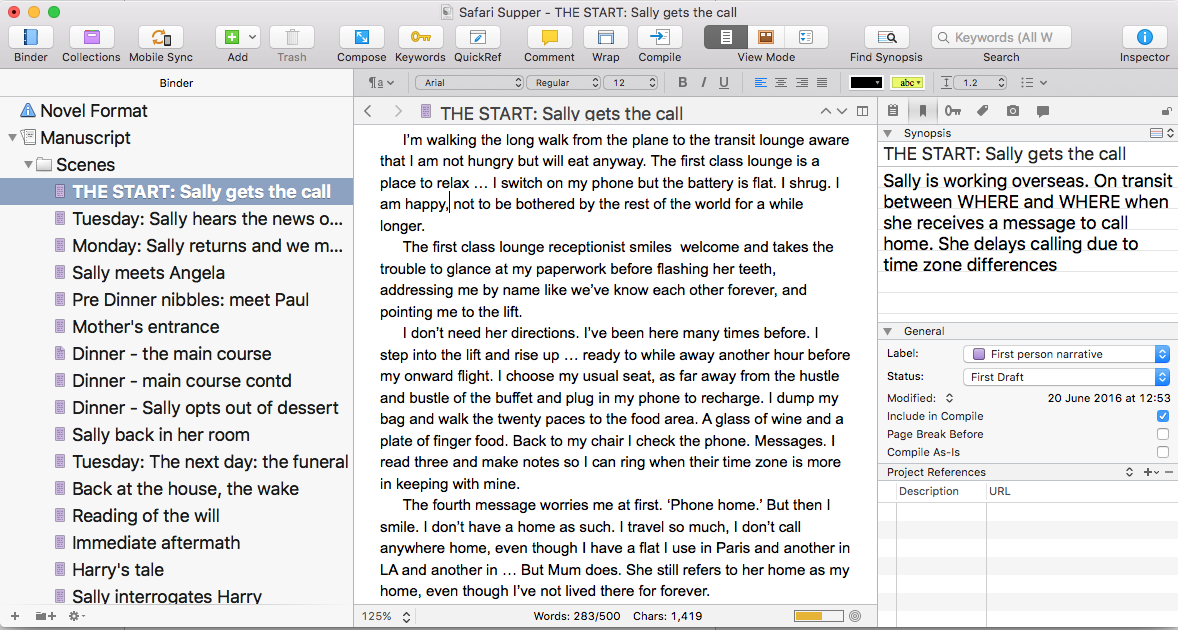
What does the Scrivener screen look like, without a split screen?
If you are looking at one scene, and choose Scrivenings view, you’ll have the Binder on the left with your selected scene highlighted, the text of your scene in the centre Editing pane, and the Inspector on the right.
![]()
Notice the icon in the top right of the middle pane. This toggle button lets you switch to split view (and back again) and it will give you two panes, one beside the other, both containing whatever was there when you clicked the toggle button.
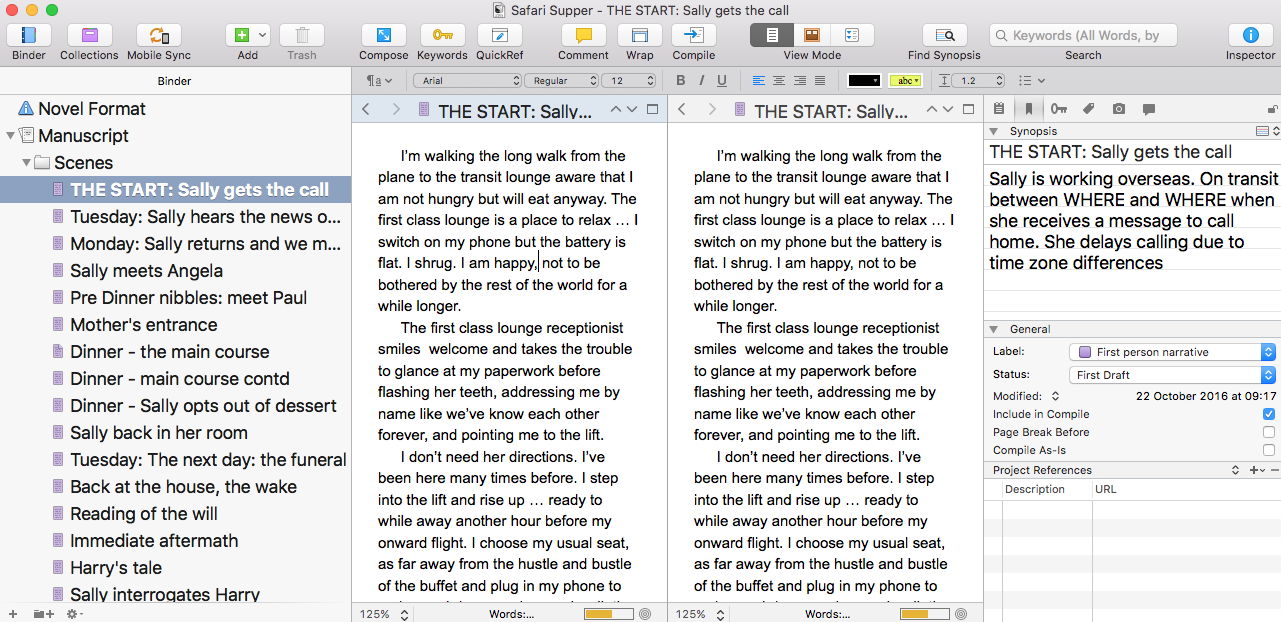
![]() Notice that the split screen toggle button changes appearance. Clicking on it again will take you back to a single Editing pane, ie, it closes the other pane.
Notice that the split screen toggle button changes appearance. Clicking on it again will take you back to a single Editing pane, ie, it closes the other pane.
I like my split panes side by side, but if you prefer yours to appear one above the other (as Rachel Hobbs, my recent guest, does), you’ll need to adjust your Layout settings. Select View / Layout / Split Horizontally.

Your screen will then have one pane under the other, like this:
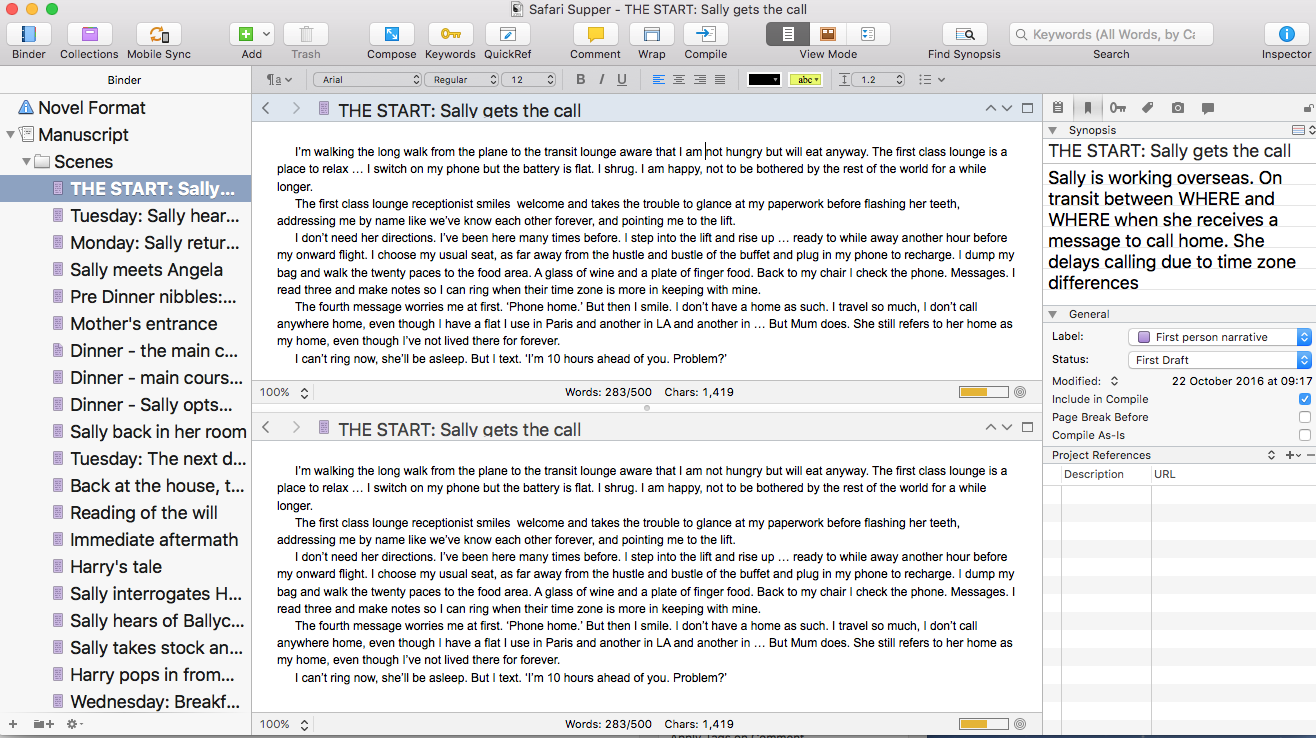
![]() When you next opt for single screen, the toggle button will have changed to show your selected Layout of ‘split horizontal’.
When you next opt for single screen, the toggle button will have changed to show your selected Layout of ‘split horizontal’.
What’s the benefit of using the split screen option?
As well as being able to view my Binder, my Editing pane, and the Inspector, the split screen option allows me to refer to my notes from the Reference folder, or the Corkboard view of that chapter, or the text from another part of the manuscript – all while working on one particular scene.
It’s up to me what I put where, and the combinations are almost endless.
I can also resize the two panes. When they are split, they are created equal in size, but they don’t have to stay that way. By dragging the strip that separates the panes – the splitter bar – you can control the amount of space each gets. If you want to go back to an even split, double-click on the splitter bar.
Some examples

For clarity, I have closed the Inspector by clicking on the Inspector button. If you don’t close it, what appears in the Inspector pane relates to the active pane of the split screen.
Not sure what’s meant by an ‘active’ pane? Read on; I explain that term in a minute.
Here, I have the Corkboard view of all my scenes on the left and the scene I want to work on, on the right.
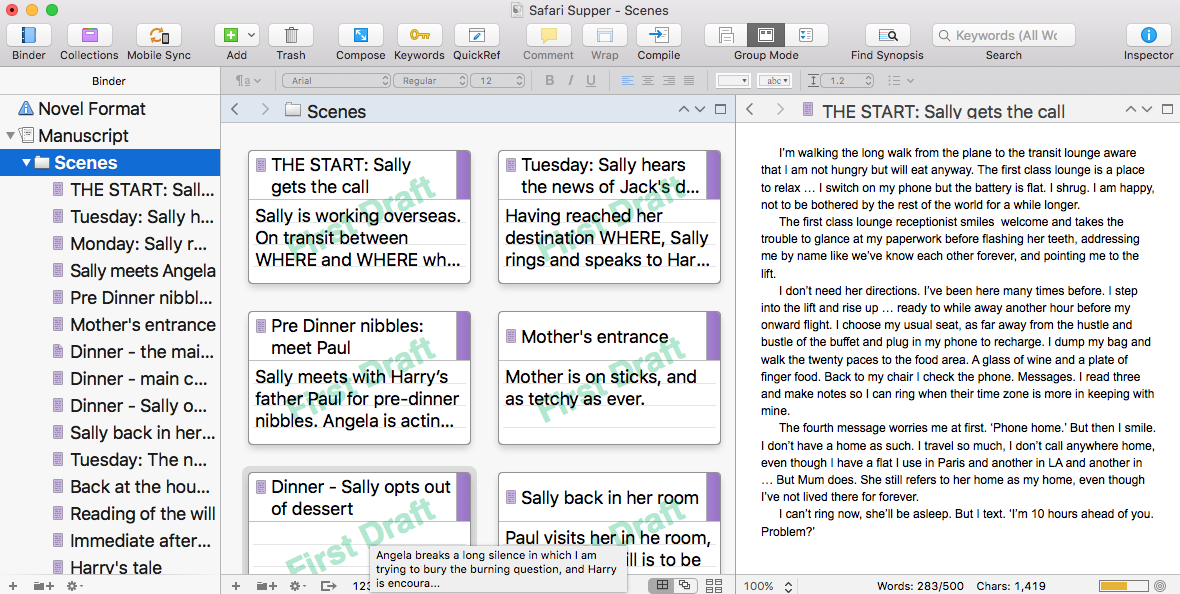
Here I have the Outliner view on the left, in which I’ve identified a scene that needs more words, and the scene I need to work on is on the right.
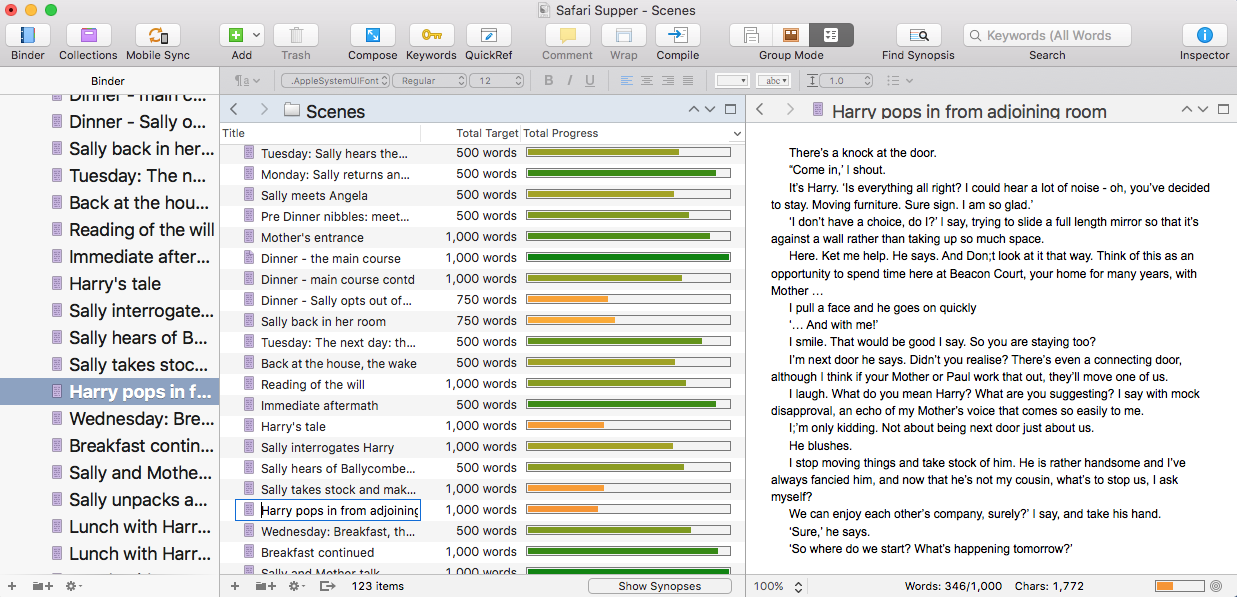
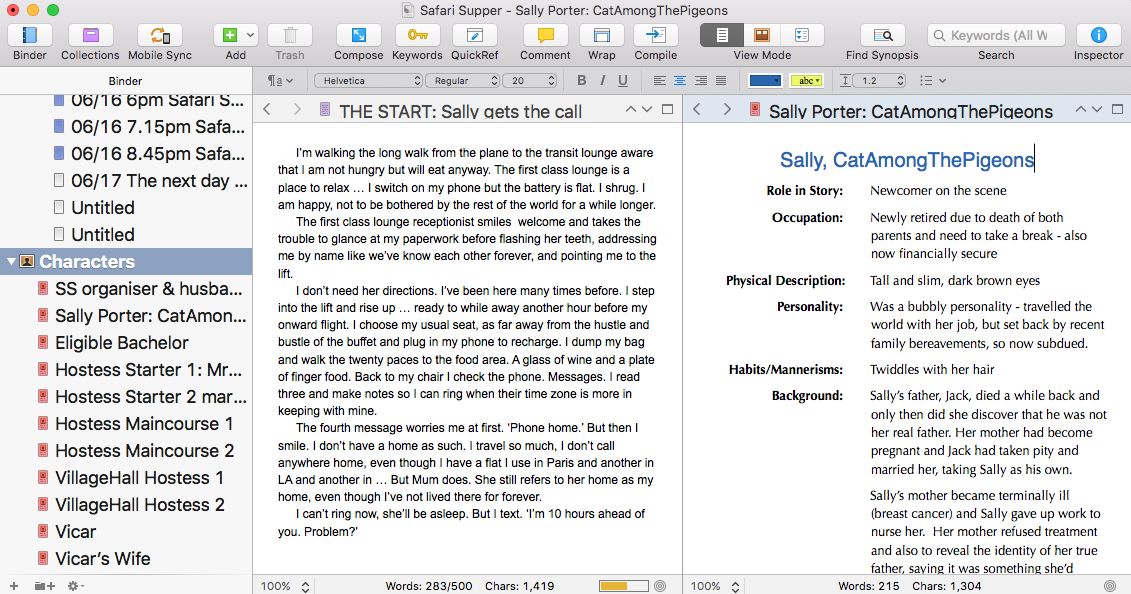
Here, I have my scene on the left and a character sketch on the right.
Because I’m a stickler for routine and probably verging on OCD, I arrange my panes in a set order: the bigger picture (corkboard/outline) on the left of the scenes I’m working on, and scenes will always be on the left of reference material such as character sketches.
How you do it, is entirely up to you! Scrivener provides great flexibility and so suits all sorts of a writer.
What can possibly go wrong?
Notice that one pane has a blue colouring on the title bar. ![]() This is the active pane. Whatever you do (eg scroll up and down, type some new material, select a different document from the Binder) will happen in the active pane.
This is the active pane. Whatever you do (eg scroll up and down, type some new material, select a different document from the Binder) will happen in the active pane.
If you do something in the active pane which you meant to do in the other pane, don’t panic. There are ‘back’ buttons on each pane (the left triangular bracket < on the far left of the title bar ). Clicking this button on the active pane takes you back to where you were. Panic over!
What if two panes are not enough?
If you need to look at two additional sources while working on a scene, there is an option to have a floating pane – and it’s called a quick reference panel.
Select View / Quick Reference and then browse for whatever you’d like to see in that pane.
I use this option when I want to see a scene, a character sketch and a setting sketch, all at the same time.
Simply Scrivener Special webinars – ask me anything
For a demonstration on how to use split screen and the Quick Reference option, or if you need to ask any questions about Scrivener, book a Simply Scrivener Special.
To help me to prepare, you might also complete this short questionnaire.
The ScrivenerVirgin blog is a journey of discovery:
a step-by-step exploration of how Scrivener can change how a writer writes.
To subscribe to this blog, click here.
Also … check out the Scrivener Tips
on my ScrivenerVirgin Facebook page.
No Comments