

Formatting: An Introduction!
 The next few blog posts will be all about formatting using Scrivener.
Today: a few ground rules and explanations …
What is formatting?
Formatting is all about controlling how your text appears on your screen and on the page when you export your manuscript:
- The font style
- The point size ie the size of the characters
- The leading – the spacing between the lines of text
- The amount of indentation, if any, on the first line of a paragraph
- The amount of space between paragraphs
- The justification – left, right, centre, justified – of a paragraph
- … and much else besides …
Lots to think about and decide!
On screen formatting versus page formatting
How your text appears on your screen is controlled separately from how it appears when you export it.
Personally, while I am writing a piece, I don’t worry about the onscreen formatting. It’s what’s exported which matters to me. But, if you want to control what you see onscreen, you need to learn about onscreen formatting.
Onscreen formatting
Scrivener provides onscreen formatting control at a project level (through Preferences / Formatting).
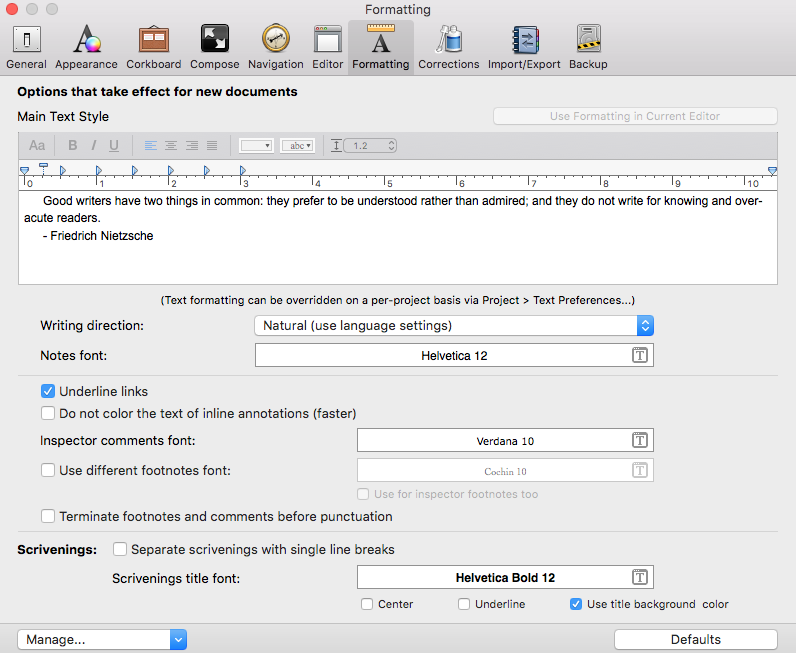
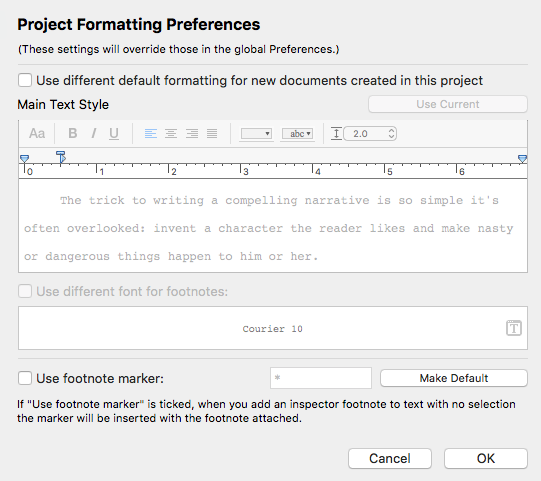
You can also apply formatting at a document level (through Projects / Text Preferences) which allows you to override the project level settings for individual documents.
Page formatting
How your manuscript will look when exported is controlled through the Formatting tab of the Compilation Options.
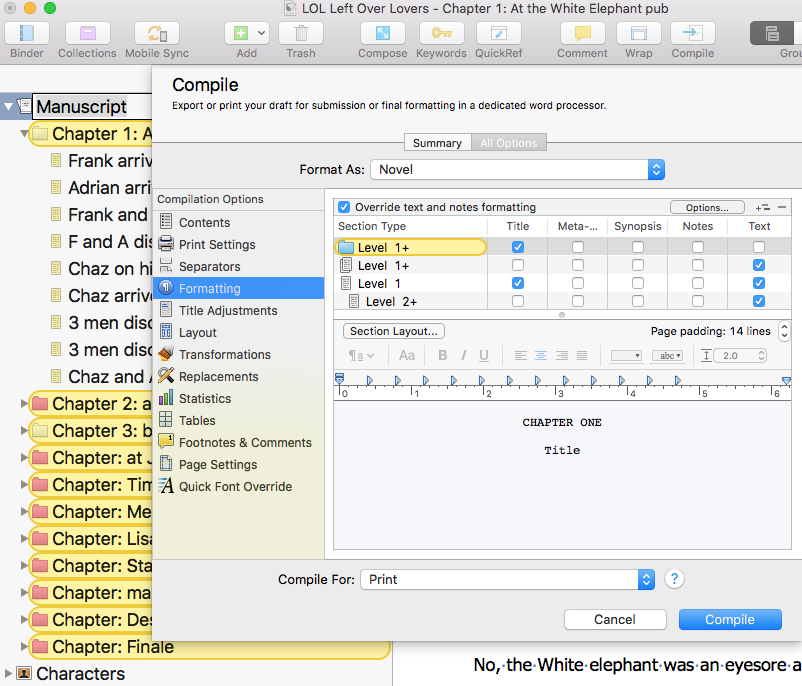
Documents are formatted according to their level within the structure of your manuscript.
The yellow highlighting shows which documents are affected by your decisions.
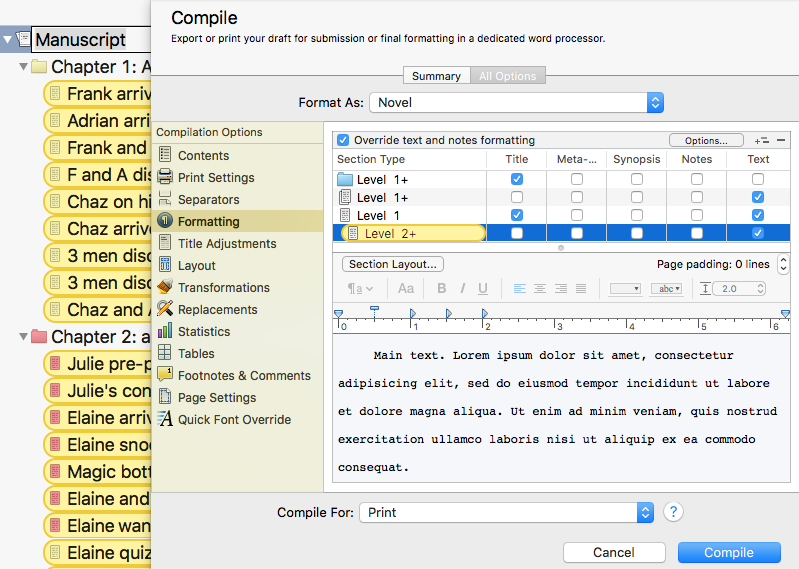
The ‘As Is’ option of the Contents compilation option allows you to overrule the formatting settings, and this makes sense eg for your title page.

Ground rules: The do-nots
- Do not use more than one space between two consecutive words.
To remove these: select Format / Convert / Multiple Spaces to Space. - Do not include spaces before punctuation marks, or after the final point of the final sentence in a paragraph.
To see these, select Format / Options / Show Invisibles and look out for blue dots ahead of your punctuation symbols or before the closing backward P. - Do not use spaces (6!) or tabs to create an indentation for a paragraph. Let the paragraph formatting control any indentation.
To see these spaces/tabs, select Format / Options / Show Invisibles and look out for six consecutive blue dots or a right arrow ahead of your initial word in a paragraph. - Do not insert extra space lines between paragraphs – let the paragraph formatting control such spacing.
To see these, select Format / Options / Show Invisibles and look for two backward Ps
The ScrivenerVirgin blog is a journey of discovery:
a step-by-step exploration of how Scrivener can change how a writer writes.
To subscribe to this blog, click here.
Also … check out the Scrivener Tips
on my ScrivenerVirgin Facebook page.
Patsy
6 November 2016 at 14:28I like to have a gap between paragraphs when I’m writing. It seems easier to read that way – and it makes cut and pasting much less of a fiddle. That’s important as I do a lot of that.
rainbowmaker
6 November 2016 at 18:32Me too. I always use 1.5 spacing to leave me room to write comments to myself. And I pull in the right hand edge as well. If you set a paragraph style of 6pt after every paragraph, you’ll get the effect you want.
John Rogers
25 September 2023 at 15:07If you’re writing for publication, most likely you’ll have to lose the extra CR. But Scrivener has that nice feature “Text Tidying” that allows you to put in that line in the draft, then take it out in the final