

A head start: Setting up a new Scrivener project

Time to set up a new Scrivener project for NaNo2018
Let’s start at the very beginning: setting up a new project file on Scrivener and deciding what our novel is about.
Setting up a new Scrivener project file
In this one file, everything that you need to write your NaNo2018 novel can be collected ahead of 1 November. You won’t write a single word of your manuscript until NaNo2018 officially starts, but you’ll have everything at your fingertips when the whistle blows at midnight on 31 October.
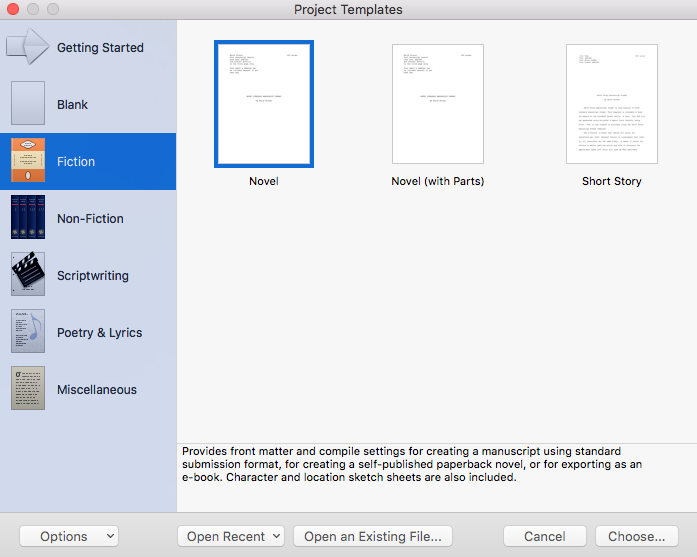
Select File / New to open the Project Templates dialogue box. Then select Fiction.
If you are working in Scrivener 2, you’ll see this.
 If you are working in Scrivener 3, it’s the same range of options but with new icons.
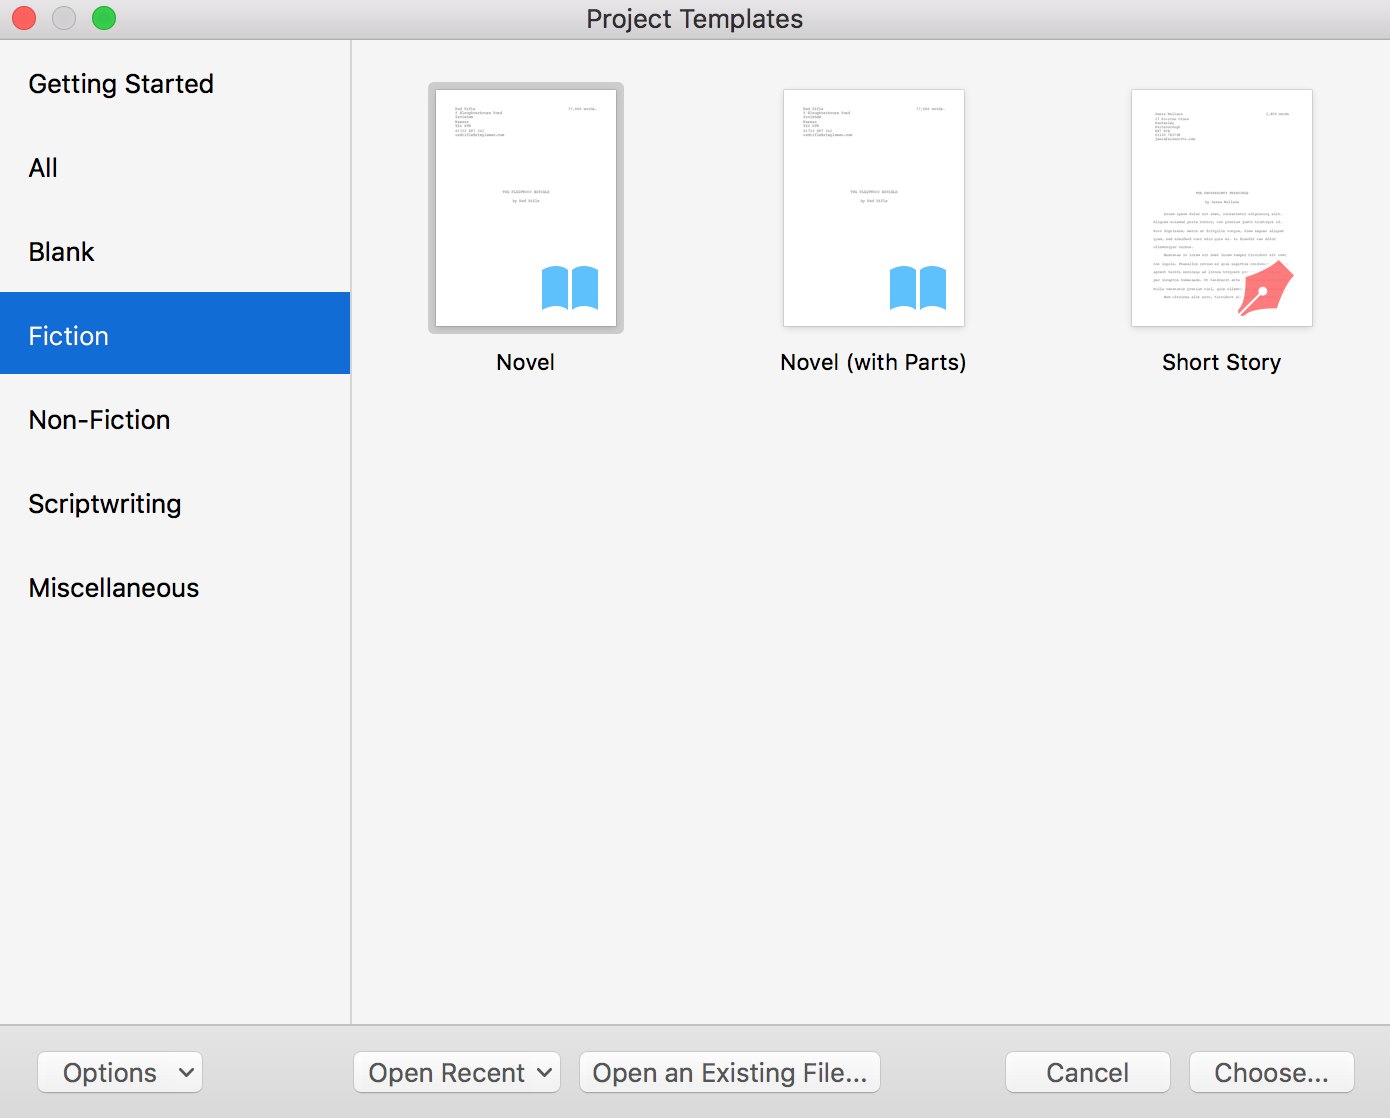
Click on Novel, and then click on Choose.
Saving the new Scrivener project file
You will be presented with another dialogue box and you need to choose your project title and where you want to store the Scrivener file.
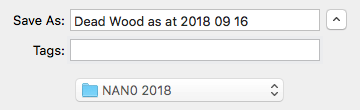 Notice that I date my project file with today’s date. Every time I work on this project, I’ll use Save As … and use that day’s date. I order the date year / month/ day so that they appear in date order and I can be sure to open the most recent.
Notice also that I have a new folder NANO 2018, in which I’ll save all of the files for this year.
Scrivener then creates the project file.
How to use the Novel format for your new Scrivener project
The initial screen opens with the text explaining how to use the Novel Format.
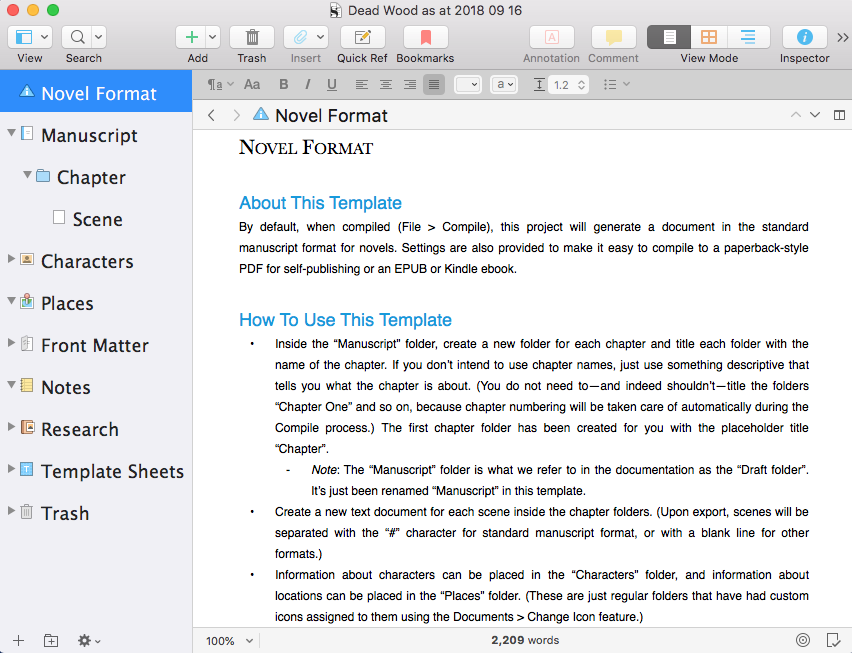
If you’ve not read the text on ‘how to use this template’ before, now would be a good time!
Setting up your MY STORY folder in your new Scrivener project
 Most of the effort in the next few weeks will be within the Research folder. Or on the corkboard – more about that delight, soon!
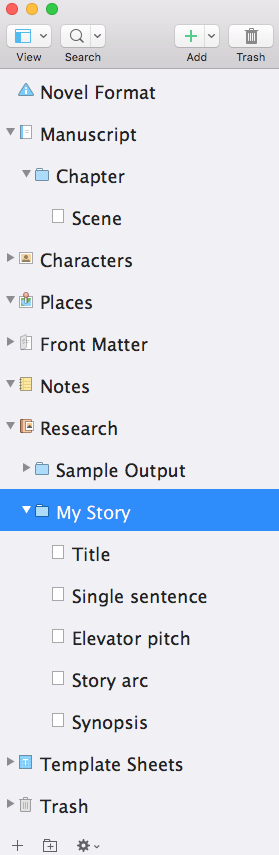
Within the Research folder, the first task is to set up a new folder called MY STORY.
Right-click on the Research folder and select Add / New Folder. Call this new folder MY STORY.
Then, right click on the MY STORY folder and add five text documents.
- Title
- Single sentence
- Elevator pitch
- Story arc
- Synopsis
![]() You could do this by right-clicking and be choosing Add / New Text, but you could also use the + icon in the menu.
You could do this by right-clicking and be choosing Add / New Text, but you could also use the + icon in the menu.
I use these five documents to house descriptions (or treatments) of my novel – in various lengths and depths/complexity.
The content will most probably change in time. But, whatever I write here, these treatments will prove useful when, having written this novel, I eventually self-publish it and then need to market the book.
Questions? Need a helping hand? Want a demo?
To watch me go through the process of using Scrivener to write or edit a novel, or to ask any questions, book a Simply Scrivener Special.
To help me to prepare, you could also complete this short questionnaire.
The ScrivenerVirgin blog is a journey of discovery:
a step-by-step exploration of how Scrivener can change how a writer writes.
To subscribe to this blog, click here.
Also … check out the Scrivener Tips
on my ScrivenerVirgin Facebook page.
No Comments