

Scrivener with Style: Named styles
Building a style using named styles
Within any ‘style’, there are building blocks.
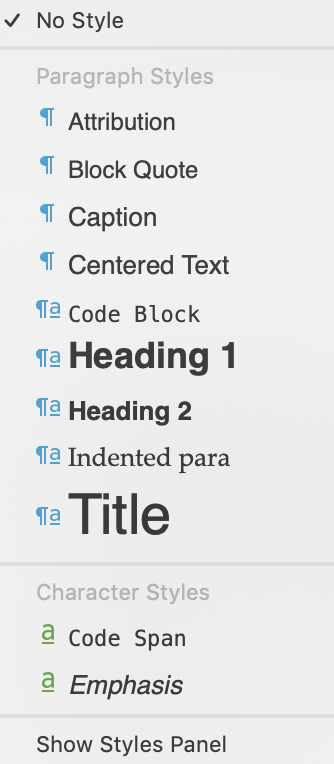
Scrivener offers a few named styles for starters. Click on the down arrow in the No Style box to reveal them.
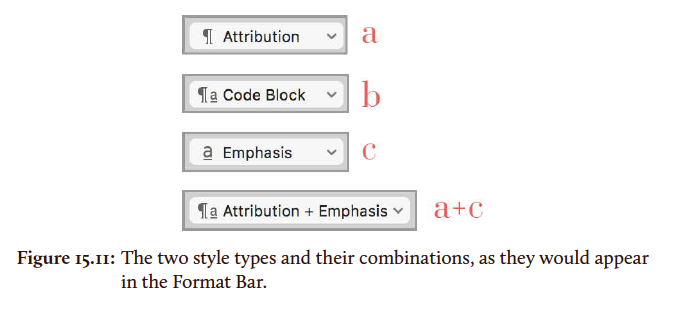
There are two main types (paragraph styles and character styles) and some are a combination of the two. This is explained in the Scrivener manual using this figure.
Notice that, within each section, the named styles appear in alphabetical order. Bear this in mind when creating your own: choose meaningful names to make it easier for you to find them in a long list.
Paragraph styles
Paragraph styles, as the name suggests, affect the appearance of entire paragraphs. They are identified by the pilcrow (backward P) symbol.
Within a paragraph style, you can control a number of settings:
- Alignment: left aligned, fully justified, centred, right aligned
- Spacing: line-height and leading, spacing before and after the paragraph
- Indentation: first line indents, block indent, hanging indent
- Tabs: tab stops, tab types
Having established the paragraph style, it is possible to layer, on top of that, character styles.
Character styles
Character styles affect only the selected text. So, that can be a single character, a single word or several words.
Within a character style, you can control a number of settings:
- Letter variants: italic
- Weight: bold or light or regular
- Kerning: the spacing between characters – this term was first introduced in the Introduction to Style post
- Adornments: strike-through, underlining, baselines
What about fonts and point sizes?
You can, if you wish, specify the font and point size for a style. However, you don’t have to, and not specifying these allows you more freedom because Scrivener treats them as being different from styles.
Why have named styles at all?
Styles provide a quick way of formatting a section of text. So, if you want to include a clever quotation at the start of each chapter, setting a named style for that text (call it ‘chapter quotation’!) and another for the author would save time in the long run.
Also, if you change your mind about how you want it to look, you just amend the style – all instances of that style would automatically be updated.
For anyone worrying about whether taking the trouble to set up the styles will be wasted when it comes to compiling, don’t fret. You have the option when you compile to preserve the style you set up in the Editor or to modify it according to whatever formatting you want to set up for the compile. (More on that another time!)
So … those who want to see the end result while writing/editing, using No Style can work for you, but it makes much more sense to set up Styles. In the next post, I’ll explain how.
Before we close today, though …
Find by formatting
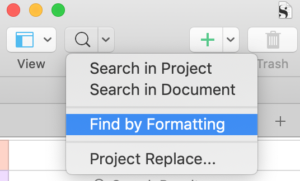
Scrivener also has the option to search on formatting. This can be accessed through the Search menu or on the main menu: Edit / Find / Find by Formatting.
Both routes lead to a window which offers the option to search for a Style (and a lot else besides … worthy of a blog post on its own!).
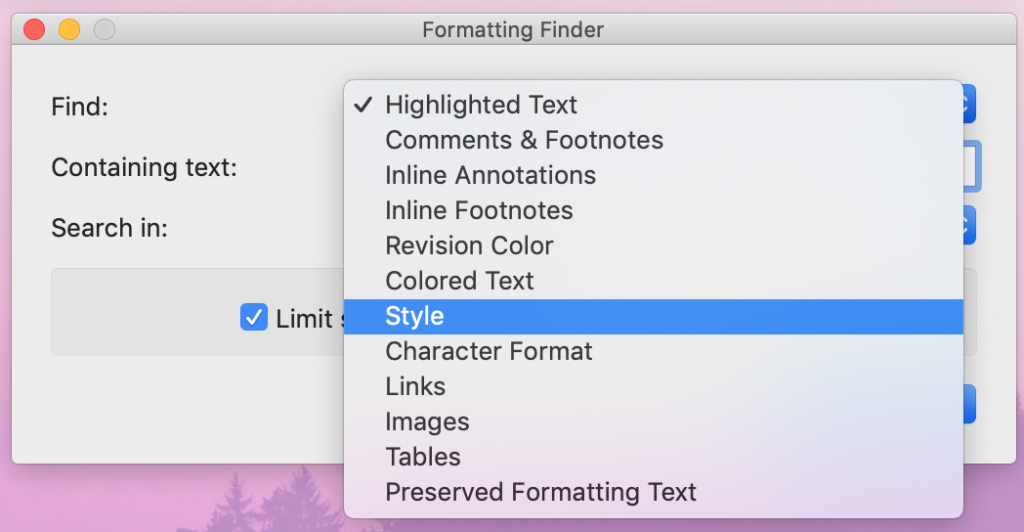
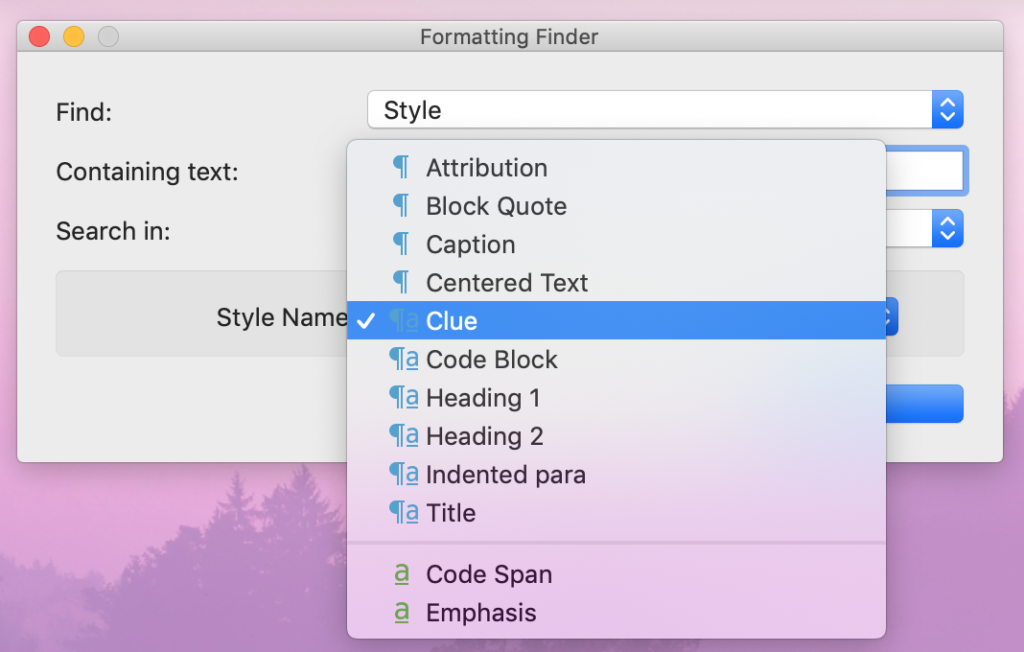
You then decide which of named styles you want to find.
Why might this feature be useful?
Although named styles are usually set up to do something – to format the text in some way – you can set up a style which does nothing apart from tagging the text so you can find it again.
For example, while writing a murder mystery, you may plant various clues and would like to be able to review these once the draft is completed.
- You won’t have used the word ‘clue’ in the text (!), so there’s no point searching on that keyword.
- You might set up a keyword for the scene but, when you view the whole scene, it won’t be immediately apparent which sentence(s) are the clue.
 Instead, if you set up a style called ‘Clue’ and assign it to relevant text, the Find by Formatting tool would allow you to find all of these relevant texts, one at a time.
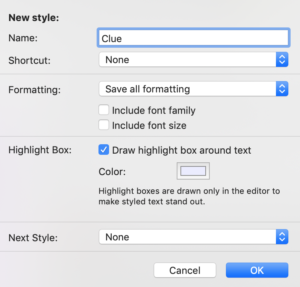
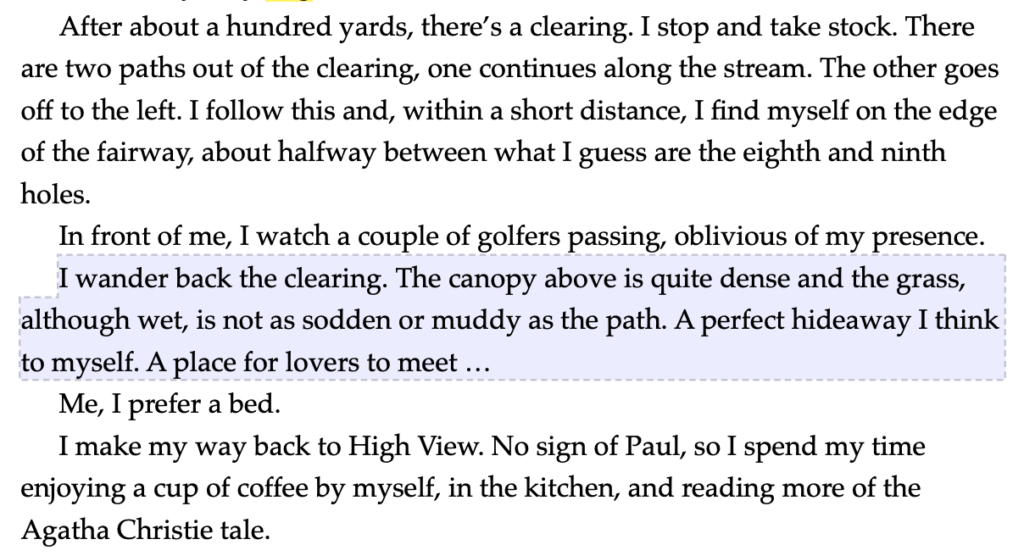
When setting up the style, tick the box to draw a highlight box around the styled text.
It’s then far easier to spot within the text.
Questions? Need a helping hand? Want a demo?
To watch me demonstrating how to use styles or to ask any questions, book a Simply Scrivener Special.
To help me to prepare, you could also complete this short questionnaire.
The ScrivenerVirgin blog is a journey of discovery:
a step-by-step exploration of how Scrivener can change how a writer writes.
To subscribe to this blog, click here.
Also … check out the Scrivener Tips
on my ScrivenerVirgin Facebook page.
Patricia Farrell
19 February 2019 at 19:45Scrivener is obviously great software but everyone who does tutorials forgets the “how to get there” part when it comes to specific problems (say text tidying). It’s as though someone said, “There’s a bear coming toward us, but don’t worry we have a gun” and they can’t tell you where they put the gun. Very frustrating. Steep learning curve.
Anne Rainbow
20 February 2019 at 11:49I was where you are about three plus years ago. I’ve recorded my journey through my blog, so, each new thing I learn, I write about it. This helps me enormously as my memory is not as good as it used to be! My advise is to use it … and each time you find something tricky, make a note. Attending my Simply Scrivener Special webinars gives you a once-weekly opportunity to clear up these small things. If you also check my Facebook page for ScrivenerVirgin (https://www.facebook.com/scrivenervirgin), I post a tip every day. So, you can learn something new every day too.