

Playwriting with Scrivener
 Playwriting is child’s play, using a Scrivener template
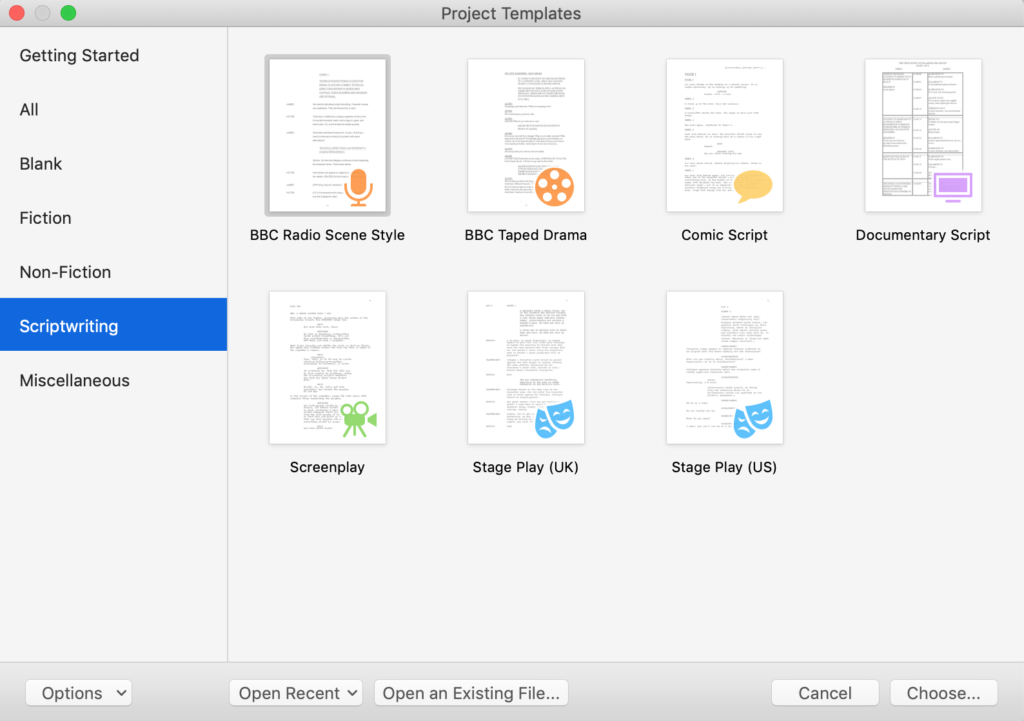
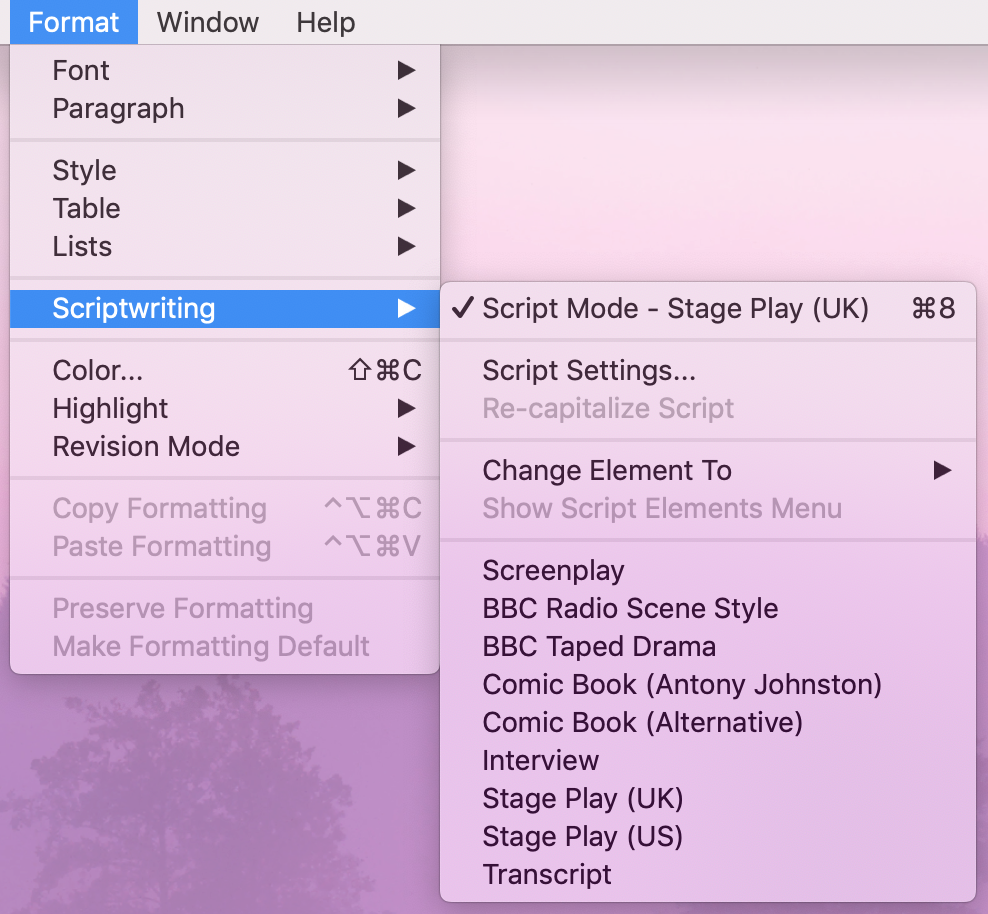
Scrivener offers a template for plays. It’s under the heading Scriptwriting, and provides seven different options. Choose the one that best matches the intended destination for your play.
I use Stage Play (UK), and this is what Scrivener provides when I select that project template.
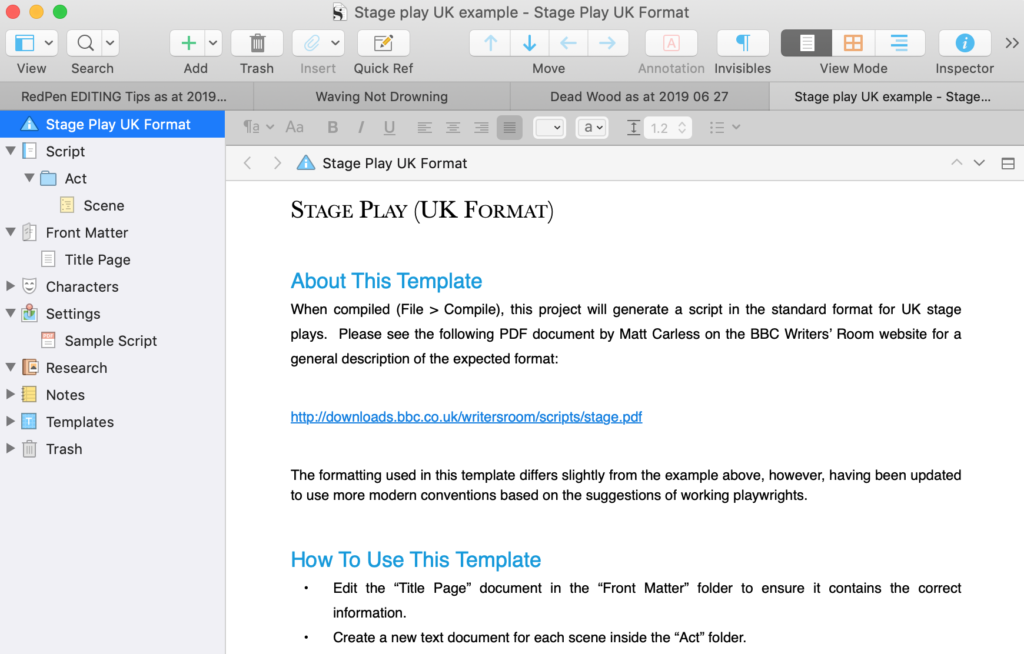
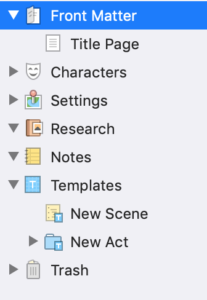
Notice the entries in the Binder: Script, Act and Scene. ‘Act’ and ‘Scene’ are the basic building blocks of the Script.
Notice also the link to the BBC Writers’ Room website. If you want your script to be read, you have to comply with the expected format. Scrivener meets those needs for you, but you do need to be aware of the strict BBC guidelines. If you don’t follow them, your script may be rejected. The guidelines are only three pages long; print it out and study it!
Then, relax for a moment …
How to use the Scrivener scriptwriting template for playwriting
Unlike the novel template (and others), there are a few extras you need to be aware of, to make the best use of this template. So, read the introductory text …
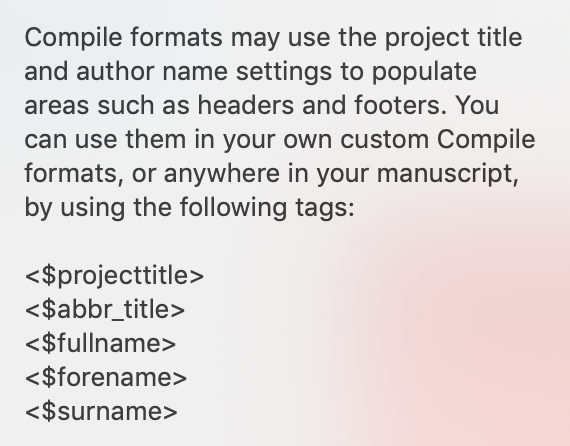
Setting up your project metadata
The first instruction is to set up your Title Page in the Front Matter folder. So, select File / Compile and then select the second icon which looks like a luggage tag.
If you click on the ? (question mark) you are advised that this metadata can be appear elsewhere and gives you the placeholders to use.
Setting up the act / scene structure
The scriptwriting Scrivener template has predefined formats for acts and, as subdocuments of acts, scenes. When adding new scenes within an act, or new acts, it’s important to follow the instructions so that all the special formatting happens as it should in your new documents. So, read the advice, and follow it!
Scriptwriting mode: on or off?
Scriptwriting mode is the feature that makes playwriting so easy, but there are parts of your project that do not require this scriptwriting mode.
Below the Script folder, Scrivener provides space for you to write about the Characters and Settings, to store Research material, and to make Notes.
Notice that only two templates are provided: New Scene and New Act. If you’d like to use the Character Sketch and Setting Sketch from the novel format, open another project that has these templates, and drag them into the Templates folder.
When you are writing material for these supporting parts of your project, make sure ‘Script Mode’ is off.
When you are writing your script, within the Script folder, make sure ‘Script Mode’ is on. Notice that Cmd 8 is the short cut key to toggle between these two states.
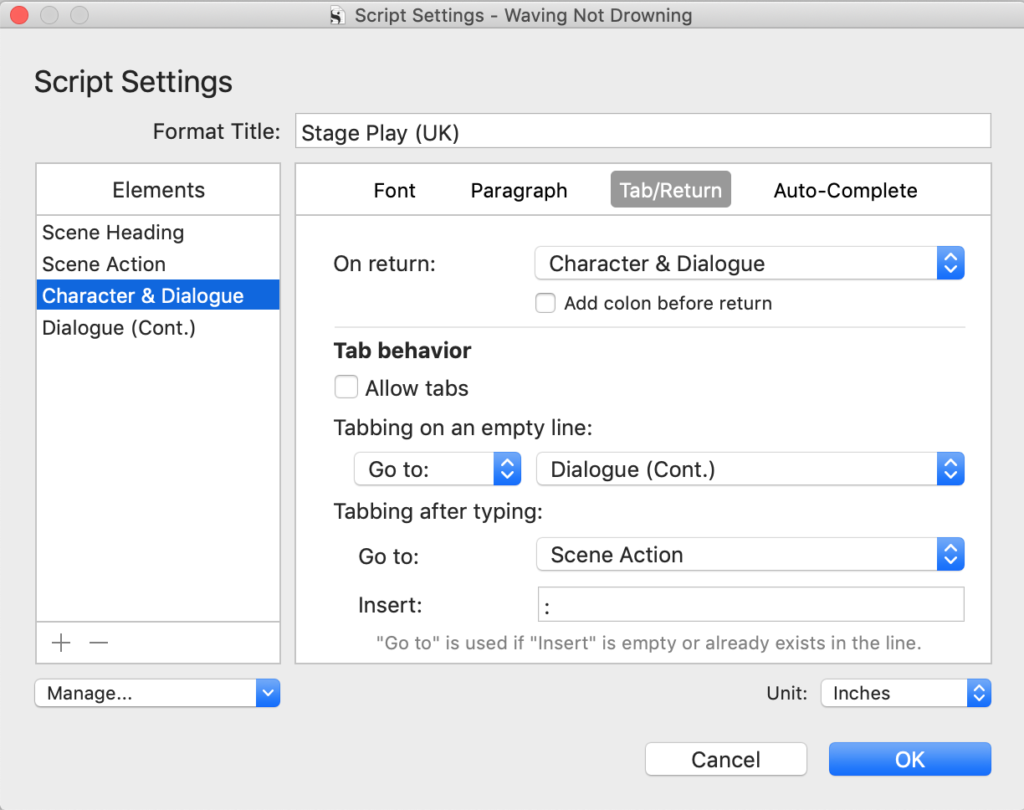
Script settings
Scrivener provides default settings for your script, dependent on the project template you chose. You can view them by selecting Format / Scriptwriting / Script Settings.
There are four elements (beautifully explained in this PDF document produced by Matt Carless on the BBC Writers’ Room website):
- Scene Heading
- Scene Action
- Character & Dialogue
- Dialogue (Contd.)
For each one, there are script setting panes for Font, Paragraph, Tab/Return and Auto-Complete. There is much information here, and I recommend leaving well alone, initially!
Writing your play
While you are writing your play, according to the position of your cursor, a menu along the bottom of the screen identifies the element. In this example (from my play called ‘Waving not Drowning’), the highlighted line is ‘Character & Dialogue’.
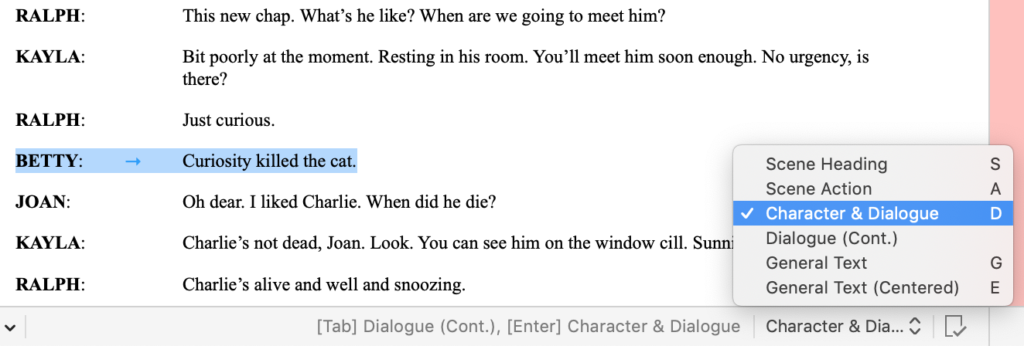
Notice that, to the left of the element menu, two options are listed.
- Tab will give you the element ‘Dialogue (Cont.)’.
- Enter (or Return) will give you the element ‘Character & Dialogue’.
This script setting provides a quick way of transitioning from one line of your play to the next and is evident in the Tab/Return tab of the Script Settings pane for ‘Character & Dialogue’ (see above).
Auto-completion
One of the great time savers of this Scrivener project format is the auto-complete function. If you choose character names with different initial letters, you only need type the name once. After that, the first letter will trigger the auto-complete.
You don’t even have to type the colon (:). Scrivener puts that in for you and jumps to the correct position for you to start typing the dialogue for that character.
Take a course in scriptwriting
In this blog post, I’ve only scratched the surface of using Scrivener to write a play. I hope I’ve done enough to encourage you to give it a go.
If you’d like to dive further into this topic, Steve Shipley created an excellent Scriptwriting with Scrivener course, available through Udemy.

The course includes an interview with me … in which I talk about ‘When I Have Fears’, a play that I wrote using Scrivener, and how I planned to develop that short play into something longer.
The screen grab (above) is from that longer play, now called ‘Waving not Drowning. You can learn more about ‘When I Fears’ and listen to a recording here. Enjoy!
Questions about playwriting? Need a helping hand? Want a demo?
To watch me go through the process of playwriting or to ask any questions, book a Simply Scrivener Special.
To help me to prepare, you could also complete this short questionnaire.
The ScrivenerVirgin blog is a journey of discovery:
a step-by-step exploration of how Scrivener can change how a writer writes.
To subscribe to this blog, click here.
Also … check out the Scrivener Tips
on my ScrivenerVirgin Facebook page.
Ray Moore
1 December 2022 at 20:07Where can I buy this program?? And how much does it cost??
Anne Rainbow
1 December 2022 at 20:49Literature & Latte https://www.literatureandlatte.com/ Enjoy!
Pingback:Scrivener ASVR Workshop 2020 | Lorelle Writes
11 July 2020 at 19:47