

Tables in Scrivener
 Creating a table … not difficult.
Creating tables in Scrivener
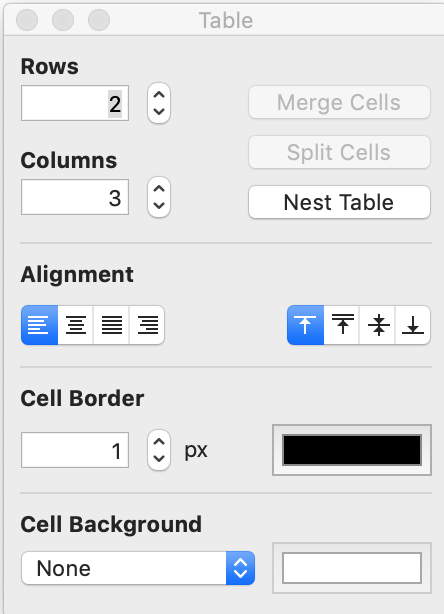
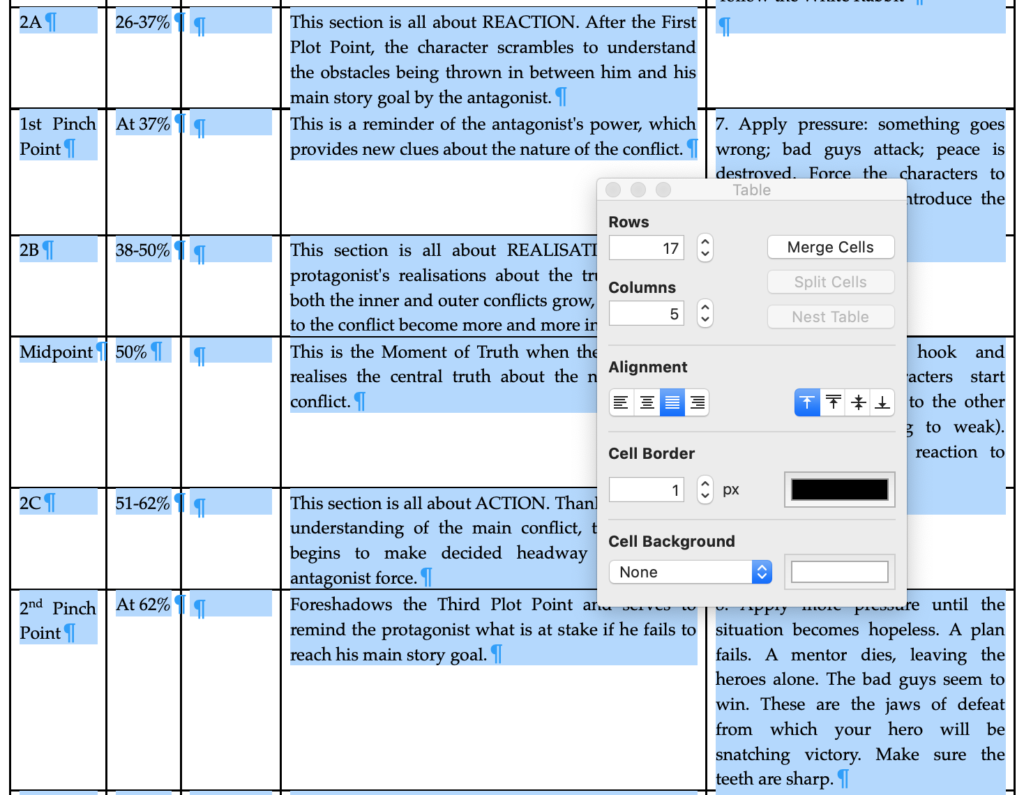
Select Insert / Table and Scrivener creates a default table with 2 rows and 3 columns and opens the Table properties window for you.
This provides all the data needed to control how the table will look on the page/screen.
- Alignment on the page: left aligned, centred, fully justified, right aligned
- Alignment of the cells: top, baseline, centred, bottom
- Cell border – in pixels
- Cell border colour
- Cell background
If you select a range of cell, the Merge Cells option will become available; right now that is greyed out.
Ditto for Split Cells. It’s only available once you have data within a cell.
Changing the dimensions of a table
Clicking on the up/down arrows for the number of rows and columns increases/decreases the number of rows/columns in the table.
Positioning the cursor in the final column of the final row and hitting the Tab key creates a new row.
Entering data and moving around the table
To enter data into any cell, click on the cell to select it and then start typing.
The Tab key can then be used to move to the next cell, if you wish.
As noted above, if you hit the Tab key while in the final cell of the table, a new row is created.
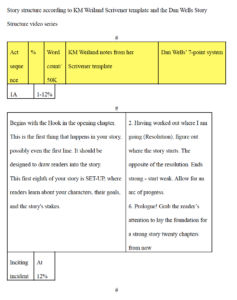
Example table: how to structure a story
I’ve set up a table to hold information about how to structure a story. I started with the default 2 rows and three columns, but needed more, so I increased the dimensions to suit my data. So, now it has 5 columns and many rows. Here are the first five rows.
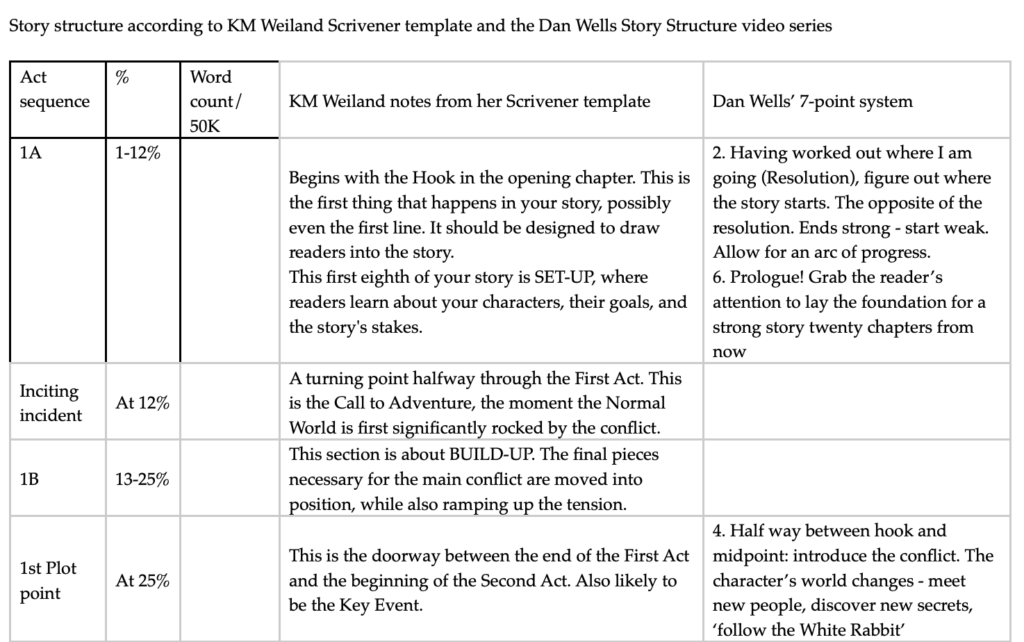
Notice that the cells in top lefthand corner (the default table size) has borders around each cell of the table, but elsewhere (the new columns and rows), it’s greyed out. Let’s fix that first.
Border control in tables in Scrivener
 Highlight all the cells in the table and select Insert / Table to open the Table properties window.
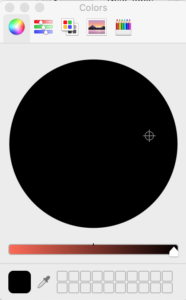
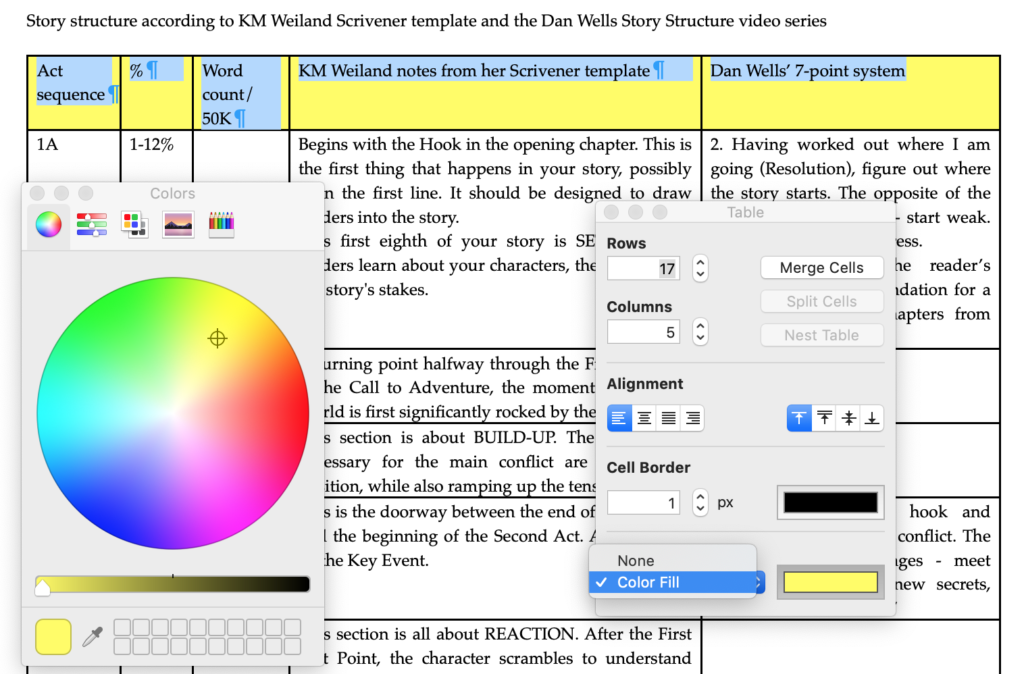
Click on the Cell Border colour to open the colour wheel and move the cross hair cursor so that you have the colour you want.
For black, the slider has to be on the far right.
You can also make the point size higher, if you wish. This creates a thicker line.
If you chose 0 for the point size, the borders become invisible, which mean your data is simply presented in columns ie tabulated.
Alignment
I prefer my data to be top aligned with full justification.
To achieve this effect, highlight all the cells in the table, and select Insert / Table to open the Table properties window. Select your options from the Alignment section of the Table properties window. You can see the effect and change your mind as often as you like!
So, apart from making the headings left-aligned, my table is how I’d want it. For the sake of demonstration though, I’ve set a background colour for the first row. Here’s how:
- Select the cells in the first row.
- Select Insert / Table to open up the Table properties window.
- Click on Background and select Color Fill.
- Slide the cross hair to the colour of choice.
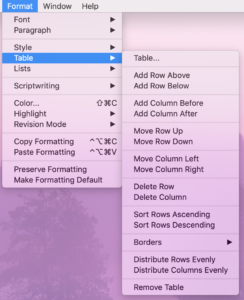
Using the right click option
Another way to open the Table properties window is to right click, select Table, and Table.
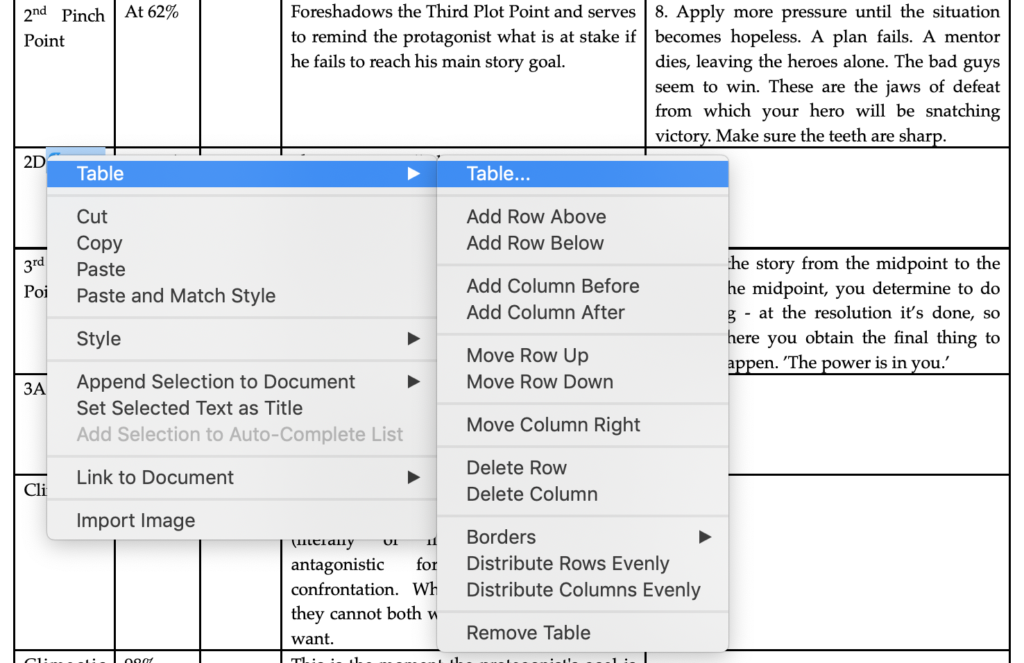
As you can see, there are other options available via the right click pane:
- To add rows above or below the current one
- To add columns before or after the current one
- To move rows up / down
- To move columns to the left / right (NB the option to Move column Left was not offered because my cursor was in the first column)
- To control the borders for a cell or group of cells.
- To distribute row/columns evenly
- Last, but not least: to remove the table
NB If you remove the table, the data remains …
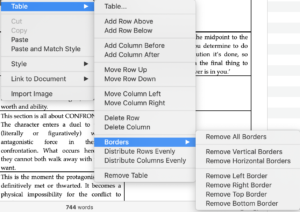
More border controls – via right click, or via Format / Table / Table
It’s possible to control every border of every cell. Click / highlight the cells and then apply/remove borders to suit yourself.
Sorting data within tables in Scrivener
You can also reach the right-click options by selecting Format / Table / Table, and this also provides the option to sort data.
The way the sort works does not preserve material across rows, ie you cannot sort on one column.
So, it does not have the same facilities as you might expect eg in an Excel spreadsheet.
Spend less than 4 minutes watching this Literature & Latte video which provides an excellent summary of how to work with lists and tables.
Enjoy!
What can go wrong with tables in Scrivener?
One of the issues with including tables within a Scrivener document is that, when it’s time to compile, the size of the table is too big for your choice of output.
- It’s too wide for your page width, or screen width.
- It’s too long to fit on one page / one screen.
Using File / Compile to output a table
If you use File / Compile without adjusting any of the default settings, what appears might shock you. It seems Scrivener does not ‘understand’ your table at all.
Instead, assigning a section type of ‘As Is’ to the document which holds your table, stops Scrivener from trying to format the material.
The net result looks like a table!

There are still issues with the positioning of data within cells, but these can be fixed by changing the width of columns and/or changing the point size of the text.
If – at the end of the day – the design of the table results in trying to squeeze too much into the available space, a compromise needs to be made.
- Simplify the table so that it does fit.
- Create the table elsewhere and pull it in as an image.
- Deliver the information in a non-tabulated way.
Any questions? Need a helping hand?
To watch me go through the process of setting up a table or to ask any questions, book a Simply Scrivener Special.
To help me to prepare for the webinar, you could also complete this short questionnaire.
The ScrivenerVirgin blog is a journey of discovery:
a step-by-step exploration of how Scrivener can change how a writer writes.
To subscribe to this blog, click here.
You can also find links to blogs of specific topics in the Scrivener index.
Also … check out the Scrivener Tips
on my ScrivenerVirgin Facebook page.
Edmund England
14 March 2021 at 16:10Great post. I have problems when i copy text from a table outside Scrivener and paste in a table. It then creates a table in a table with the text. I would only want the text pasted directly in a table in Scrivener.
Anne Rainbow
15 March 2021 at 05:58Pasting text from elsewhere brings with it formatting material Paste and Match Style might solve your problem. Also try pasting first to another app, eg Notes. You’ll then see what you are pasting.
Jackie Layton
21 January 2020 at 19:25You helped me so much. Thank you!
Anne Rainbow
21 January 2020 at 19:29I am so glad. It’s a complicated subject, but achievable once you know how. Coincidentally, this topic is on the agenda for today’s Simply Scrivener Special. https://www.scrivenervirgin.com/simply-scrivener-specials/