

Messaging in Scrivener: 1 Annotations
This is the first of a series of posts introducing the topic of messaging in Scrivener.
And today’s post is all about annotations.
Essentially, there are four options for messaging:
- 1 Annotations
- 2 Footnotes
- 3 Comments
- 4 Project and document notes
Depending on what you are trying to achieve, choosing the best of these could make life easier for you in the long run, so learning about all four makes sense.
What are annotations?
Annotations are messages you leave yourself within the text. Just like you might scribble on the hard copy of a manuscript, you can annotate your text using the annotations feature within Scrivener.
Scrivener offers two types of annotation: inline and linked (AKA annotation bookmarks). Here, I’m focusing on the inline variety. Bookmarks will be the topic of a future blog post.
How do annotations look, on screen?
Scrivener treats annotations like formatted text … and presents them, as red text, within a clear bubble.

How do you create an annotation in Scrivener?
You have two options:
- Use Cmd + Shift A to switch ‘Annotation mode’ on and then type your message.
Cmd + Shift A is a toggle switch – the same keystroke combination turns annotation mode off. - Or, highlight the text you want to turn into an annotation and then use Cmd + Shift A.
To delete an annotation, simply delete the text and the bubble: position the cursor at the right-hand end of the bubble and use the Delete key to delete every character in the annotation. Or, right click anywhere within the annotation text, select Select Annotation and then hit the Delete key.
Is red the only colour for annotations?
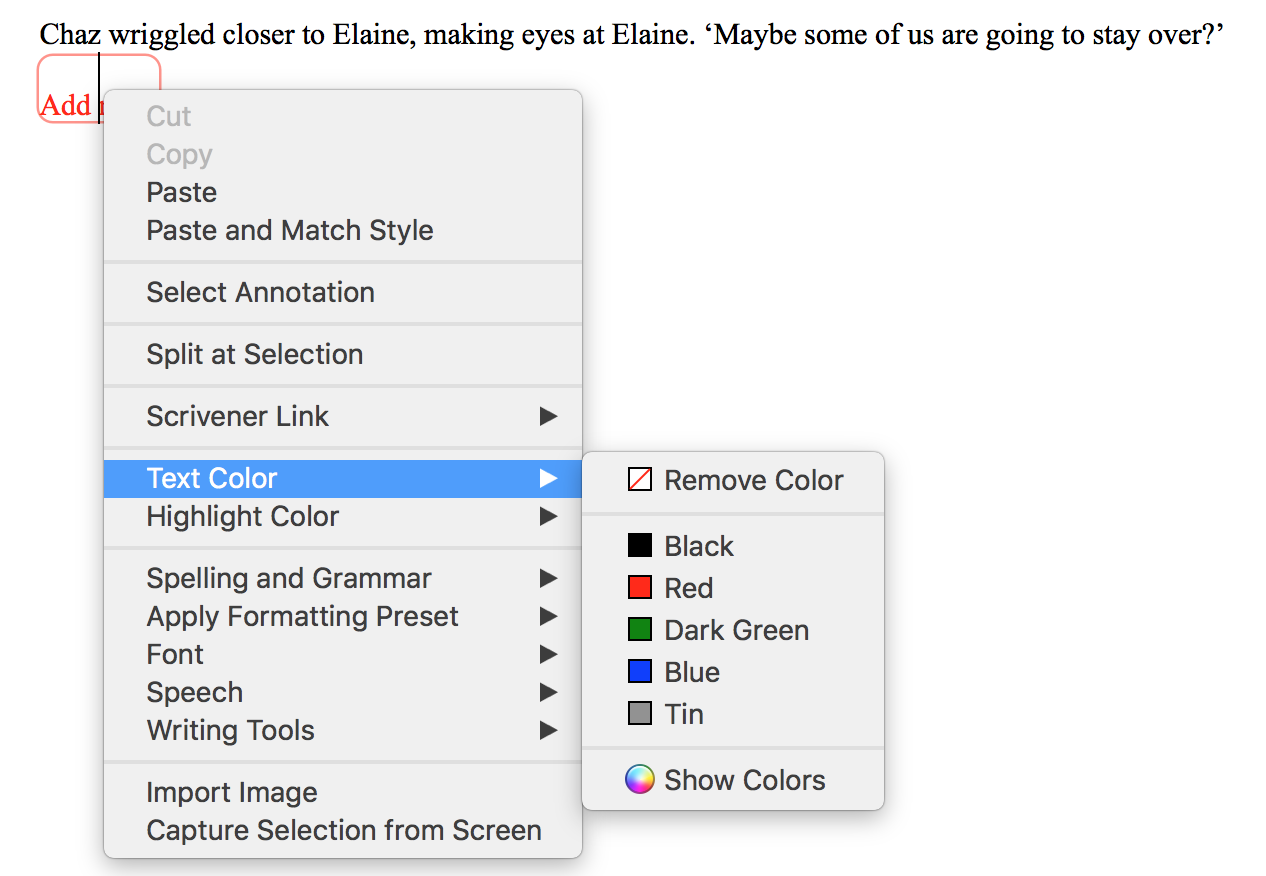
No! Because Scrivener treats annotations just like text, you can choose whatever colour you wish for the text within the annotation bubble.
Right click anywhere within the annotation bubble and then choose Text Color … and then make your choice.
What happens to annotations when exporting to the page?
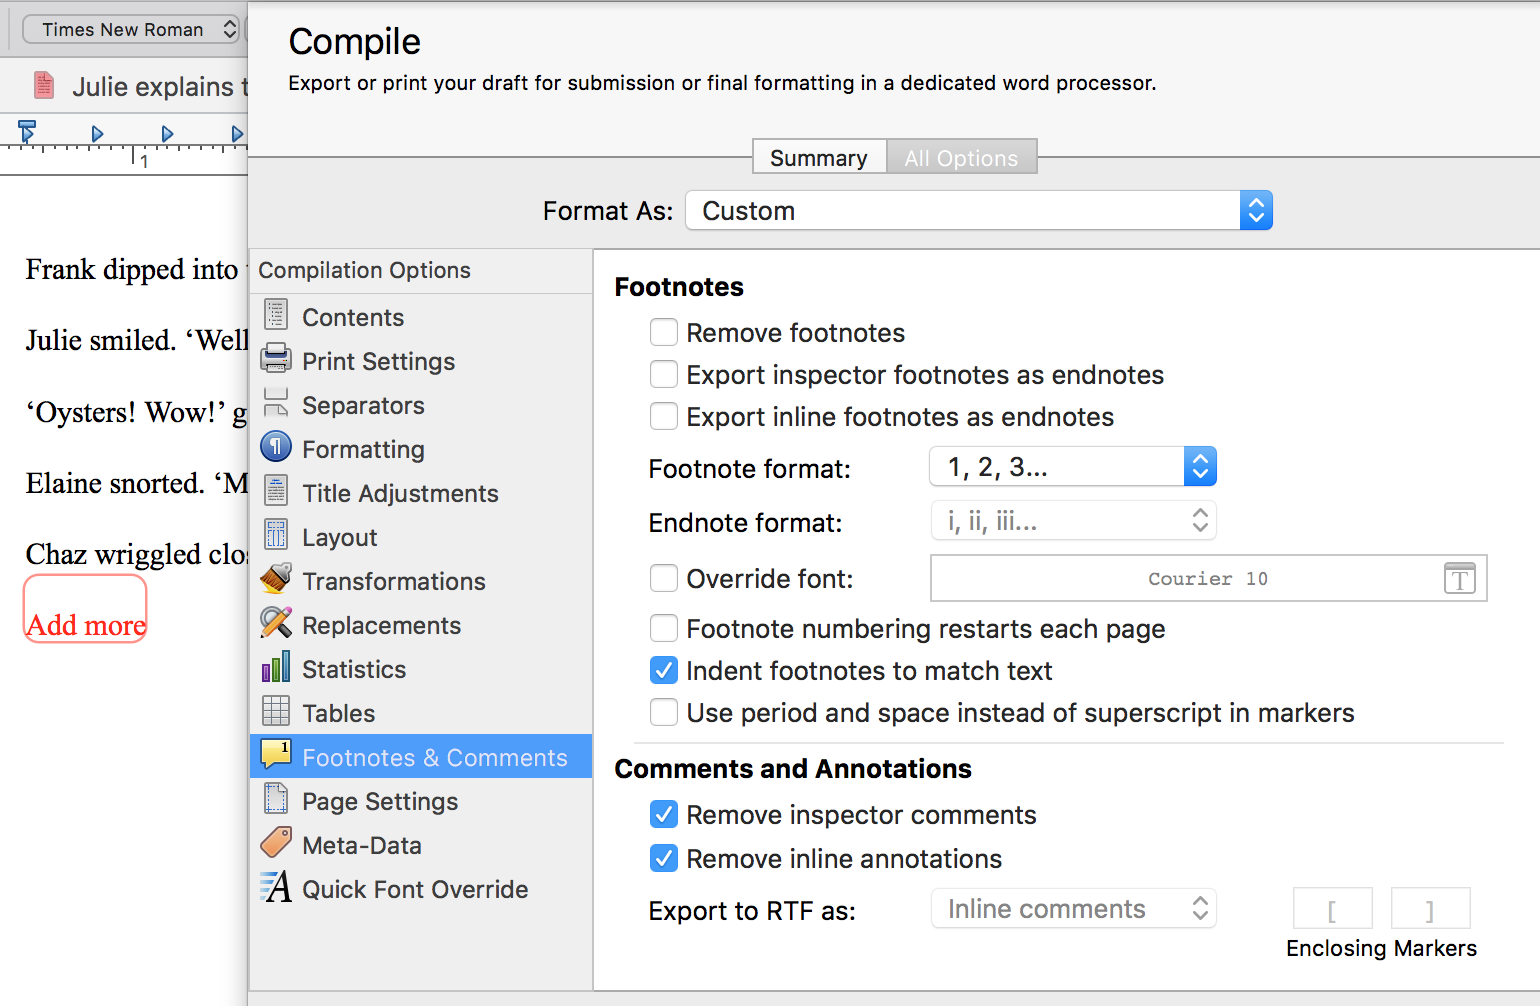
It’s up to you … Normally, you would not expect annotations to be printed. The default setting of ‘Remove inline annotations’ allows you to export (say) a final draft, without your reviewers or beta readers seeing the private messages you’ve left for yourself.
However, if you want the annotations to be visible, and this might be useful when you are mid-edit, simply untick the ‘Remove inline annotations’ within the Footnotes & Comments tab within the Compilation Options dialogue box.
[Scrivener 3 does this next bit differently. See this more recent post.]
Note that the spacing either side of your annotation will remain, even if you export without the annotation. So, be careful not to insert additional spacing either side of your messages.
Are annotations any good for collaborative projects?
If two or more people are involved in the project, and you want to leave messages for each other, you could allocate a different colour to each person.
However, if you need more precise information about who is leaving the message and when, and need an audit trail of any conversation between you, the comment feature might be a better option.
The next blog post looks at footnotes; the one after that focuses on comments.
If you have any questions about annotations, please leave a comment on this blog, or on my ScrivenerVirgin Facebook page.
The ScrivenerVirgin blog is a journey of discovery:
a step-by-step exploration of how Scrivener can change how a writer writes.
To subscribe to this blog, click here.
Also … check out the Scrivener Tips
on my ScrivenerVirgin Facebook page.
Pingback:Annotations (First draft editing) | ScrivenerVirgin
30 November 2024 at 23:04