

Messaging in Scrivener: 3 Comments

This is the third of a series of posts introducing the topic of messaging in Scrivener
Aand today’s post is all about comments.
Essentially, there are four options for messaging:
- 1 Annotations
- 2 Footnotes
- 3 Comments
- 4 Project and document notes
Depending on what you are trying to achieve, choosing the best of these could make life easier for you in the long run, so learning about all four makes sense.
What are comments?
Comments are messages, within the Linked Notes pane of the Inspector, that you leave for yourself or other co-workers, and they leave for you.
The comments feature is ideal for collaborative working, providing an audit trail of all conversations related to the manuscript.
How do you create a comment in Scrivener?
Position your cursor where you want the comment to be, or highlight the relevant text. Select Format / Comment. If the Inspector is not already open, it will open and an entry appears. The entry specifies who is making the comment (whoever is logged in), the date and time. You can then type your comment.
Notice that the position of the comment within the text is highlighted with a yellow rectangle.

To delete a comment, click on the small X in a circle within the comment box in the Linked Notes pane of the Inspector.
Reviewing comments
Selecting View / Inspect / Comments and Footnotes then will open the Inspector (if it’s not already open) and switch to the Linked Notes pane. You can then review the comments for the folder or document you’ve selected in the binder after.
Selecting Manuscript in the binder will reveal all the comments (and footnotes) for the entire manuscript.
Processing comments
If you click on a comment in the Linked Notes pane of the Inspector, the yellow box surrounding the text to which it relates changes to gray. You can then make any necessary amendments to the text in response to the comment.
Conversely, if you click on text within your manuscript which has the yellow comment highlighting, a border appears around the relevant comment within the Linked Notes pane of the Inspector. You can then add to the comment, or delete it if you have processed the comment to everyone’s satisfaction.
Exporting comments
Like annotations, it’s assumed comments are not to be exported. However, if you want to see them on the page, you can overrule the default and then decide how you’d like your comments to be presented.
- First, untick the ‘Remove inspector comments’ option.
- Then, click on the ‘Export to RTF as:’ and choose between Inline comments, Footnotes or Endnotes.
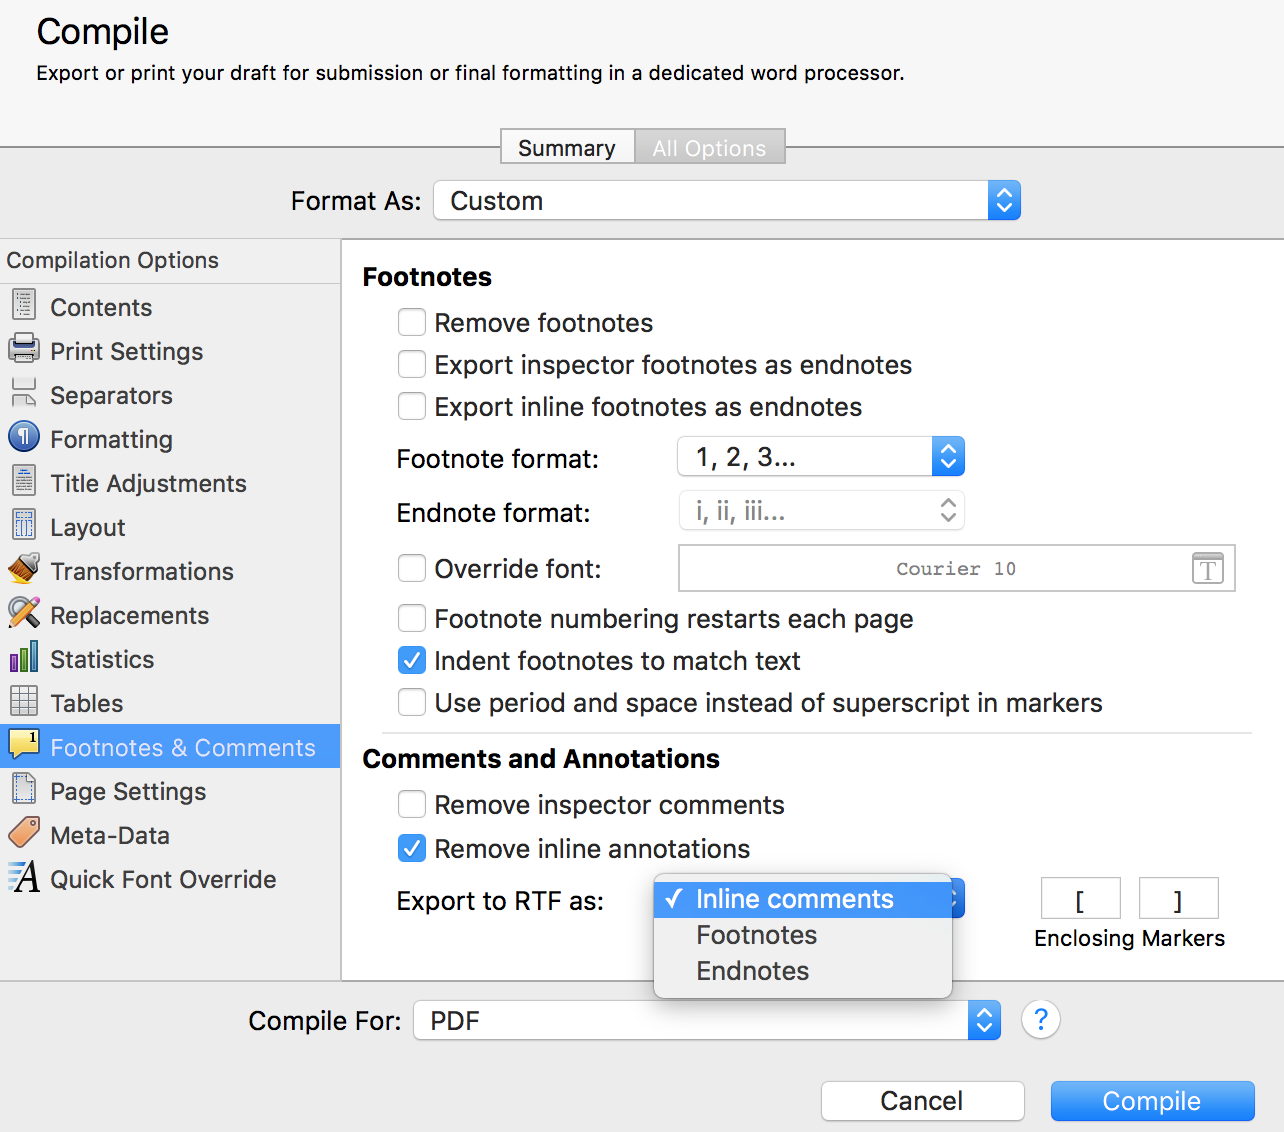
The Enclosing Markers are set as [ and ] by default; you can alter these if you wish.
If you have any questions about comments, please leave a comment on this blog, or on my ScrivenerVirgin Facebook page.
The ScrivenerVirgin blog is a journey of discovery:
a step-by-step exploration of how Scrivener can change how a writer writes.
To subscribe to this blog, click here.
Also … checkout the Scrivener Tips
on my ScrivenerVirgin Facebook page.
Patsy
29 December 2016 at 11:47The only comment I have to add right now is one wishing you a happy New Year!
rainbowmaker
29 December 2016 at 23:29And to you Patsy!