

Managing the Scrivener workspace
 Managing the Scrivener workspace boils down to deciding what you want to see while you are working on your manuscript.
The Scrivener workspace
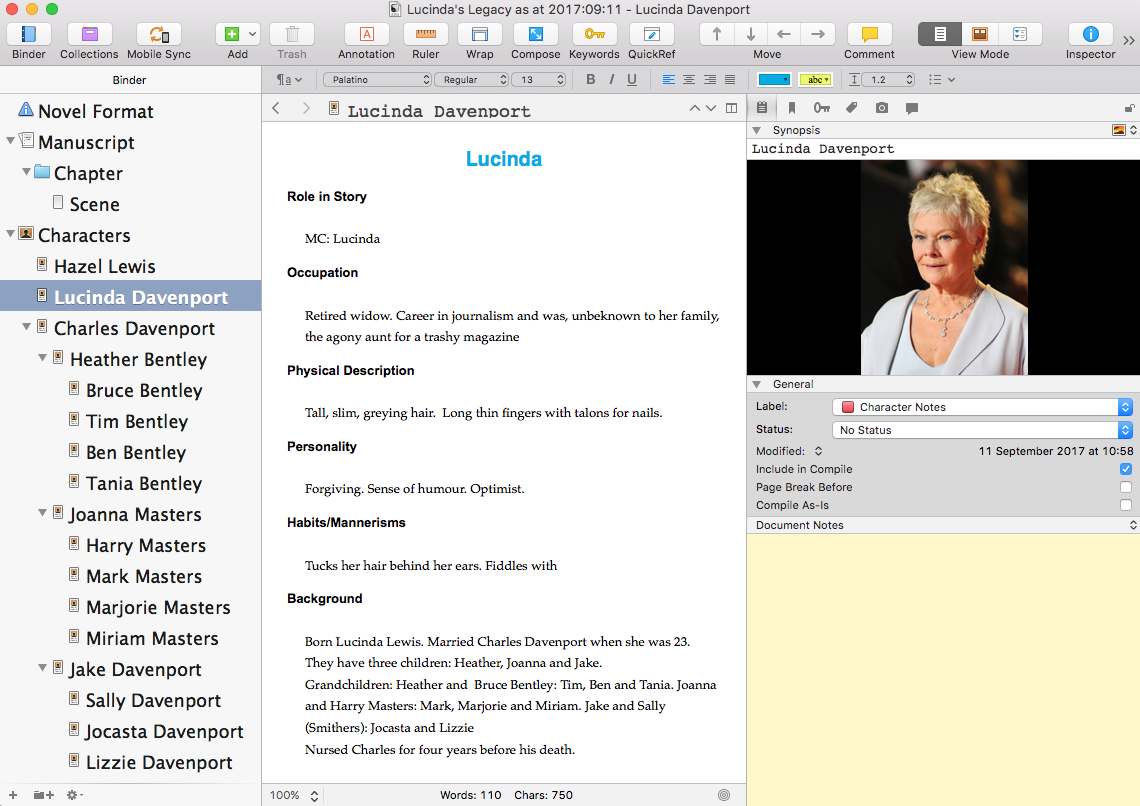
The basic workspace can be separated into three panes:
- The Binder on the left
- The Editing pane in the centre
- The Inspector on the right
What appears within the Editing pane?
![]() The choice is Scrivenings (as shown above), or Corkboard, or Outliner. Which one you see is determined by your selection of the View Mode.
The choice is Scrivenings (as shown above), or Corkboard, or Outliner. Which one you see is determined by your selection of the View Mode.
More on the Corkboard and Outliner in another post – once I have written enough of my NaNo2017 novel to show you how useful these options are!
Closing the Inspector pane
 The Inspector pane can be closed (and reopened) by clicking on the Inspector icon.
You could then write, for each document, within the Editing pane, using Scrivenings mode. Click on the document and start writing …
Right now, I am writing character sketches for my NaNo2017 novel: Lucinda’s, in particular.
Notice the word count at the very bottom of the screen.
Composition mode – the best writing space?
So that you have no distractions at all while writing, select View / Enter Composition Mode. (To escape from it, click the ESC key!)
If you hover near the bottom of your screen, some options appear.
On the right: a slider control to fade the background and to the right of that, an exit button.
![]()
On the left: controls for the size of text, position and width of the paper, plus three buttons to bring up additional information.
![]()
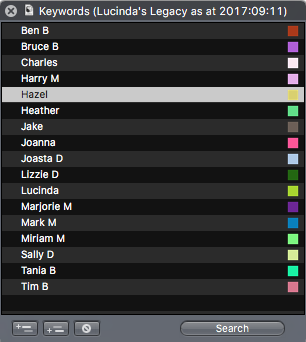
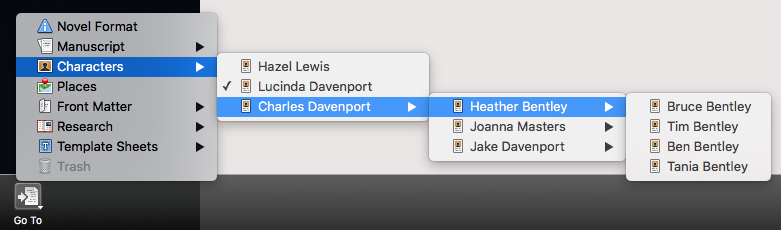
Clicking on Keywords opens the Keywords dialogue box, so you can add a keyword if one occurs to you while writing. I’ve set up keywords for each of my characters. This will prove useful when it’s time to edit this NaNo2017 novel. Notice they appear in alphabetical order, whereas, in the binder I have created a heirarchy according to their position in the family tree.
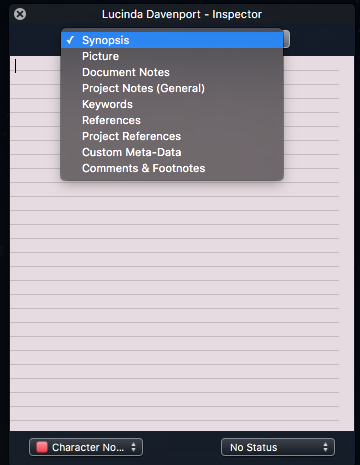
Clicking on Inspector opens a window for the document you are currently writing, and the top area offers various options, such as synopsis (the default), keywords and custom metadata.
Clicking on Go To allows you to jump to a different document, and you can start typing straight into it.
Choosing a Backdrop for your writing space
To change from the default black (no backdrop), select View / Composition backdrop / Choose … and browse for an image that you want to appear either side of your writing area.
This is my choice.
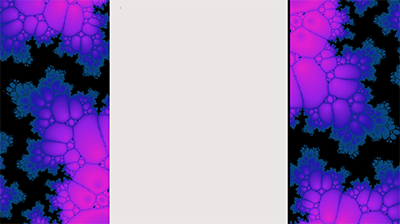
I downloaded the image from Dreamstime. It’s called Acid Test Black / ID: 55380 © Boligogo | Dreamstime Stock Photos
Simply Scrivener Specials
To see me demonstrate ‘Setting up my workspace’, or if you need to ask any questions about Scrivener, book a Simply Scrivener Special.
To help me to prepare, you might also complete this short questionnaire.
The ScrivenerVirgin blog is a journey of discovery:
a step-by-step exploration of how Scrivener can change how a writer writes.
To subscribe to this blog, click here.
Also … check out the Scrivener and RedPen Editing Tips
on my ScrivenerVirgin Facebook page.
Pingback:Scrivener user interface: the writer's workspace - ScrivenerVirgin
24 February 2018 at 18:31