

Snap!
A TrackChanges view of your editing
While editors learn how to use Scrivener to provide editing services for their author clients, and authors become used to receiving feedback in Scrivener, I’m sure there will always be a need for a TrackChanges view of what editing has been done, and by whom.
Word is not the only software with this facility. Scrivener’s snapshot feature provides the same insight into progress made to date.
How to take a snapshot
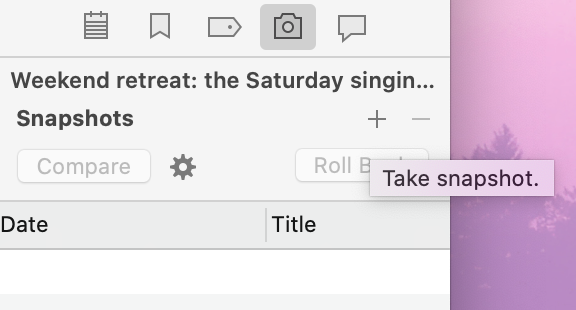
In the Binder, choose the document for which you need a snapshot. Then, in the Inspector, in the tab with the camera icon, click on the + sign to take a snapshot.
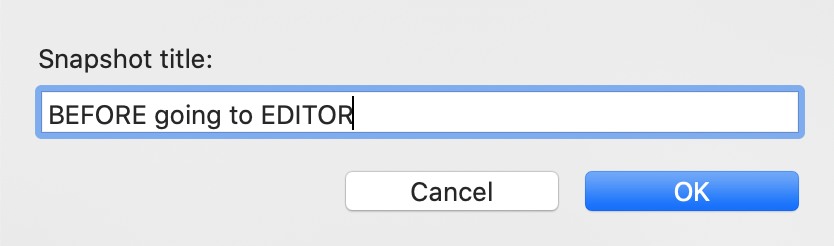
Scrivener records the date and time and gives the snapshot a title of ‘Untitled’ with your status for that document in brackets. Rename the snapshot, eg BEFORE sending to EDITOR.
Scrivener also changes the camera icon to one with an asterisk, so you know snapshots exist for this document.
This option is great when you are working on a single scene/document. Once you reach the stage of sending your whole project to an editor, a different approach is needed.
How to take a snapshot of the whole project
Rather than taking snapshots of individual documents (which could take forever), you can take a snapshot of the whole manuscript, or whichever documents/chapters you plan to send for review.
Highlight the documents in the Binder and then select Documents / Snapshots / Take Titled Snapshots of Selected Documents.

A pane will then open and ask for the title to be used. This will be applied to every document that you highlighted.
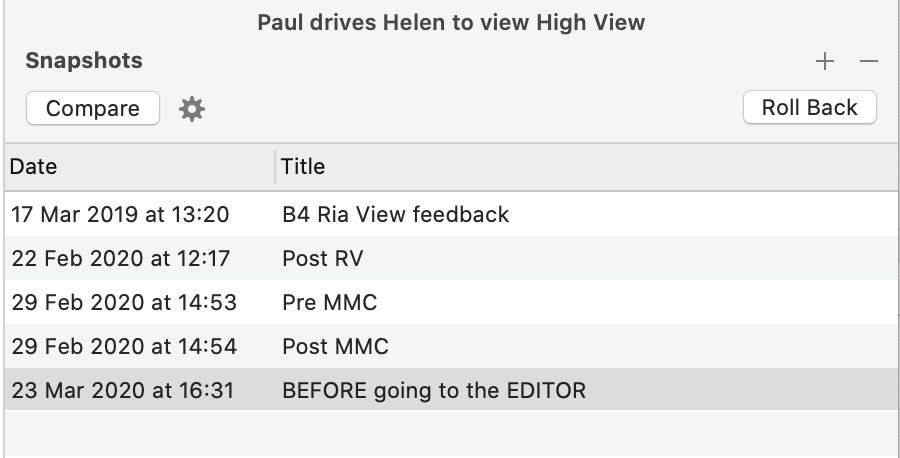
How to view snapshots
 The Inspector shows the history of snapshots taken to date for each document. I’m lucky enough to belong to two face-to-face review groups: RV (Ria View) and MMC (a Monthly Mentoring Circle), and I feed my chapters, one at a time, through both groups as part of my editing process. (This is Step 10 of the RedPen Editing cycle. Read all about it, in my book.)
Only when a manuscript has been edited as best I can, with as much feedback I can glean from the members of these two groups, is it ready to start its journey, in its entirety, to a professional editor.
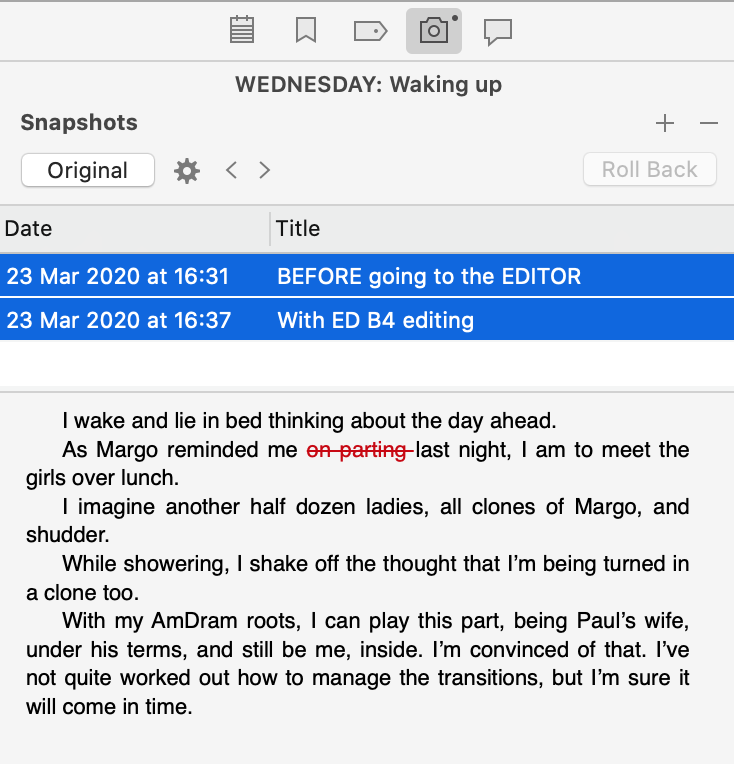
Comparing one snapshot of a document with another
Notice that it’s possible to compare snapshots.
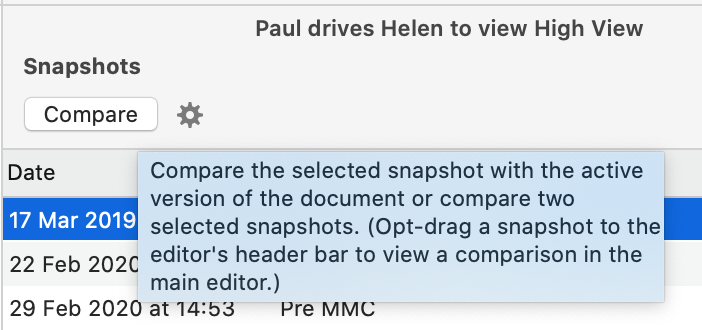
If you click on the Compare button, the area below displays the changes made – in TrackChanges style – between the one highlighted and the current version.
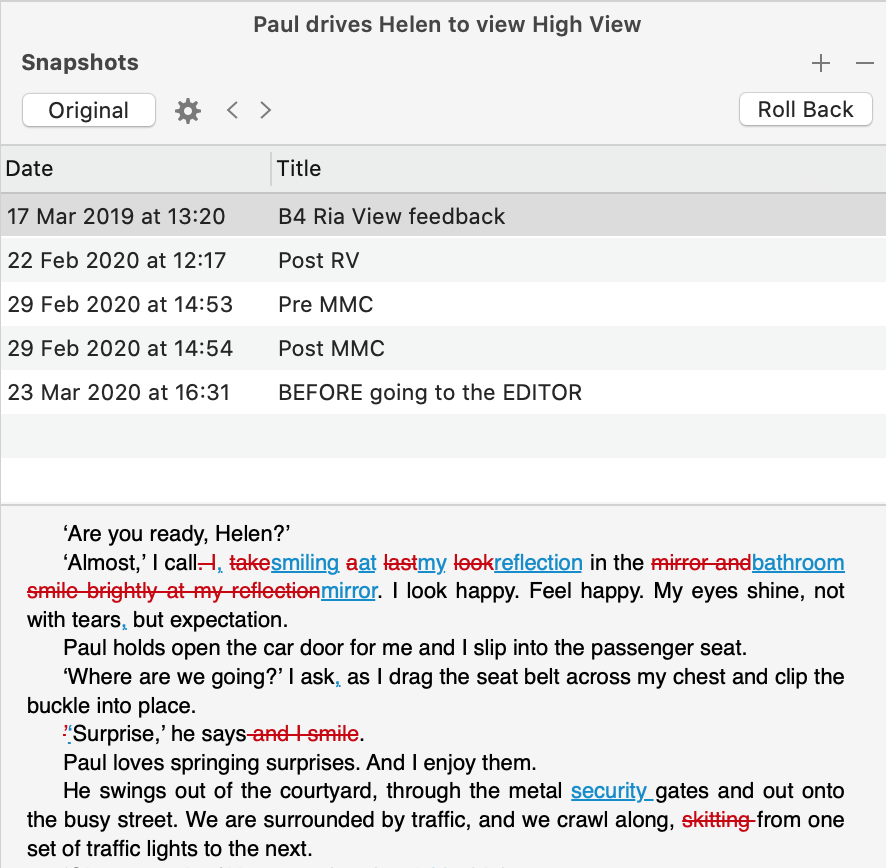
And the button now reads Original. Clicking that will result in the text reverting to the original (the latest version).
Rolling back to an earlier version
If you decide you want to undo whatever editing had been done between one snapshot and another, it’s possible to revert to an earlier version.

Select the snapshot you want to adopt and click on the Roll Back button. A warning message appears!
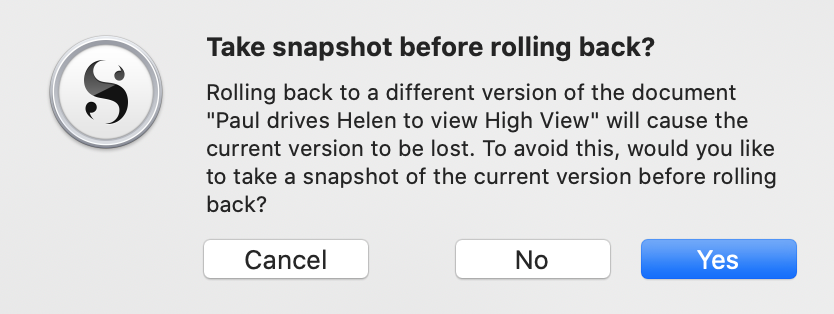
If you haven’t taken a snapshot already, do so, just in case you change your mind again. Call it ‘B4 ROLLBACK to …’ and include the date/time of the earlier snapshot.
Working with a professional editor who also uses Scrivener
I recommend this procedure:
- Authors: Take a snapshot before you send your project to your editor.
- Editors: Take a snapshot as soon as you receive a project from an author.
- Editors: Take a snapshot once you’ve completed the editing, before you send it back to the author.
- Authors: Take a snapshot as soon as you receive a project back from the editor.
Why so many snapshots? Simply so there is less room for misunderstandings as to what was sent, what was received, what editing was done, etc.
Here, for example, it seems the author deleted two words after taking the snapshot and before sending it to the editor. Or the editor deleted them before taking the snapshot?
Keeping an audit trail of changes made, and by whom, and when, is the professional way to work – especially when your team size is greater than one.
Any questions? Need a helping hand?
I’m happy to explain more about my use of Scrivener for developmental editing and to answer your questions. Book a Simply Scrivener Special.
To help me to prepare for the webinar, please also complete this short questionnaire.
The ScrivenerVirgin blog is a journey of discovery:
a step-by-step exploration of how Scrivener can change how a writer writes.
To subscribe to this blog, click here.
You can also find links to blogs of specific topics in the Scrivener index.
Also … check out the Scrivener Tips.
Lora Arbrador
30 March 2020 at 18:45Very interesting. I’m sure this will be very useful once I get the hang of it! Thank you Anne.
Anne Rainbow
31 March 2020 at 12:34You’re welcome. There’s so much to learn, Lora! Just remember this features for when you need it.