

Scrivener for lifelong learning
Online courses are shiny things
It’s so easy to sign up for online courses. Many are free and your immediate reaction is: Why not?
So, you sign up and do the first couple of classes. Then what? If you are anything like me, other (less shiny) things come along and you don’t have time for the third class, and before you know it, time’s up, or you forgot about the course completely.
As 2020 came to an end, I decided 2021 would be dominated by learning. So I did a quick check on what courses I’d enrolled for so far … Shock, horror … there are a lot. I decided the best place to store everything would be in a new Scrivener project.
If you are new to Scrivener – and the prospect of having to master the compile process scares you – this is an excellent starting place for you. Using Scrivener as a store for information, rather than to write a book you plan to publish will give you time to become familiar with Scrivener.
Creating a Scrivener-for-Lifelong-Learning project for all your courses
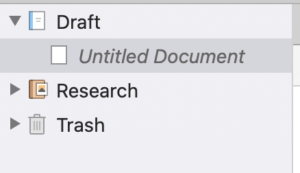
The Blank template provides a Binder structure with the barest of essentials.
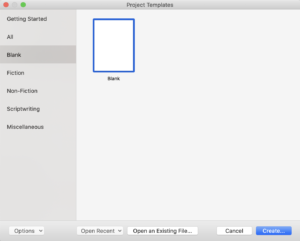
There are only four items in the Binder.
When asked what to call your project, choose a meaningful title and direct Scrivener to save it somewhere sensible in your Documents.
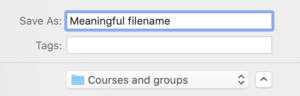
I called my project Courses 2021, with every intention of revisiting these regularly in the next 52 weeks.
Customising the Binder for your courses
The power of Scrivener comes in its flexibility. Whatever default values are given, you can change them to suit yourself.
As a first step, I renamed the ‘Draft’ as ‘Courses’ and set up some new folders in which I’d then be able to file information about all my courses.
Slowly and systematically, I created new folders so I had a sensible filing system for my information.
Adding a new folder
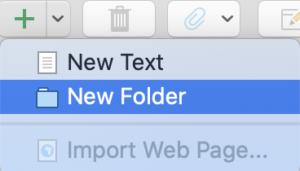
To add a new Folder, there are several options. First, position your cursor on an item in the Binder. This will guide Scrivener as to where the new folder will be inserted (after the one you selected!). Then …
- Click on the Add icon in the menu bar, and select New Folder.
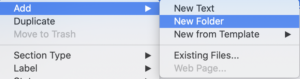
- Use the right click option. You can then select New Folder from its menu.
- If you prefer to use the Menu bar, select Project / New Folder.
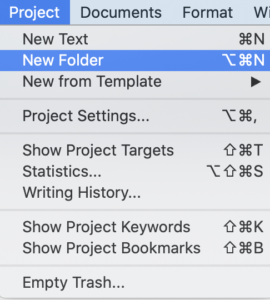
- Notice the keyboard shortcut for Project / New Folder. You can use that instead. Option+Command+N.

Why so many options? The Scrivener interface (the way you, the human, interacts with it, the software) is designed to suit a variety of human preferences. I’m a Right-Click person because I trust the software (not just Scrivener but all the applications I use) to second guess what I need, depending on where I’ve placed my cursor, and to provide these in the Right-Click menu. Other users will prefer the menu … others are into keyboard shortcuts. Whichever route suits you, go for it.
Renaming a folder
Having inserted a new folder, Scrivener calls it New Folder. The name is highlighted in blue which means: if you start typing, whatever you type will overwrite what’s there.
![]()
If you miss this opportunity, double clicking on a document or folder title turns it blue (selects it) and you can then edit it.
Repositioning a folder
Ideally, you will select an appropriate folder ahead of this process which results in the new folder being where you want it. However, if you’ve not mastered that part, it doesn’t matter … you can move folders (and documents) around in the Binder.
Click in the Binder on the folder that you want to move. Having selected it, when you drag this folder up/down the Binder, other folders will be highlighted as you pass over them. This allows you to drop one folder within another. If your mouse/tracker board skills are not so good, this can result in your inadvertently dropping a folder within another and then thinking you’ve lost it. Or worse, that Scrivener has hidden it from you!
To prevent this happening accidentally, hold the Option key down while you drag. Notice that none of the other folders highlight as you pass and you can be confident your folder will end up where you want it.
Changing the level of a folder
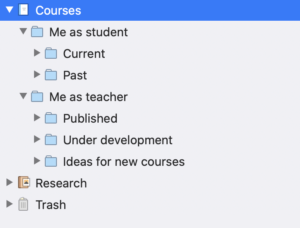
The Draft folder – or my renamed Courses folder – is a root folder. It is positioned to the farthest left in the Binder. The folders within it are at the next level. The folders within those are another level. I have five levels so far.
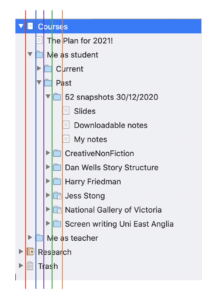
At the root level, I have Courses. Then: ‘Me as student’ and ‘Me as teacher’. Within ‘Me as student’, there are two folders: ‘Current’ and ‘Past’. Within ‘Past’ there are seven folders and ’52 snapshots 30/12/2020′ has within it three documents: ‘Slides’, ‘Downloadable notes’ and ‘My notes’.
If, when you look at your structure, you have a folder (or document) at the wrong level, you can promote it (move it leftwards one level) or demote it (move it rightwards one level).
Select the folder/document that needs to move, and choose an arrow from the Move icon.

If you can’t see this icon in your toolbar, customise the toolbar to include it. See this blog post for how that’s done.
And, in case you’re not sure what the icons ion the Binder mean, read this blog post too.
Pulling material for your courses into your project
 Once your Binder structure is close to what you think you need, it’s time to pull in information from elsewhere.
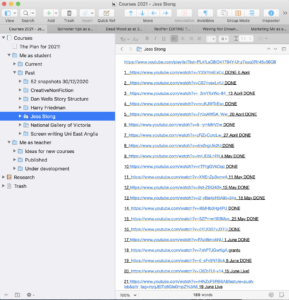
I had much of my information in my Notes App. To transfer the material, I used Cut and Paste.
Anne! You keep telling us to use Paste with Match Style. Why not here? Because this Scrivener project is a store for information; it’s the words that matter, not how they look.
Some of my material was in Word documents – like the Downloadable notes for the ’52 snapshots’ webinar. It is possible to drag the link from the Finder into the Editing pane, but Scrivener just displays the link. If you click the link, it opens the document. My aim was to have all the material within this project, so I used Copy and Paste … and then moved that Word file to the Bin.
Some of my material was in PDF format. It is possible to drag the individual pages into the Editing pane. I used this method for the Five-finger-pitch material I gleaned from the Screen Writing course given by the University of East Anglia.
And, for more recent courses, I typed straight into the Editing pane, using Scrivenings view of that document.
Questions? Need a helping hand? Want a demo?
To watch me demonstrating the various Scrivener features mentioned in this blogpost or to ask any questions about social media posts, book a Simply Scrivener Special. To help me to prepare, you could also complete this short questionnaire.
The ScrivenerVirgin blog is a journey of discovery:
a step-by-step exploration of how Scrivener can change how a writer writes.
To subscribe to this blog, click here.
Also … check out the Scrivener Tips
on my ScrivenerVirgin Facebook page.
CarolSue Ayala
4 January 2021 at 14:54Anne, I LOVE this. I am drowning in valuable information and am flagging so any emails to get back to, but you can bet it’s just too tedious. This could really, really help me OWN and ACCESS the information. I follow your instructions on how to structure the binder. Where I get glassy eyed is on how to get the info into the binder in a readable way. I am attending tomorrow’s session. Will you be demonstrating? Thank you.
Anne Rainbow
4 January 2021 at 15:02Glad it’s providing a solution for you. Re ‘in a readable way’, that’s all about formatting. If you join RedPen as a Visitor member, you will get access to all previous recordings of the Simply Scrivener specials – and a recent one was all about formatting. This is the form to complete https://www.surveymonkey.co.uk/r/8CJPWSJ
Barry Featheringill
4 January 2021 at 12:29Very disappointing that Scrivener 3 for windows is still not out. With all the great things I hear and see about Scrivener 3 Mac and still having to rely on so much trial and error with latest project it is frustrating that I am not able to find many of the older articles that have helped in the past using windows operating system.
Changing from Windows 7 to Windows 10 is bad enough but struggling with Scrivener to is getting to be to much. Got through all the writing but the compiling is not coming out like I want.
Anne Rainbow
4 January 2021 at 14:48There is a rumour the version for window might be available before too long (!!!). I sympathise with your frustration. It was having to change op systems every five minutes that made me move from Windows to Apple. I too am waiting on the videos for the Windows version …