

Using Scrivener during the review stages
 Step 10 = Ask for feedback
Once second-fix editing is complete, what happens next?
Asking for feedback
At various times in the writing/editing process, you might decide to seek feedback from others. In my RedPen Editing cycle, this is Step 10.
Once second-fix editing is done, and you feel as happy as you can be with what you’ve produced, you might send your manuscript to a developmental editor for professional guidance.
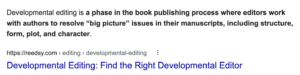 This will involve an investment (to pay the developmental editor) and, most likely, will lead to another round of editing.
After that, or if, like me, you have some editing experience and are relatively confident about the structure of your novel, you might feel ready to send it to some writer friends for feedback. I anticipate their comments will address my writing skills from a writer’s perspective, and this is therefore a less expensive level of developmental editing.
My writing friends are therefore my first tranche of beta readers. I don’t pay them; but, in return, I’d read their first drafts and give them feedback when they reach that stage. You might belong to a writing group who encourage a similar quid pro quo arrangement.
Once I’ve processed their comments (and another round of editing!), I would then turn to the real beta readers: friends who wouldn’t want to write a novel but love reading them. They will have a completely different perspective. Hopefully, they’ll be absorbed in the story and simply report back on how it made them feel.
What role does Scrivener play in the review stages?
I use three features of Scrivener when processing feedback during the various review stages.
- I keep track of reviewers in the Outliner.
- I write Chapter Notes for overview comments.
- I write colour-coded Comments to record review suggestions.
Also, although I say ‘I write’ Notes and Comments, it’s usually a copy-and-paste exercise, depending on how the reviewer has sent their feedback.
Tracking reviewers in the Outliner
A long time ago, in the first two rounds of reviewing, I was working chapter by chapter. This shows the progress of my novel going through those two review stages.
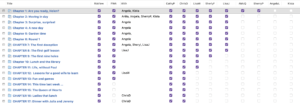
In the first round, my chapters were read by members of the Ria View writing group. Six of us met monthly for a whole day. Each of us took a turn ‘in the spotlight’ and received comments, both written and verbal, from our fellow writers. Once a chapter had been processed in this way, I ticked the RiaView column.
Before the next stage, I ran each chapter through ProWritingAid (and ticked the PWA column). Then, as a member of Joan Dempsey’s Gutsy Great Novelist group, I had a number of feedback partners with whom I swapped chapters, and we gave each other feedback. At any one time, I could see from this Outline view of my manuscript who had reviewed what and which chapters were with whom.
How did I do this? I used keywords.
I’m now at the stage where writer friends have read the whole book, so I have their copies beside me and I’m working directly from their handwritten comments, or – from some – an electronic list which I’ve printed out and tick off as I process each comment.
Chapter Notes
Reviewers tend to write two types of comments:
- They spot typos and circle them, and/or isolate a sentence and ask a question, and/or write something in the margin alongside the text.
- They write a summary of the effect of a chapter on them, and this is to be found on the final page of a chapter.
For the second type of feedback, I use chapter notes.
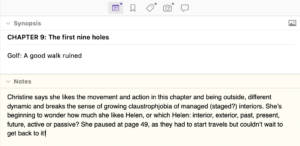
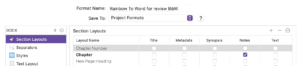
These are in the Inspector, first tab, under the entry for Synopsis. Later, when I want to re-read the whole manuscript, I can print these notes out at the start of each chapter, to remind me of the comments made to date. I just tick the Notes column in Compile.
Colour-coded Comments
For the itsy-bitsy feedback on the page, I tend to fix what is easy to fix (typos especially) and, if I have the energy, a bit of rewriting to make things clearer. Mainly though, I add comments to my text so I have a record of how the material affected the readers.
I colour code these.
- Red is for comments I need to address.
- Yellow is for reactions – they are kept just for comparison with later reactions and may or may not be acted upon.
- Green is for notes to myself eg some research I need to do, or a fix I’ve worked out but haven’t yet implemented.
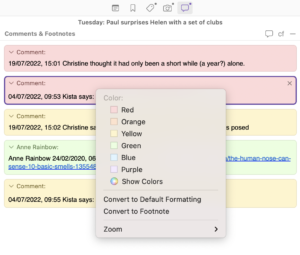
You can change the colour of comments. A right click offers a choice. Whatever you choose, that colour will be used for subsequent new comments, until you change the colour again.
Questions about Scrivener?
Need a helping hand with Scrivener tools for the review stage? Want a demo? Book your own Simply Scrivener Special session with me, at a time to suit you.
Need a helping hand with self-editing? Check out my online self-editing courses. Join RedPen Editing and enjoy a 5-day editing taster course for free.
The ScrivenerVirgin blog is a journey of discovery:
a step-by-step exploration of how Scrivener can change how a writer writes.
To subscribe to this blog, click here.
Also … check out the Scrivener Tips
on my ScrivenerVirgin Facebook page.
No Comments