

DIY Book Formatting with Scrivener: An Introduction
 Scrivener: the DIY publishing tool
Formatting is a huge topic and I’ve written many blogs about it already.
- Formatting with Scrivener 3
- Formatting with S3: All projects, this project, this document
- Formatting for printed output
- The Scrivener Mindset: Formatting via section layouts
- The Scrivener Mindset: Formatting via Compile
- The Scrivener Mindset: Formatting thru Section Layouts
You might think, that’s quite enough! No …
Manuscript formatting versus book formatting
I found this excellent article which distinguishes between manuscript formatting and book formatting.
- Manuscript formatting is preparing your manuscript professionally for agents and editors.
- Book formatting is designing your completed manuscript for publication.
 The article goes on to explain the technical terms and conventions used in publishing circles, and recommends software that you might use. They don’t mention Scrivener (!) and yet all the necessary tools exist within Scrivener.
The need for another series of blogs on formatting!
In this series of blogs, I’ll step through all that you need to know to format your book. Using Scrivener …
- Setting the page size (called the trim size) ie the width and height of the book
- Setting your margins: the space around your text on each page
- Setting the bleed: ensuring images that extend to the edge of a page ‘bleed’ at the edge of the page
- Choosing a style for your chapters: how you present the chapter title, where it sits on the page and where the first paragraph starts
- Setting up headers and footers for your pages
- Choosing which fonts you’ll use for headings, subheadings and main text: both the font style (eg serif or sans serif) and font size (called point size) so that it’s comfortable to read
- Determining the line spacing between lines of text and between paragraphs
- Deciding how to treat widows and orphans (stray lines that appear at the bottom or top of a page, separate from the rest of the paragraph they are in)
- Setting up the FrontMatter (material that appears ahead of the body of your manuscript) and BackMatter (material that follows the body of your manuscript) so that the text appears on recto pages (the right hand side as you look at the open book) when you want it to
- Tweaking all of the above so as to control the page count ie how many pages in the book so the book feels right in the hands of your reader
Making formatting decisions
Before you can format your book, you need to make lots of decisions. It’s then just a case of making sure the settings in Scrivener will make it happen.
In making those decisions, various factors should be taking into account.
- Your book will sit alongside others in a bookshop, or on a library shelf, and, eventually, in the home of your reader. It needs to ‘fit’ (physically) according to your genre and suit the audience you hope to attract. It also needs to look ‘professional’ even though you’re a DIY publisher.
- When a prospective reader opens the book, the immediate effect of how you’ve laid out your page needs to appeal to that reader. They won’t necessarily understand the formatting decisions you’ve made; they just know how it makes them feel. Hopefully: keen to buy and then read your book.
- Once you’ve designed one book, all books in the same series should look the same: same size page, roughly the same thickness, a branded cover image, etc. So, when designing the first one, it’s important to make good choices.
DIY book formatting is achievable using Scrivener. The software was designed to take an author from blank page to publication. However, as an amateur publisher, you do need to invest time and energy in learning how the professional publishing world does things. It’s not rocket science – just a lot of conventions and aspects to consider. The aim is for a professional product even though you’ve done it yourself.
Let’s get started? My next blog focuses on the page. Then, styling. Then, the mechanics of the various parts of a book. Then, a final look at how it all needs to work together to produce a perfectly formatted book, ready for publication.
HOMEWORK!
Yes, ahead of reading the next blog in this series, I’d like you to do some research. (Three tasks in true RedPen style.)
1. Think about book size
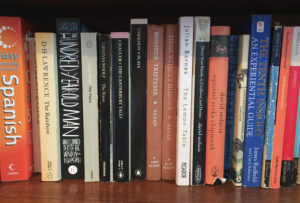
Examine your own bookshelf. This is how one of mine looks. Notice the width of the books. Notice the height. Notice how thick the book is – and what information is put on the spine.
2. Look inside
Take any book and open it at any page somewhere in the middle of the book. What’s your reaction to how the text looks on the page?
If it’s from your own bookcase, then presumably you liked to look of the book when you bought or borrowed it. Why wouldn’t you? But ask yourself: what is it that you like?
Then look inside some other books and see what you don’t like. Font too small? Font too big? Margins too narrow? Line spacing too small. Or too large? Whatever makes you shudder, make a note. This will be something you’ll avoid in your own book formatting design.
Amazon offers a ‘look inside’ option. 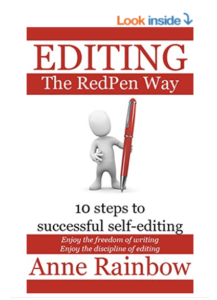 This image ‘looks inside’ my Editing the RedPen Way book. It’s available electronically for Kindle readers.
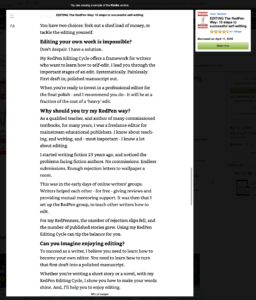 Notice the Aa in the top left hand corner of the ‘look inside’ image. This allows the reader to customise their view of the text.
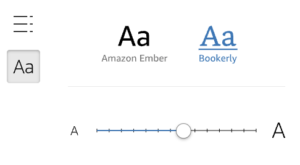
For electronic books, the options are a sans serif font (Amazon Ember) or a serif font (Bookerly), and the point size is offered on a scale of small to large. So, as a DIY publisher, it makes no sense to spend any time deciding things which the reader can change. Instead, there are other decisions which affect the look of the page, and, in particular, in a later blog in this series, we’ll look at headings and the use of white space on the page.
Now, look inside a paperback book instead.
From Amazon again, it’s a collection of short stories, Dress Your Family in Denim and Corduroy by David Sedaris, a book I have on my bookshelf.
This image shows the opening page of one of the short stories. Notice how the page is laid out.

- The size of the page (width and height)
- The white space above the header
- The content of the header, its position (centred), font style and size
- The white space at the top of the page between the header and the story title
- The position (left aligned), font style and size of the story title
- The use of capitals in the story title
- The white space after the story title and before the text starts
- The paragraph style: indentation for the second paragraph, but none for the first
- The large W on the first line of the opening paragraph
- The use of capitals (small caps) for the first five words in the opening paragraph
- The font style and size of the body text
- The line spacing of the body text
- The justification of the body text (fully justified)
- The widow at the bottom of the page (single line of text separated from the rest of that paragraph which falls on the next page)
- The white space between the final line of body text and the page number
- The position (centred), style and size of the page number
- The white space between the page number and the footer
- The content, position (centred), text style and size of the footer
- The white space below the footer
- The width of the left and right margins (they differ!)
That’s a lot of decision-making by the book formatting designer – and that’s just for the opening page of a chapter/story.
3. Look either side of the body of the book
Material (called FrontMatter) appears ahead of the start of the book and can also appear after ‘the end’ (EndMatter). Study some books and see what is common to most books of the type you plan to publish.
Questions about Scrivener?
Need a helping hand with Scrivener tools? Want a demo? Book your own Simply Scrivener Special session with me, at a time to suit you.
And, if you need a steer on self-editing, check out my RedPen Editing course. Join RedPen Editing and enjoy a 5-day editing taster course for free.
The ScrivenerVirgin blog is a journey of discovery:
a step-by-step exploration of how Scrivener can change how a writer writes.
To subscribe to this blog, click here.
Also … check out the Scrivener Tips
on my ScrivenerVirgin Facebook page.
Pingback:DIY Book Formatting with Scrivener: Headings, Headers and Footers - ScrivenerVirgin
19 February 2025 at 22:55Pingback:DIY Book Formatting with Scrivener: FrontMatter and EndMatter - ScrivenerVirgin
5 December 2024 at 09:55