

Formatting: For the page
 When it’s time to compile your manuscript …
… the formatting for the page is done through the two main areas of the Formatting pane: the Structure and Content table, and the Formatting Editor.
Today I’m focusing on the Formatting Editor.
Formatting Editor
Many of the controls in the Formatting Editor work in just the same way they do in any text document within your manuscript. Here though, they apply not just to one document, but to all documents on the level selected in the Structure and Content table which I explain in a subsequent posting.
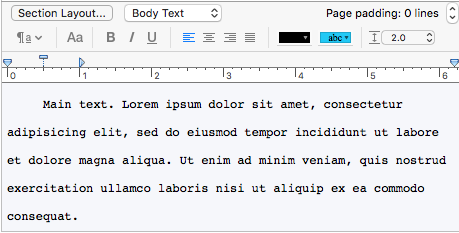
The Formatting Editor provides a preview of the text (using dummy text) so you can see what effect your changes will have on the page.
So, you will be familiar already with how the ruler works, and what controls are available via the formatting toolbar. What’s new here?
The three controls above the formatting bar are Section Layout…, Text style (default is set as Body Text), and Page padding.
Choosing the text style is simple: Click on the blue arrows and make your selection. The other two options warrant a bit more explaining.
Section Layout…
The default for the section layout for the top level is to provide an automated CHAPTER heading, followed by the Title as per the name you’ve given to your folder.
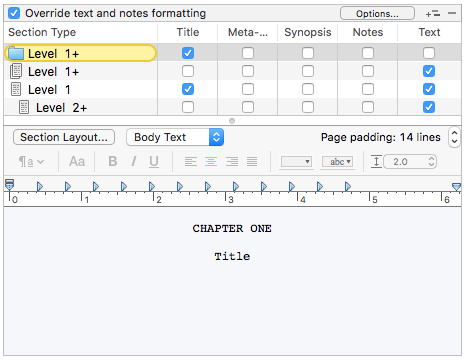
The numbering of the chapters is also automated. Click on the Section Layout… button to see the tag set for the Prefix.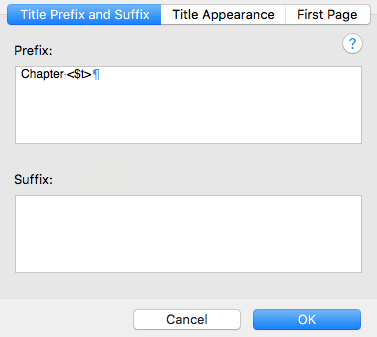
Note that the default for the section heading is Uppercase as specified in the Title Appearance tab.

Notice also that you can have the first few words of a section is uppercase, or in small caps, if you want. This is determined by the settings on the First Page tab.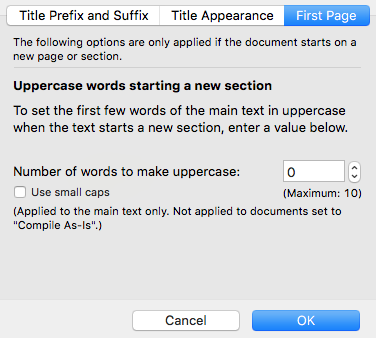
If you want to use your own numbering for the chapters, include the text you want to see, within the folder title, and in the Formatting pane of the Compile option, delete CHAPTER ONE, and the tag ‘Chapter <$t>’
Page padding
As well as deciding on the paragraph setting (the option to the right of Section Layout …). You can set the Page padding, that is the number of lines before the text (ie the Chapter heading) starts on the page.
To see the effect of the page padding, you need to compile the manuscript and look at the first page of a chapter to make sure you are happy with it.
The default is 14 lines. This is a third of the way down a page that displays 42 lines of text. If you are compiling to an eBook format, you may want to reduce this. I reduced mine, for my EDITING The RedPen Way to zero!
Read the Scrivener Manual!
If you want to learn more about the clever ways you can format your manuscript. Especially for chapter/section titles, refer to section 24.11 of the Scrivener User Manual.
The ScrivenerVirgin blog is a journey of discovery:
a step-by-step exploration of how Scrivener can change how a writer writes.
To subscribe to this blog, click here.
Also … checkout the Scrivener Tips
on my ScrivenerVirgin Facebook page.
MOLLY HERRON
13 April 2021 at 00:11I’m getting double page numbers on my document. Each page number is noted at the bottom center AND the top right of each page. Can you tell me how to change the formatting so it is just one?
Anne Rainbow
13 April 2021 at 09:09Page numbers are set within Page Settings on the Header and Footer pane. This blog post explains: https://www.scrivenervirgin.com/2020/09/placeholders-headers-and-footers/ If you are getting two page numbers, you must have set it up to appear twice?