
NaNo2018: Outlining using the corkboard
Outlining is best done using the Corkboard in Scrivener
Each to their own, but, when I start writing a novel, I like using Scrivener from the outset, for the outlining stage.
I know other writers who start on paper and, only when they can see the whole plot, so they start setting up the structure, electronically.
And there are other software tools, too. But for me, it’s Scrivener from start to finish!
One scene at a time
I use one text document per scene and plan one scene at a time.
What is a scene?
My definition of a scene is that it happens in one physical location, it has a fixed cast of characters and it happens at one time. So, if the action changes location, or a character enters or leaves, or there is a break in time, I start a new scene.
Where to start?
When building an outline, because my novel is character driven, I begin by looking at one character sketch and deciding what scenes might be needed for that character.
- What events will that character attend?
- Facts about that character need to be revealed?
- What conversation will he/she have and with whom?
- What is that character’s arc?
If you are writing a plot-driven novel, you’ll tackle this differently, but, any which way, I’ll show you the Scrivener features and tools which will help you to set up your outline quickly and easily on the Corkboard. Read on!
Setting up the Scrivener workspace for outlining
For outlining purposes, I set up my workspace with split screens: the Corkboard view on the left and a character sketch on the right. (Click on the link if you are not sure how to split the Editing pane into two.)
This shows the progress of my novel so far: 34 scenes outlined and sort-of in order.
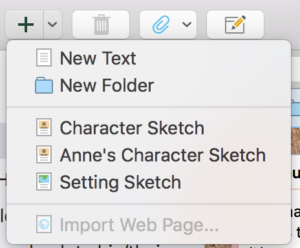 To create each new card, you could click the Add button in the top menu bar and select New Text.
I right click and choose Duplicate as this automatically copies the target of 500 words I’ve set for each scene.
Note that whatever title I type onto each card, this appears in the Binder, and vice versa.
At this stage, I’m just throwing my thoughts onto cards. The synopsis will provide me with a prompt when the real writing starts at midnight on 31 October.
The order doesn’t really matter as I can move them later if I wish.
Controlling the corkboard display
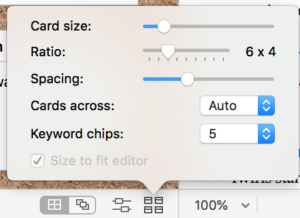 The size of the card, together with the width of your screen window, determines the number you can see across the corkboard.
If I want to change this, click on the icon in the bottom right-hand corner of the corkboard area.
If, instead of Auto, you stipulate the number of cards, you can also decide whether you want ‘Size to fir editor’. Lots of flexibility!
Questions? Need a helping hand? Want a demo?
To watch me go through the process of outlining a novel or to ask any questions, book a Simply Scrivener Special.
To help me to prepare, you could also complete this short questionnaire.
The ScrivenerVirgin blog is a journey of discovery:
a step-by-step exploration of how Scrivener can change how a writer writes.
To subscribe to this blog, click here.
Also … check out the Scrivener and RedPen Editing Tips
on my ScrivenerVirgin Facebook page.
No Comments