

Scrivener with No Style: Choosing your Onscreen Layout
Layout options galore
Having acquired control over the font for your current project, the next important topic is the layout onscreen. How do you want your text to look in the Editing pane?
(We’ll discuss how it looks when you output to PDF, eBook or paperback in the series on Compile which follows this series of posts.)
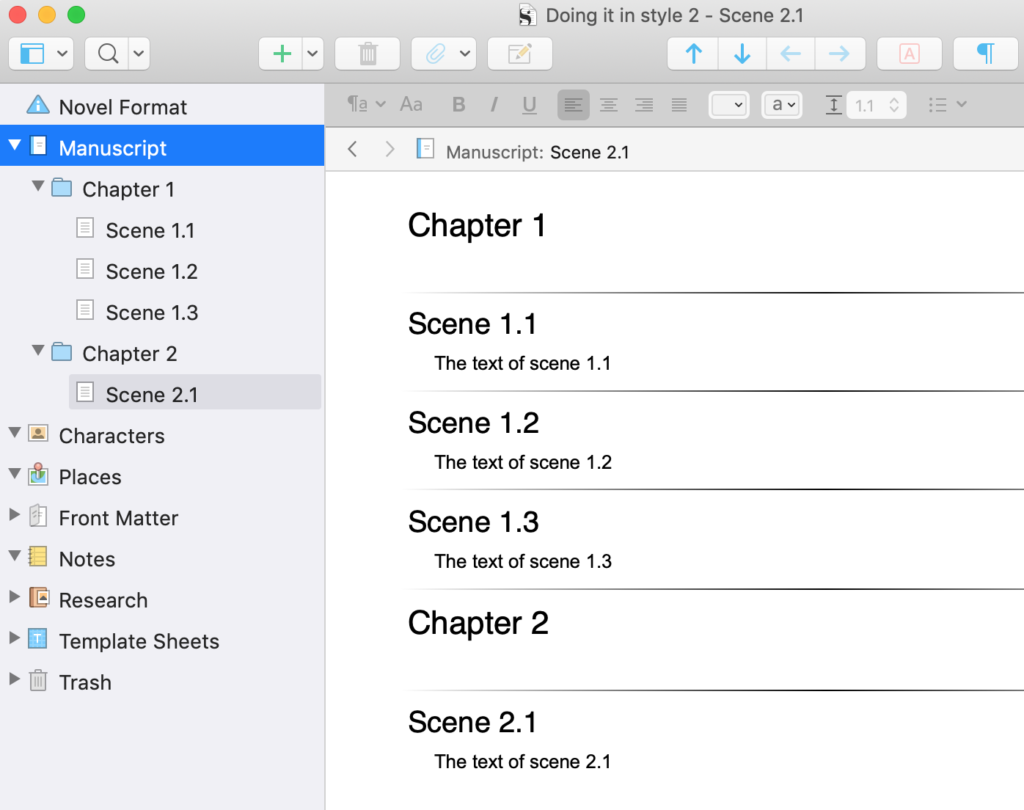
This is an example of how your novel may look, using Scrivenings, in the Editing pane.
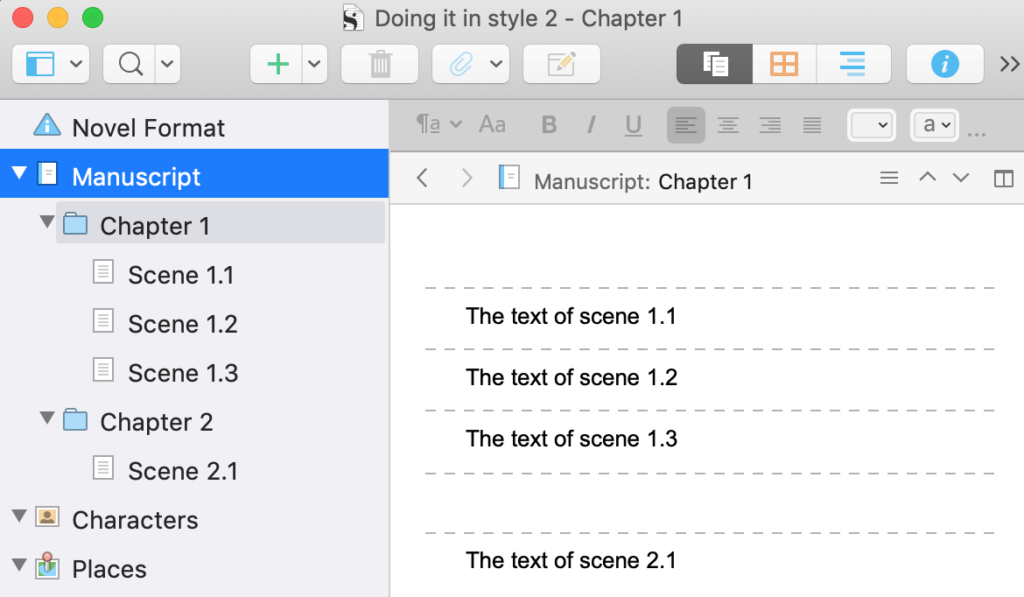
A dashed line is used to separate chapters and documents. The blank areas above the dashed lines (the separators) above ‘The text of scene 1.1’ and ‘The text of scene 2.1’ are for the folders Chapter 1 and Chapter 2, which contain no text.
It looks like this because these are the default settings for the Appearance of the Scrivenings.
Showing Titles within the editing pane
It’s unlikely you’d want the document/scene titles appearing on the version of your manuscript that goes to the reader but, while writing and during editing, I like to have these visible.
Select View / Text Editing / Show Titles in Scrivenings.
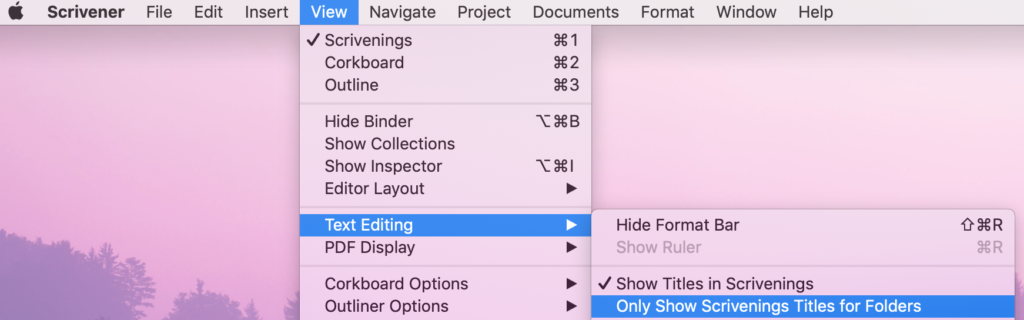
Notice that there is an option just to show the folder titles – these will be your chapter titles.
Choosing your own layout for the Titles
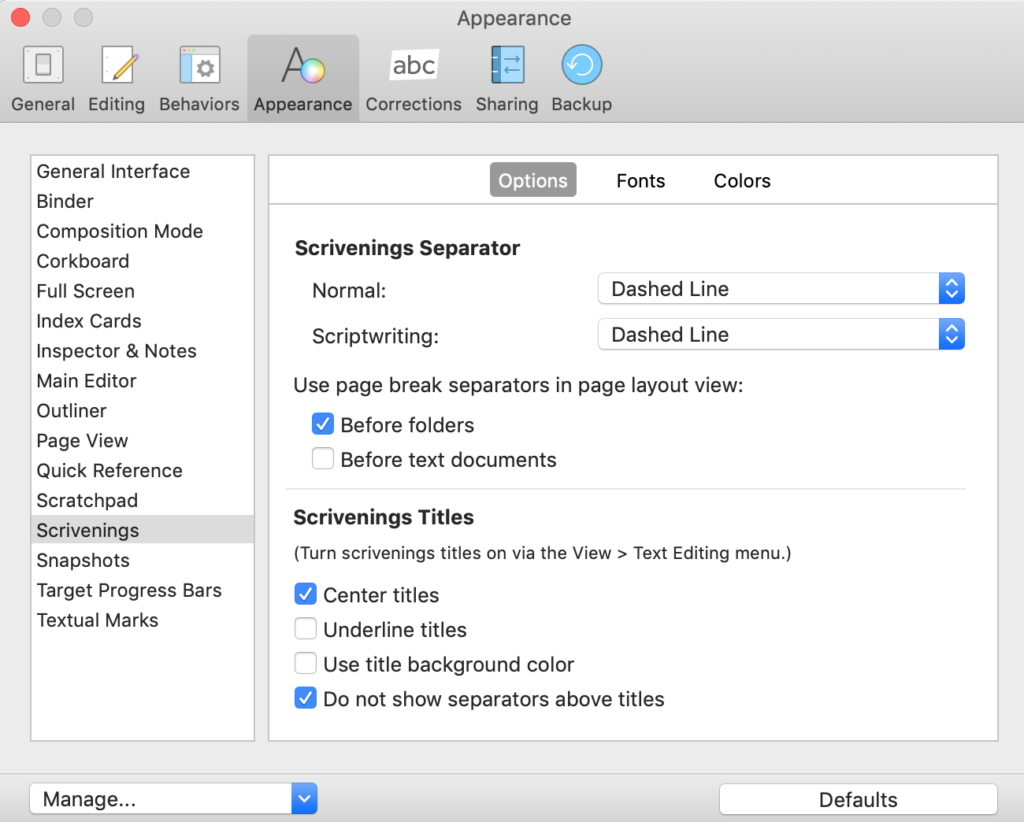
The titles appear (by default) centred. I prefer them to be left aligned!
To change this:
- Select Scrivener / Preferences / Appearance / Scrivenings
- Uncheck the box for ‘Centre titles’.
I’ve also changed my mind about the separators, and opted for the ‘Divider’ style.
You can have whatever layout you like. Select Scrivener / Preferences / Appearance / Scrivenings to open up the window with the current settings (default when you start) and experiment with different separators, and checking/unchecking boxes.
Editor margins
One more ‘option’ is in the space either side of your text – the editor margins. The default margin is set at 20 points.
You can change this: Scrivener / Preferences / Appearance / Main Editor.
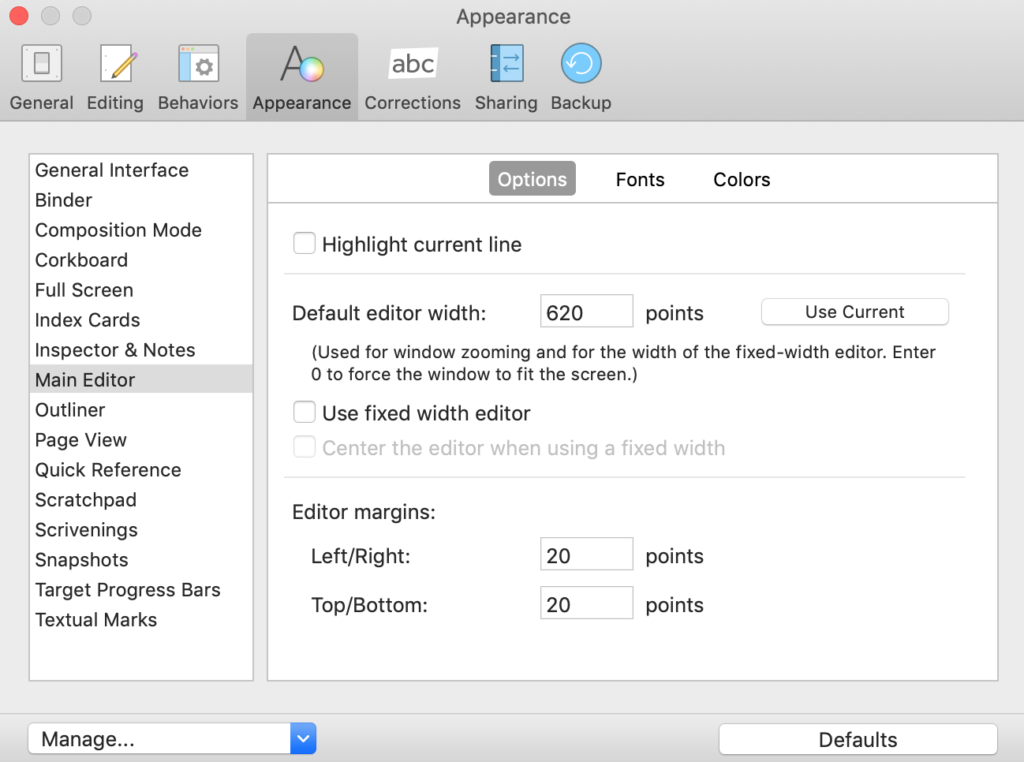
What are points? In typography (the setting of print), there are 72 points in 1 inch. So, 20 points is about a third of an inch.
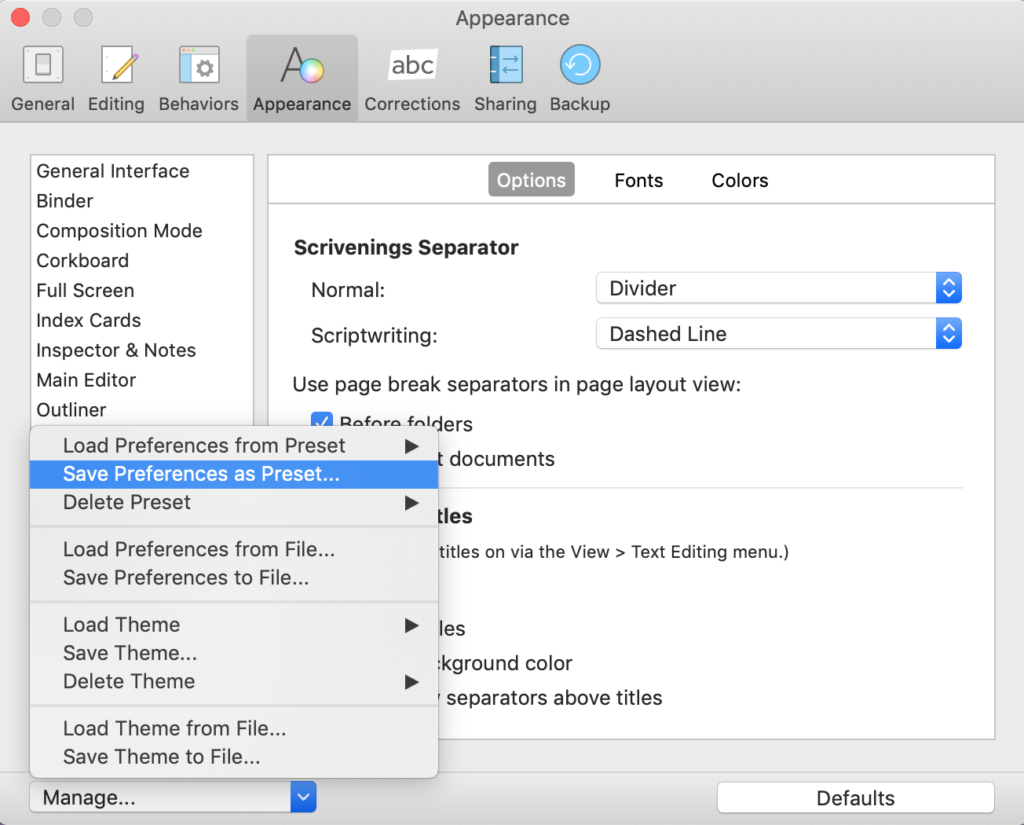
Setting up a preset layout
Once you’ve decided on your preferred layout, you can save this as a preset.
- Click on the Manage button (bottom left).
- Select Save Preferences as Preset.
- Choose a name for this preset.
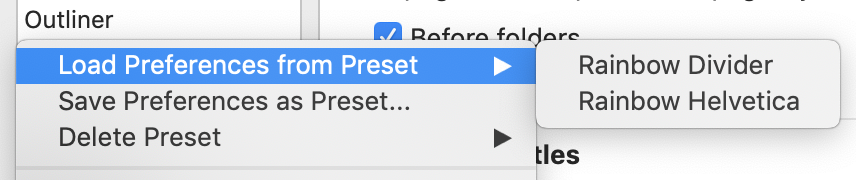
Then, if/when you want to use these particular settings, use the Load Preferences from Preset. You’ll be offered all that you’ve set up to date.
Questions? Need a helping hand? Want a demo?
To watch me go through the process of setting up a preset layout or to ask any questions, book a Simply Scrivener Special.
To help me to prepare, you could also complete this short questionnaire.
The ScrivenerVirgin blog is a journey of discovery:
a step-by-step exploration of how Scrivener can change how a writer writes.
To subscribe to this blog, click here.
Also … check out the Scrivener Tips
on my ScrivenerVirgin Facebook page.
No Comments