

Scrivener with No Style: Creating white space
White space works
One of the ‘tricks‘ when presenting written material is to create the right amount of white space.
White space, sometimes called negative space, is the portion of a page (or screen) left unmarked
White space is controlled in two ways
Spacing happens in one of two directions: horizontally, or vertically.
- Horizontal spacing: margins (between the text and the vertical edges of the page), indents (between the vertical margins and the text), gutters (the gaps between columns of a table), tabs (for alignment of tabulated data)
- Vertical spacing: the margin at the top of the page above any header, the margin at the bottom of the page below any footer, between any header and the start of text, between the end of text and any footer, between lines of text, between paragraphs, between images/tables and text
Horizontal spacing
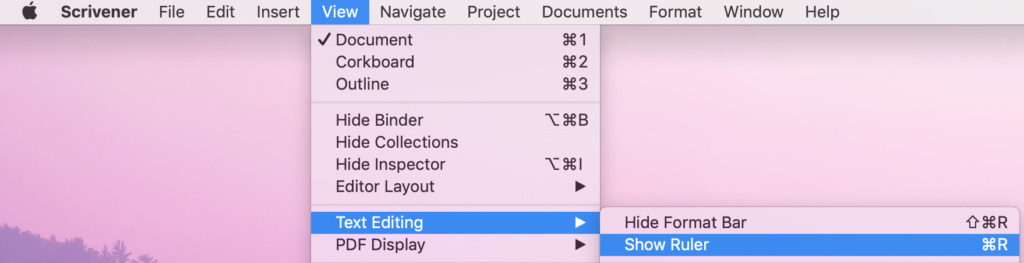
Much of the horizontal spacing control relies on the ruler. If your ruler is not visible, select View / Text Editing / Show Ruler.
Ruler symbols
The symbols reveal the current settings for indentation and tab stops. Here is an example:

- The down-triangles at 0 and 6 indicate the left and right indents. This is the amount by which the text is offset from the left and right margin respectively.
- The rectangle at 0.5 represents the indentation for the first line of each paragraph.
- The right-triangle at 0.5 and at 2 are left-align tab stops.
- The diamond at 3 is a centre tab stop.
- The left-triangle at 4 is a right-align tab stop.
- The circle with a dot in it at 5 is a decimal tab stop.
By sliding these settings along the ruler, you can change how the text lands on the page and, consequently, the white space effect.
Ruler calibration
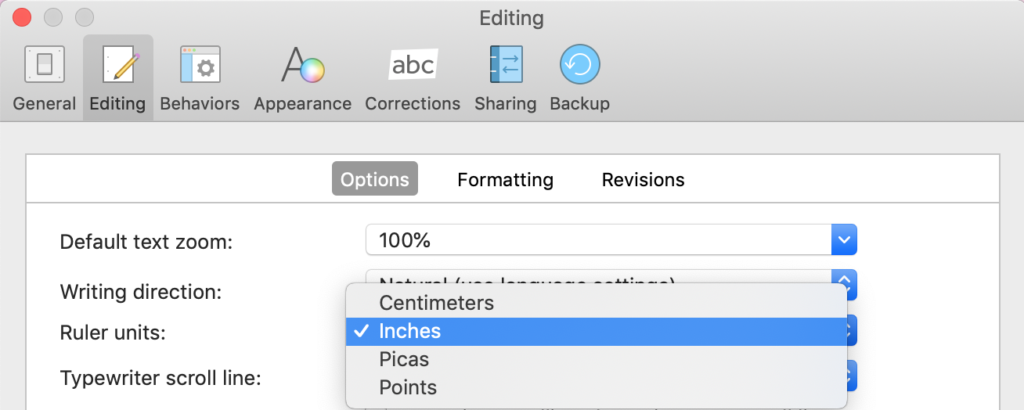
Notice that the ruler can be calibrated in centimetres or inches or pica or points. The choice is yours and is determined in Scrivener / Preferences / Editing / Options.
The default is inches.
There are 12 points in 1 pica and 6 picas in 1 inch. There are 72 points in an inch.
Horizontal spacing: Font formatting versus paragraph formatting
The horizontal spacing of text is mostly controlled at paragraph level. Whatever format you apply, it tends to be applied to one or more paragraphs.
However, there is an option to tweak the spacing between letters within a word. This is accessed through Format / Font / Character spacing.
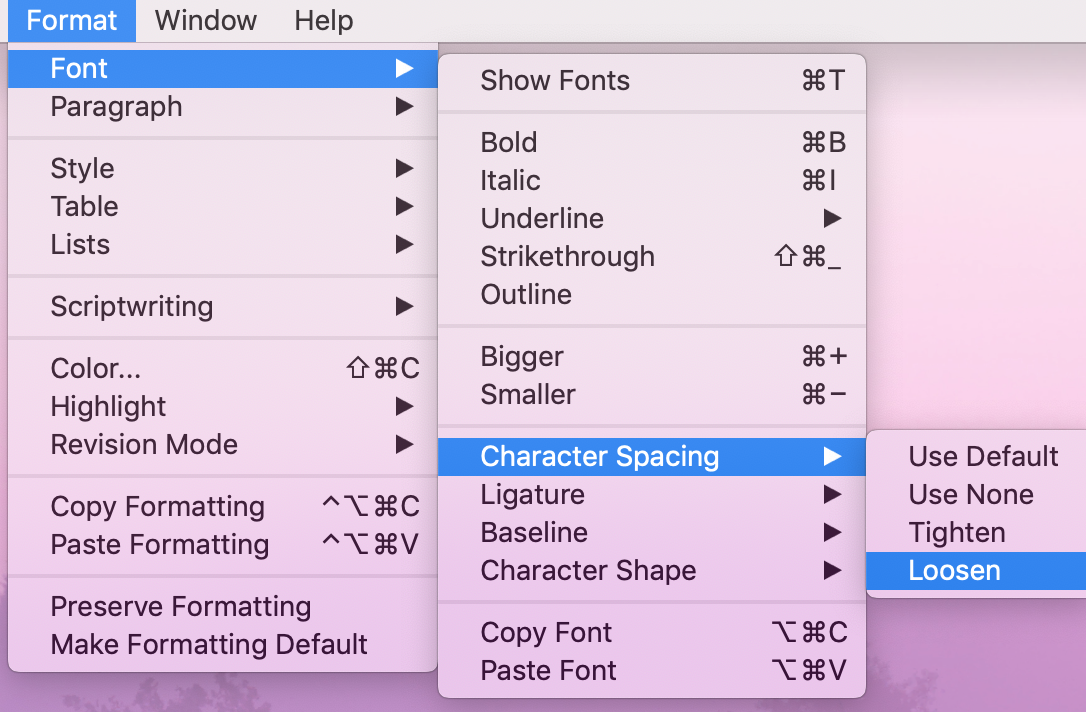
The only time I’d be inclined to use this feature would be if I wanted a heading to fill the width of a page and I thought it might look cool to do so!
Paragraph formatting for horizontal spacing
This is the route you are most likely to need to take. Select Format / Paragraph to open this window. Here, you can control the horizontal spacing. (You can also control this by manipulating the ruler.)
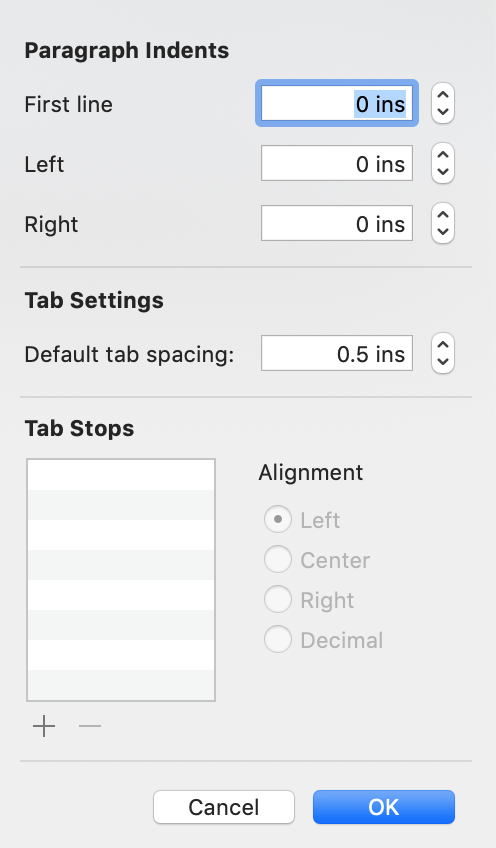
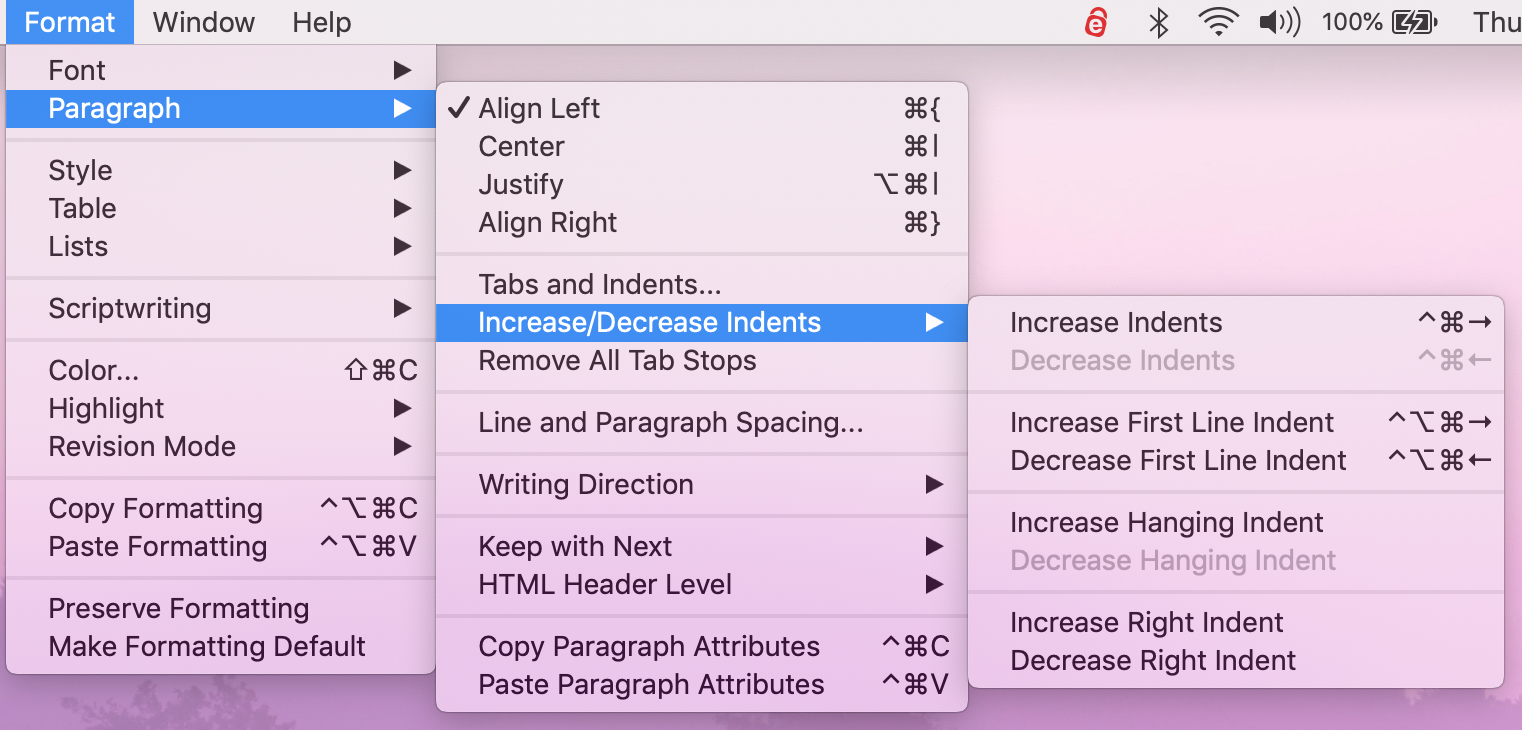
Having set this up (here or using the ruler), Scrivener lets you control the tabs and indents, increase/decrease the indents, and remove all tab stops, via the menu. For example: Paragraph / Increase/Decrease Indents offers lots of options.
Vertical spacing
Vertical spacing is controlled through formatting. Do not use extra returns to create space between paragraphs or before/after headings – instead specify this as follows.
Select the text you want to format, and Format / Paragraph / Line and Paragraph Spacing. In the window that opens, choose your vertical spacing and click OK.
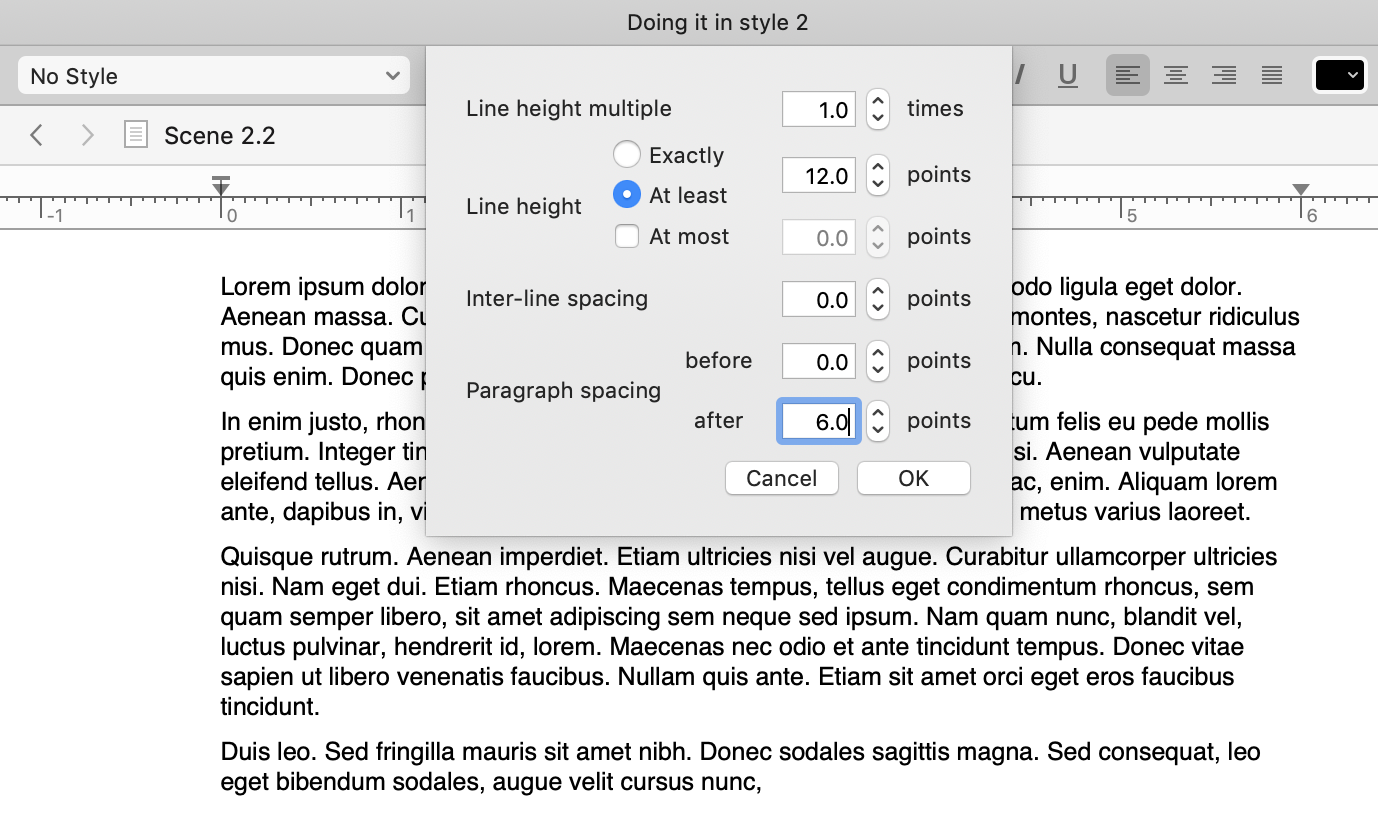
Notice that if you use a ‘blocked‘ style (ie no first line indentation), you need maybe a 6pt space after each paragraph (matching the line height). If you prefer first line indentation for each paragraph, there need be no extra gap between paragraphs.
Changing the colour of your white space
Scrivener offers the option to change almost anything you want to change – to customise your workspace so it’s just how you like it best.
And, you can change the colour of the ‘paper‘ so your ‘white‘ space can be whatever colour you like.
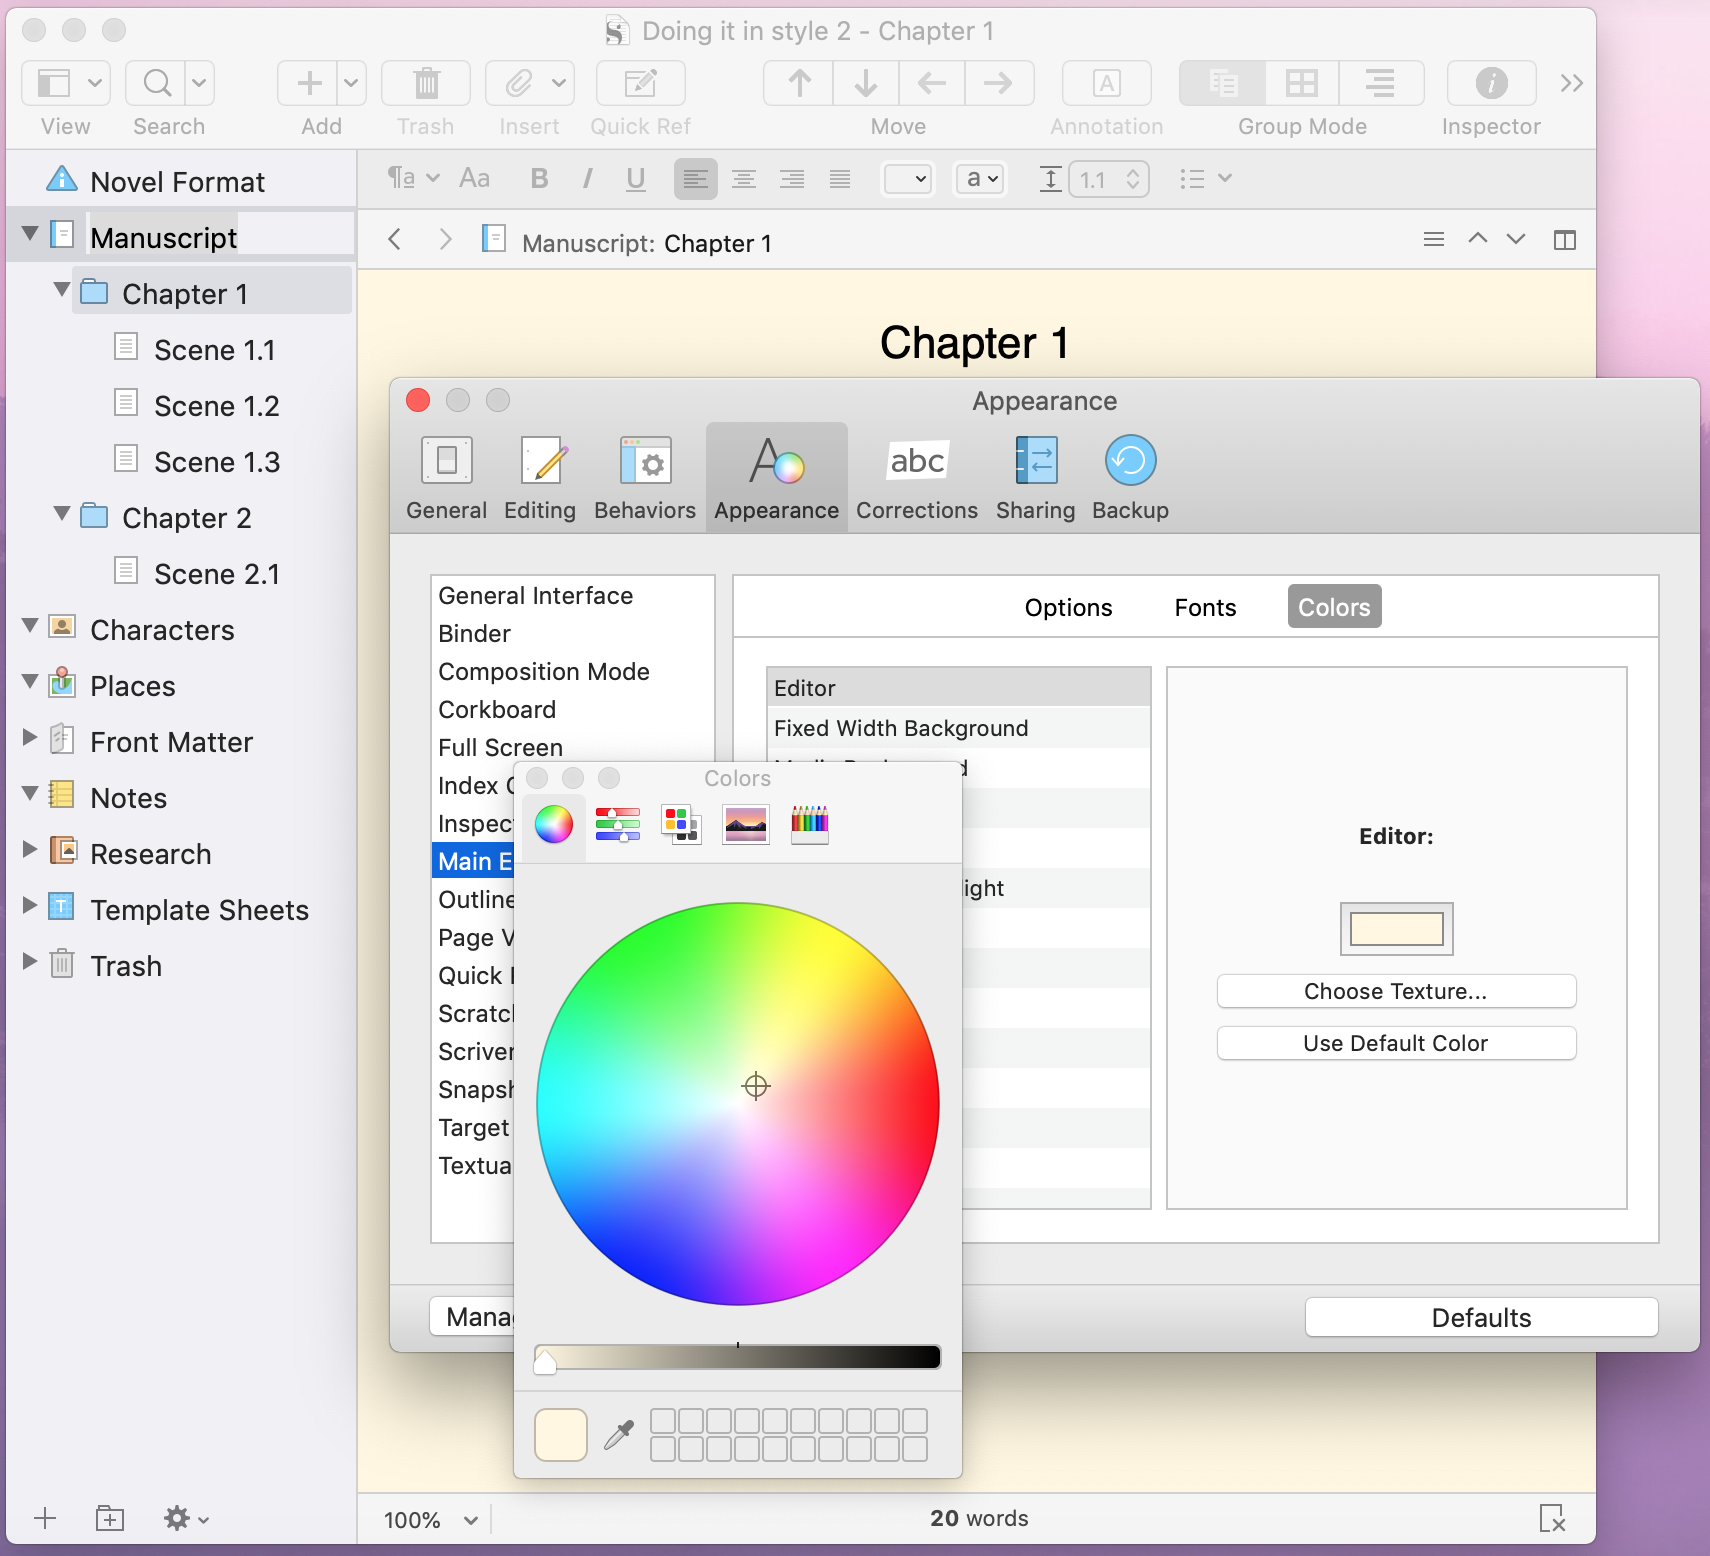
Select Scrivener / Preferences / Appearance. In the Editor tab, click on the Colors tab, and then on the rectangle (white will have been showing white). A colour pane opens and you can choose whatever colour you like for your ‘paper‘. I’ve selected a light cream.
Questions? Need a helping hand? Want a demo?
To watch me go through the process of formatting onscreen or to ask any questions, book a Simply Scrivener Special.
To help me to prepare, you could also complete this short questionnaire.
The ScrivenerVirgin blog is a journey of discovery:
a step-by-step exploration of how Scrivener can change how a writer writes.
To subscribe to this blog, click here.
Also … check out the Scrivener Tips
on my ScrivenerVirgin Facebook page.
No Comments