
Formatting: Creative compiling
 Compiling is the process of exporting …
… your manuscript to a format that suits your purposes.
Usually, this will be your entire draft, but you can be more creative in your choice of what to include …
What’s included when you’re compiling?
You specify which sections of your manuscript are to be included, by ticking the box in the Include column in the Contents tab of the Compile pane.
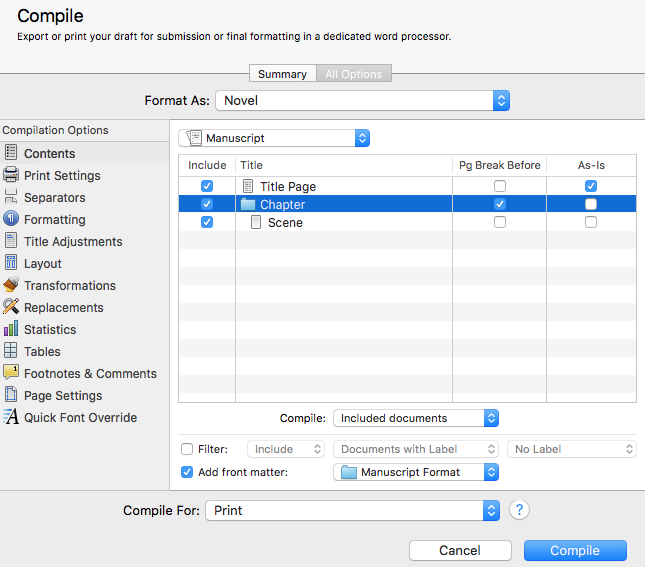
If the title page contains text (such as a copyright message) that you want to format from the screen rather than through the Formatting tab, tick the As-is box.
I have ticked the Pg Break Before for the chapter; I wouldn’t want a page break before each scene, so it’s left unchecked for a scene.
If you only want to export part of your manuscript, untick the Include box for parts of your manuscript you don’t want to be included. This is useful, maybe, when you want to send sample material to an agent!
Being creative when compiling
During the writing and editing stages, you can be quite creative when compiling.
On the Formatting tab, for each section type (the various levels within your manuscript). You can choose whether or not to include aspects of your manuscript: Title, Meta-…, Synopsis, Notes and/or Text.
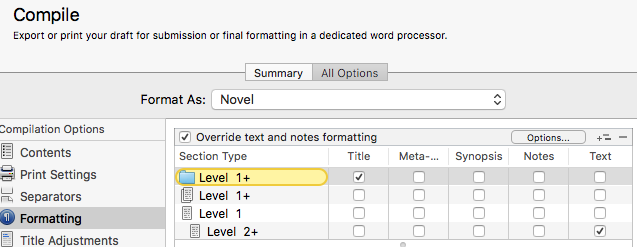
Usually, you’ll tick the boxes for the title of folders, and the text of documents, to export your manuscript, but there are other options too.
Exporting an outline
Unticking the boxes in the Text column will result in an export which contains just the titles of your folders: a simple outline, listing your chapter titles.
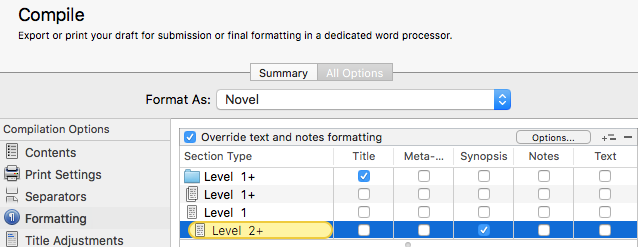
Ticking the boxes within the Synopsis column would create an outline – your chapter titles and beneath each the synopsis for each scene.
Exporting a to-do list
If you include notes on what needs working on, eg what additional research is needed for particular scenes. Ticking the Title and Notes columns will result in a useful reminder list.
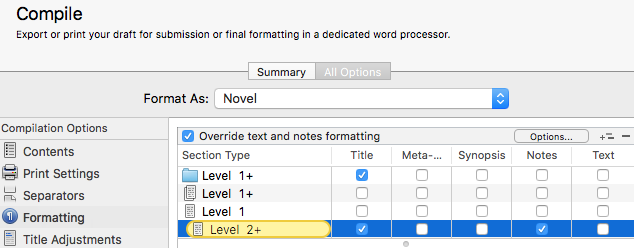
Notice that I have ticked the title for the Level 2+ so that I have the scene title as well as the notes for that scene in the exported document.
I’ve shown just two examples but there are lots of options for ringing the changes as to what is exported. Be creative when you compile!
The ScrivenerVirgin blog is a journey of discovery:
a step-by-step exploration of how Scrivener can change how a writer writes.
To subscribe to this blog, click here.
Also … check out the Scrivener Tips
on my ScrivenerVirgin Facebook page.
No Comments