
Inspector skills: Bookmarks

Inspector skills to the fore
In this ‘crash course’ of Scrivener features, we have already considered Binder skills, and Editing pane options. Now it’s the turn of the Inspector.
The next four blog posts focus on these four topics.
- Bookmarks
- Metadata
- Snapshots
- Comments and footnotes
Today, it’s bookmarks.
What is a bookmark?
Within a browser environment, the term bookmark is almost interchangeable with ‘favourite’ – you bookmark a webpage because you want to return to it. It’s often listed under ‘My Favorites’.
In Scrivener 3, bookmarks provide the same feature, within your Scrivener project; they provide links to your ‘favourite’ documents.
How do you ‘bookmark a document’?
There are two types:
- Project Bookmarks
- Document Bookmarks
They are set up in different ways.
Project Bookmarks
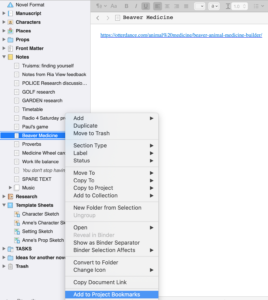
For these, selecting a document in the binder, and right-clicking reveals the option to ‘Add to Project Bookmarks’.
Once you’ve bookmarked a document, you can similarly remove it from the Project Bookmarks.
These Project Bookmarks are available throughout your project as is explained later in this blog post.
Document Bookmarks
These apply to a single document and appear, as well as the Project Bookmarks, in the Inspector.
Select the second icon in the Inspector. You have two choices:
![]()
- Document Bookmarks
- Project Bookmarks
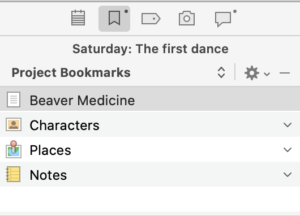
Cmd6 toggles between the two. This is how the Project Bookmarks appear.
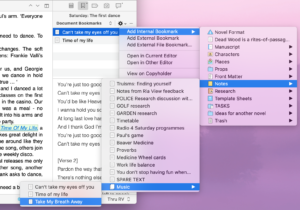
To set up a Document Bookmark, make sure you’ve selected Document Bookmarks and then click on the cogwheel. This opens a menu of options.
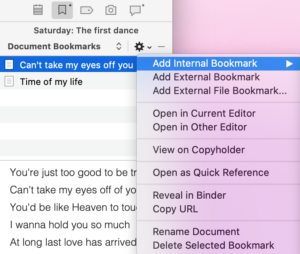
Follow the arrows until you reach the document you want to bookmark.
Accessing your bookmarks
There are a number of ways of accessing the bookmarks you’ve set up.
- Via the Inspector
- Via the Navigate Menu
- Via the Project bookmarks menu
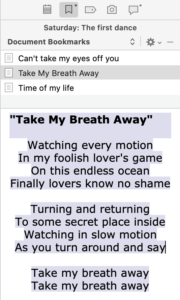
Bookmarks via the Inspector
Select the bookmark in the Inspector, and the contents of that document are displayed within the Inspector area.
Bookmarks via the Navigate menu
If you want to go to a document, without scrolling down the Binder, select Navigate / Go To.
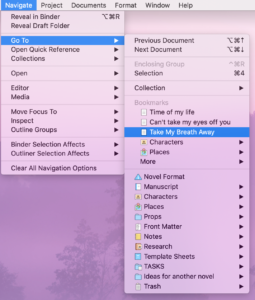
At the top, there are options (Previous Document, etc) and then a section for Bookmarks. At the bottom, all the folders in the Binder are listed. A black triangle indicates ‘there’s more!) and clicking on that reveals the next level down, and so on.
So, if there are particular documents that you want to access often, it makes sense to bookmark them.
NB The bookmarked documents are also listed if you click on Open Quick Reference. Choosing a document through this route will open a Quick Reference window with the chosen document within it.
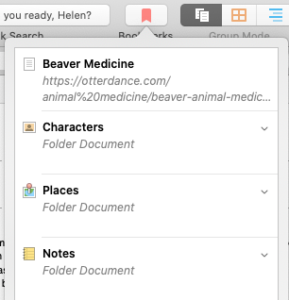
Project Bookmarks via the Project menu
Select Project / Show Project Bookmarks.
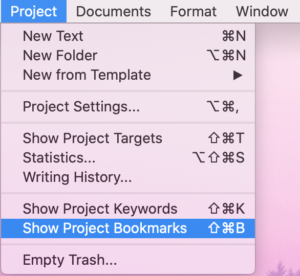

This opens the Project Bookmark window.
At the top of this list, there is the Beaver Medicine which I bookmarked as a Project Bookmark.
Note that the Document Bookmarks do not appear in this pane, only in the inspector for the document where they were set.
It makes sense to limit the number of Project Bookmarks to only those which apply to more than a single document. I keep most of my project-wide reference material in Notes; they are close enough!
The Bookmark icon in the Toolbar
You have the option to customise the Toolbar to include the Project Bookmark icon.

(This blogpost explains how to customise the toolbar.)
Clicking on this icon opens the Project Bookmark pane and saves you going through the menu route.
Any questions about Scrivener tools?
To watch me using Scrivener or to ask any questions about Scrivener, book a Simply Scrivener Special.
To help me to prepare for the webinar, please also complete this short questionnaire.
The ScrivenerVirgin blog is a journey of discovery:
a step-by-step exploration of how Scrivener can change how a writer writes.
To subscribe to this blog, click here.
You can also find links to blogs of specific topics in the Scrivener index.
Also … check out the Scrivener Tips.
No Comments