

The Scrivener Mindset: Binder text output options
New page? Chapter title? Number? You decide!
If you have followed the advice I gave in the previous post, your Binder text will comprise titles for your folders and documents.
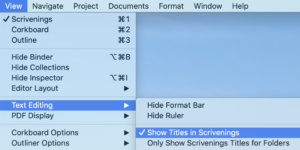
And the text of your manuscript (minus any headings) will be visible in the Editing pane. If you feel happier seeing those titles in the Editing pane, select View / Text Editing / Show Titles in Scrivenings.
There is also an options to only show titles for folders …
Chapter titles and numbering
Structuring in Scrivener is all about creating folders and documents, and one of the first decisions you’ll be making relates to chapter titles and numbering.
- Shall you number your chapters?
- Or have titles?
- Or both chapter numbers and titles?
- Or neither?
It’s totally up to you, and, as a bonus, Scrivener offers to automate the numbering for you.
How to title your chapters
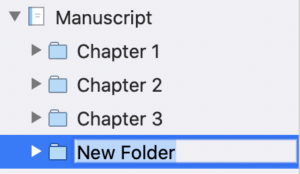
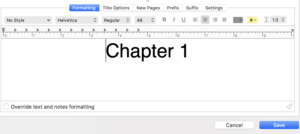
When you create a new folder for a new chapter, Scrivener labels it as ‘New Folder’.
While this dummy text is still highlighted in blue, you can type your chosen title. Here, I have called the chapters Chapter 1, Chapter 2, Chapter 3 and this next one is destined to be Chapter 4.
While I am writing my outline, I stick this simple system: 1, 2, 3, 4, …
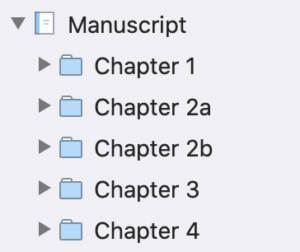
If later, I decide a chapter is too large and I need to break it into two smaller chapters, I’ll retitle only those two. In the example, I’ve broken chapter 2 into two and called them 2a and 2b.
Won’t that Binder text look daft when the book is compiled? No …
No, because Scrivener gives you the option not to use your Binder text – your folder titles – and to apply automatic numbering instead.
So, I don’t need to spend precious time renaming all my folders whenever I make a change to the structure of my novel. I’m content with 1, 2a, 2b, 3, 4, … for the time being.
How to control what appears as the title when compiling
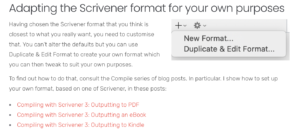
When you think it’s time to compile your manuscript, the first time you compile, you need to go through a few steps.
- Choose one of the defaults and opt to duplicate and edit that format; I explain how to do this in this post.
- Assign section layouts to your section types.
- Edit those section layout formats.
Let’s consider steps 2 and 3 in some detail.
Assigning section layouts to your section types
Scrivener assigns default values for the section types of folders and documents. In the Novel template, these are Chapter Heading and Scene. When you select File / Compile, the next task is to assign section layouts and you are presented with lots of choice.
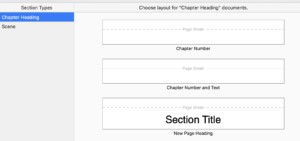
The available section layouts fall into two groups:
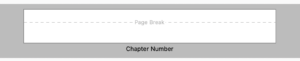
- Those which start on a new page
The sample image for these show as —— Page Break ——- - Those which don’t (and which are not shown in the screen grab above)
This is why your first decision is: do I want this section type to (always) start on a new page? Yes or no?
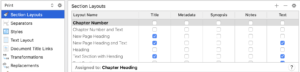
Notice the names given to the section layouts which all start on a new page: Chapter Number; Chapter Number and Text; and New Page Heading. You will see these names again in a moment.
Notice also that the ‘New Page Heading’ option automatically includes the section title – so whatever you typed into the folder title would appear in the output (unless you change your settings).
To select/assign a section layout, click on it so that the background changes. All of these section layouts can be customised so if you are not sure which will suit you best, pick one and run with it.
Click on OK to save it. It will then appear as a selected/assigned layout.
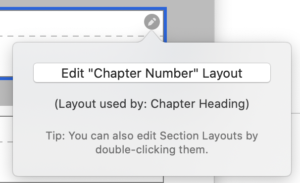
To edit the section layout, click on the pencil icon …

… and click on the ‘Edit … Layout’ window.
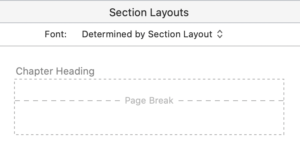
Editing the format of the section layout
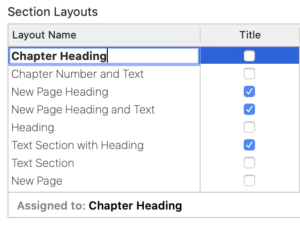
When you proceed to editing the format, the names shown in the ‘assign section types’ pane are shown in the formatting pane. And whichever one you chose is identified as ‘Assigned to’.
You can, if you wish, change the Layout names – maybe replace them with the section type.
Now, the row needs completion.

If you want to output the Binder text – the title you typed into the Binder – tick the Title box. (If you don’t, don’t tick the box!)
Notice that the Title column box is, by default, ticked for the layout New Page Heading. If you had chosen that in the first place, that would have saved you a tick. But it doesn’t matter which route you take …
Automatic numbering in chapter titles
The numbering is achieved (if you want it) using placeholders ie tags.
Below the Section Layouts table with all its tick boxes, there’s a pane with several tabs.

Click on Title Options.
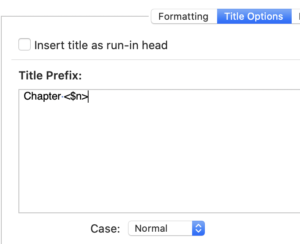
Whatever you type as the Title Prefix, Scrivener will replicate any text and – during compile – replace tags with actual values. If you click on the Formatting tab, you will see how this will be interpreted by Scrivener when you compile.
If you go back to the Title Options pane and change the tag, you’ll see different versions of the chapter numbering.
Selecting Help / Placeholder reveals the full extent of tags and, if you scroll down quite a long way, you’ll find the ones used to control automatic numbering.
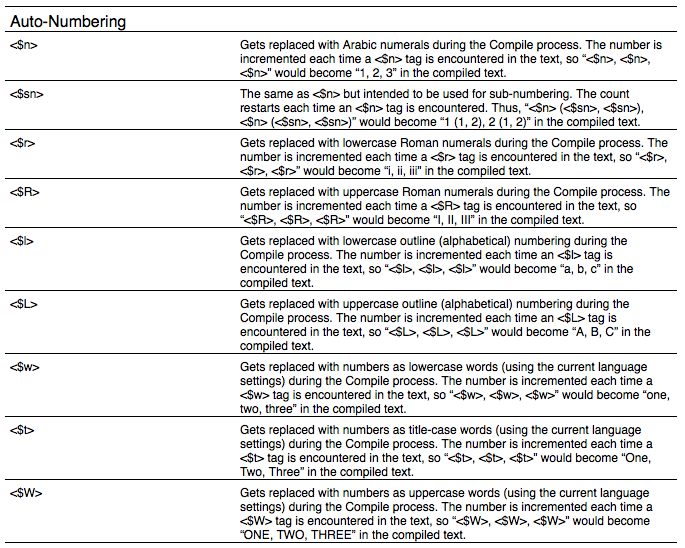
Lots to choose between!
Using your own chapter titles, or not?
As you’ve seen above, if I choose <$n>, a digit version of the chapter numbering is displayed.
Since my own numbering might not be perfect (eg 1, 2a, 2b, 3, 4, …), I have the choice of using the automatic numbering and let Scrivener count the chapters for me. Phew!
I then have to decide about my titles. Do I dream up a title for each chapter, or not?
If I decide I do want my own titles (as well as the numbering, or instead of), I simply overwrite the folder titles in my Binder, and tick that Title box in the Section Layouts pane.
Assigning section layouts to the remaining section types
Having formatted your chapter titles, the next step is to repeat the process for your other section types: which, in a novel, is just your scenes.
You won’t want them starting on a new page, so scroll down to see the options that don’t have ‘New Page’ included. As before, it doesn’t matter too much which one you choose as you can adjust the settings (tick/untick boxes) at the next stage.
For my novels, I tend to output titles of scenes when I want a reminder of what that scene was supposed to do, but these titles are omitted whenever I create an output destined for a reviewer or for final publication. The titles are especially useful in the early stages when all I have is a synopsis. Check this blog post for more details.
 For a non-fiction, I would want titles throughout, as they serve as headings for the text that follows.
One thing to note is the As-Is section layout …
As-Is
It is possible to control the formatting in the Editing pane and have that carry through to the compile. It’s a useful option for the occasional ‘special’ page but I wouldn’t recommend it for the bulk of your manuscript.
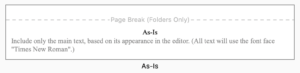
Notice that this layout forces a page break if the section type is assigned to a folder.
- If you do want a page break before this material, make sure the section type is assigned to a folder. You can change a document into a folder very easily: select it in the Binder, right click and choose Convert to Folder.
- If you don’t want this material to start on a new page, make sure the section type is assigned to a document. You can change a folder into a document: select it in the Binder, right click and choose Convert to File. (Yes, Scrivener calls the documents files … !)
You might also be wondering about headers and footers! Check this blog post.
Questions? Need a helping hand? Want a demo?
To discuss your options for outputting whatever you’ve typed in the Binder, or to ask any questions about Scrivener features, book a Simply Scrivener Special.
To help me to prepare, you could also complete this short questionnaire.
The ScrivenerVirgin blog is a journey of discovery:
a step-by-step exploration of how Scrivener can change how a writer writes.
To subscribe to this blog, click here.
Also … check out the Scrivener Tips
on my ScrivenerVirgin Facebook page.
No Comments