

The Scrivener Mindset: Nailing the Binder structure
 The backbone of your project
The Binder serves so many purposes, it’s important to nail it.
- Include what you need.
- Leave out what you don’t.
- Create a structure that makes sense for whatever you are publishing.
The aim is always for clarity.
Headings versus text
Text can be separated into two types: headings; and the text which appears under those headings.
 In a novel, it’s chapter titles that form the headings, and the scenes within the chapters are the text. Any ‘headings’ for the scenes typed in as document titles are for the writer’s benefit – they will not be published.
- In a non-fiction book, the structure can be a little more complicated and you might have sub headings and sub sub headings. But there’s always some text for each of those levels.
Scrivener treats folders and documents the same so they simply serve a purpose for you, the writer. Here are my recommendations.
- Use documents for your text. (In a work of fiction, have one scene per document.)
- Group documents in folders but leave those folders free of text.
- Use the titles of documents and folders for all your headings. Never put headings within the text.
Structuring in Scrivener
Structuring in Scrivener is all about creating folders and documents. Using your Scrivener mindset, think of a Scrivener project file as a filing cabinet.
- Within that filing cabinet, you have folders.
- Within the folders, there are documents.
Scrivener offers the flexibility to move folders and documents within the Binder, so it’s not crucial how you set things up to start with. The structure can evolve as your project progresses. However, it makes sense to start with one of the many default templates provided by L&L – the one which suits you most closely. I explain all in this blog post.
After that, it’s simple! But, if you need help with developing your Binder skills, check out this post too.
What goes where in the Binder?
 One aspect of adopting the Scrivener mindset involves knowing what goes where in the Binder.
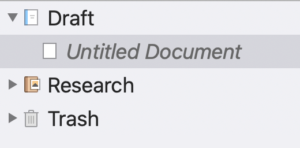
The Binder in the Blank template has three components:
- Draft folder
- Research folder
- Trash
All other templates are extended versions of the Blank template. They still have those three components (called root folders) but additional folders and templates are provided to help the writer.
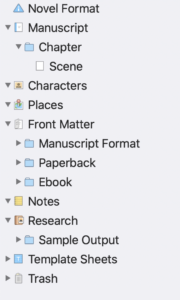
The Novel template, for example, has a folder for Characters, another for Place (for your settings), and another for Notes.
In anticipation of publication, the FrontMatter is also provided: three samples to allow for exporting the manuscript (eg to an agent), a paperback and an ebook.
The Research area also has some extras: sample output and the template sheets.
Notice that the Draft folder is now called Manuscript. And, the Untitled document is replace by a Chapter folder and, within that, a Scene document.
If you look at all the formats and compare them, each tries to provide what the writer might need. This blog post explains the range of templates on offer.
Levels of indentation in the Binder
If you consider the Binder entries and identify which entries are one level to the right of the Manuscript, which are two levels to the right and so on, you can see the ‘structure’ of your manuscript.
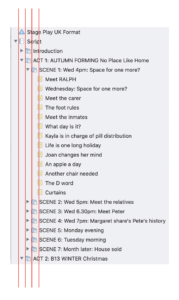
In the diagram, I’ve superimposed lines to highlight this indentation.
- One at the level of the Script folder. This is the Scrivener project for my play, Waving not Drowning, and I’ve used the ‘Stage Play for the UK’ default template.
- One at the level of my Acts (as understood in theatre terminology).
- One at the level of my Scenes (as understood in theatre terminology)..
- One at the level of the documents in which represent what I consider to be a ‘scene’ – same cast on stage, same place and same time.
Why is this important?
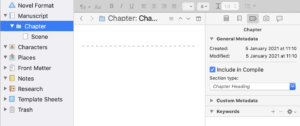
Scrivener provides default section types when folders and documents are created, according to the level.
In the Novel format, for Chapters (folders), the default section type is ‘Chapter heading’ emphasising that this is where you type the chapter heading.
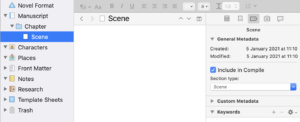
For Scenes (documents), the default section type is ‘scene’ emphasising that you should use the scene as your smallest unit of text.
There are times when you need more than one section type for items that are on the same level. For example, if you have an Introduction like I have, and/or a Prologue and/or an Epilogue for your novel, these will need to be treated differently, even though they appear at the same level, especially if you are expecting Scrivener to automatically number your Acts or Chapters.
I explain more about section types in a subsequent post, but, for now, be aware that the structure of your Binder needs to be ‘correct’ if you are ever to produce the end result you desire.
Starting to write
When you start to write, again, you need to adopt the Scrivener mindset. Most of the Binder, you can ignore. The important parts are the Chapter folder and the Scene document within it.
I write my novels one scene at a time and only when all those scenes are planned / written do I wonder how to group them into chapters.
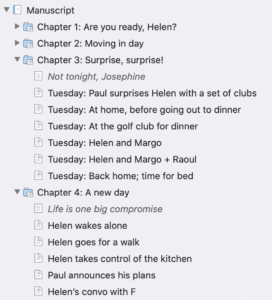
This shows a work-in-progress of my DeadWood novel.
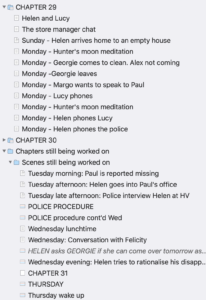
According to this screen grab, taken a while ago, Chapters 1-29 were complete. From then on, I still had to decide which scenes would form the chapters. Some of them, I still had to write!
Notice that I had a document called Chapter 31. This was my first guess as to where the break between Chapters 30 and 31 might be.
What do the Binder icons tell you?
Binder icons serve to give a quick indication of the content:
- Folder or text document?
- Whether or not there’s a synopsis
- Whether more folders/documents are contained within
- Whether or not you’ve taken a snapshot
I explain all here.
As you continue to work on your project, the icons change, and the Binder also evolves. Eventually, when you have finished writing (or designing) the manuscript, the Binder reflects the structure – the backbone – of your project.
The effect of the Binder on the Editing pane
What you see in the Editing pane depends on two things.
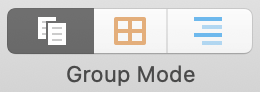
 What you select in the Binder: a document of a folder, or a selection of documents/folders
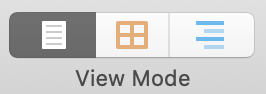
- The View/Group mode selected: Scrivenings or Corkboard or Outliner
I explain this in detail in a series of posts starting here. But the important thing to note now is that how you set up the Binder determines what you can see / access in the Editing pane.
Nail the Binder and writing/editing the text becomes easier.
The effect of the Binder on your TOC
You have two options when it comes to creating a TOC (table of contents).
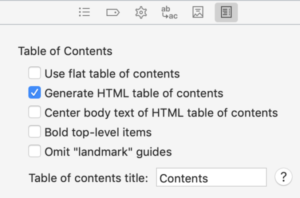
- Tick the HTML box in compile and let Scrivener set up a TOC for you. This is based entirely on the entries in the Binder. All the entries …
- Do it yourself … by showing/hiding items in the Binder until what you see provides the level of detail you want in your TOC. I explain how here.
First and foremost, the Binder structure needs to work for your project. To work also as a TOC is an additional challenge, but at least you have the option to create your own TOC?
Questions? Need a helping hand? Want a demo?
To discuss nailing the Binder, or to ask any questions about Scrivener features, book a Simply Scrivener Special.
To help me prepare, you could also complete this short questionnaire.
The ScrivenerVirgin blog is a journey of discovery:
a step-by-step exploration of how Scrivener can change how a writer writes.
To subscribe to this blog, click here.
Also … check out the Scrivener Tips
on my ScrivenerVirgin Facebook page.
Pingback:Scrivener Advent Calendar: B is for ... - ScrivenerVirgin
2 December 2024 at 11:01