

Binder skills: Searching and collections
 Seek and ye shall find!
Scrivener provides three types of search:
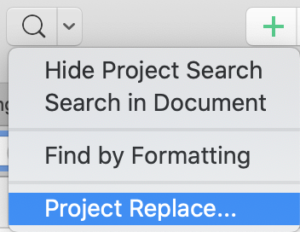
- The Project search allows you to find instances of particular words or phrases within the whole project, subject to choices you make about where you want the search to happen, and how fussy you are about what is to be found. There is also a Project Replace tool – which searches and replaces.
- The Document search is confined to the selected document(s) and provides a Search and Replace option.
- Format searches find particular types of text – text that has been formatted in a particular way eg annotations.
Which of these you should use, and what happens next, depends on what you are trying to achieve.
 Project Search
A Project Search locates a subset of the Binder: those documents in which your search key (the word or phrase you are seeking) exists.
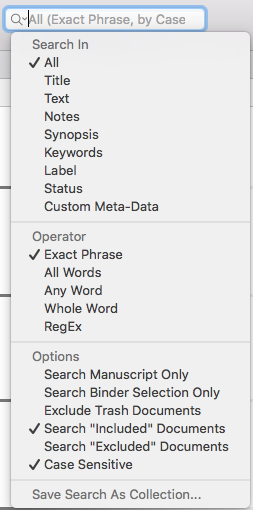
- First, click on ∨ beside the magnifying glass, to reveal all your options. Select what suits you.
- Then enter your search word/phrase and click on Enter.
You then have the option to create a collection:
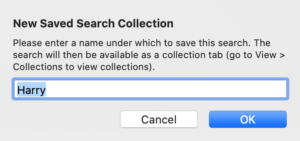
- Click on the Save Search as Collection (last entry in the option list)
- Name the collection (Scrivener offers to search key) and clock OK.
Having done a Project Search, it makes sense to save this subset of documents as a collection. You can then set aside time, later, to work on this collection, without reference to the rest of the scenes in your manuscript.
You can create many collections for a single project. Scrivener assigns a different colour to each, so you can easily identify which particular subset of documents you are working on: the whole manuscript (ie the Binder) or one of the subsets (ie a collection).
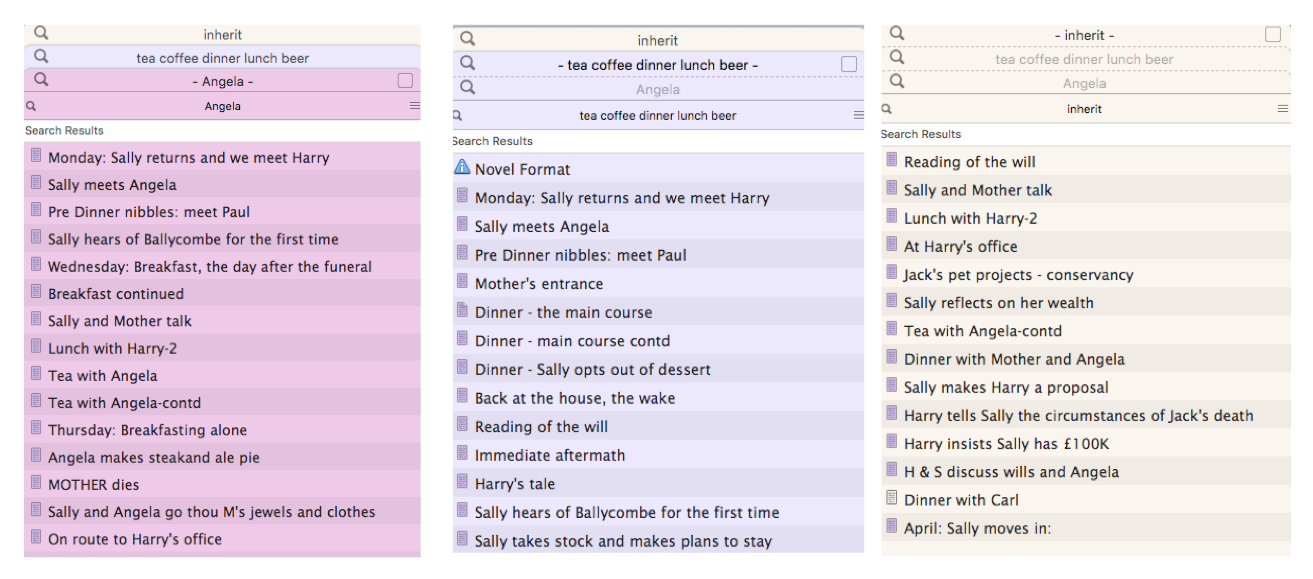
The other advantage of collections is that they are dynamic. Every time you view a collection, the search is redone, so if you (by mistake) introduce wording that you had already decided to alter (eg Harry to Harold in the example below), the collection will reveal all instances that still need your attention.
Project Search options
While the default Project Search options are All (Exact Phrase) – and Search “Included” Documents, Scrivener allows great flexibility in two different ways:
- Where it searches: ‘All’ is the default but you can be more specific and focus on one (only one!) of the others listed: Title, Text, Notes, Synopsis, Keywords, Label, Status, Custom Meta-Data. So, if you want to search within more than one of these options, select All.
- What operator it uses: Setting the operator allows you to narrow or widen a search.
It then also offers some additional Options, such as Case Sensitive. This option can be helpful if you are searching for documents involving a character called Sue. Without the Case Sensitive option ticked, the character string ‘sue’ in other words such as ‘issue’ would be counted as a match.
Why might you use a Project Search?
The Project Search is probably most useful once you’ve written your first draft. Then, one of the ‘EDITING the RedPen Way: The Devil in the Detail’ editing tasks is to make sure your characters speak with consistency.
For example, it’s normal in a speech to contract – and here, I’m using double quotes for the dialogue to distinguish them from the apostrophe used for the contraction.
- ”I’m” is usually said as “I’m”.
- “I will” becomes “I’ll”.
- “I do not …” becomes “I don’t …”
Outside of speech, contraction would be unusual, and the contrast might help the reader to hear the narrator’s voice more easily. (However, in my example, the narrator (Sally) has the POV; so, everything she says or thinks could be contracted.)
How does the Project Search work?
Within the Binder, all documents which include the search term are listed. Click on one of these documents and, within the Editing pane, Scrivener highlights each instance of a match with your search key.

If you searched for ‘I am’, Scrivener will highlight every instance in your manuscript that you’d need to consider changing. You can fix (or not) the first instance, and then scroll down to find the next highlighted term.

There are many possible contractions, and a separate Project Search would be needed for each one.
To search an entire manuscript is a tedious and time-consuming task, one that maybe needs to be saved for a rainy day, but also one which would be difficult to complete in a single editing session. Starting again, Scrivener would highlight all the instances that still exist, some of which you might have decided not to fix.
You might also create collections – one for each phrase – and process them when you have time.
Project Replace
Project Replace is useful when you want to do a global change, like turning Harry into Harold. The judgement applies to all instances – so a global search and replace should be applicable.
It’s unlikely the character string ‘harry’ will appear in the manuscript other that as Harry’s name, so this Replace is not too dangerous.
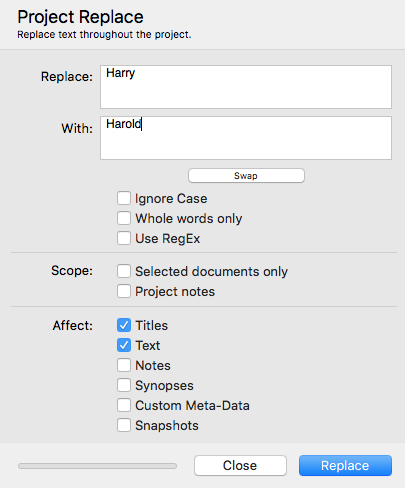
Contemplating changing somebody called Sue into Sandra could be problematic though. The character string ‘sue’ appears in so many other words: issue, tissue, suet, … This is where the Case Sensitive option can come to your rescue. However, it’s best to try to choose the right name for a character from the get go!
Document Search
Document Searches are done through Edit / Find which opens up a pane into which you enter the search key, and make some choices.
Scrivener will then step through each occurrence within the document(s) you have selected, highlighting individual matches on screen.
For example, ProWritingAid tells me I use ‘feel’ too often in my text, so I might search for this in each chapter and consider whether I can rephrase any instances to good effect.

Having found a match, you can act upon it (edit it) or click on Next to skip to the next occurrence of the search key.
You also have the option to Replace the text of the search key.
Format Search
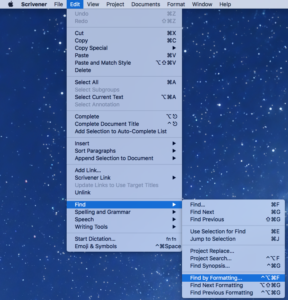
Format Searches act in much the same way as Document Searches in that you are stepped through each occurrence. To access the Format search option, select Edit / Find / Find by Formatting.
There are then many options:
- Highlighted text
- Comments and footnotes
- Inline annotations
- Inline footnotes
- Revision colour
- Coloured text
- Links
- Text with preserved style
- Character format
So, you now have an overview of the three main types of search available within Scrivener.
I’ve also published a series of blog posts starting here which goes into greater depth, which might be useful for those new to Scrivener.
Questions? Need a helping hand? Want a demo?
To watch me go through the process of writing a novel or to ask any questions, book a Simply Scrivener Special.
To help me to prepare, you could also complete this short questionnaire.
The ScrivenerVirgin blog is a journey of discovery:
a step-by-step exploration of how Scrivener can change how a writer writes.
To subscribe to this blog, click here.
Also … check out the Scrivener Tips
on my ScrivenerVirgin Facebook page.
Pingback:Scrivener Advent Calendar: S is for ... - ScrivenerVirgin
19 December 2024 at 11:01