

Formatting: The Structure and Content Table
 The Structure and Content Table …
… is where you control what elements, at the various levels of your manuscript, will appear on the page.
First – and most important –
note the tick against the ‘Override text and notes formatting’. This is the default setting and underlines the fact that how you format your text onscreen, while you are writing, need bear no resemblance to how it appears when compiled onto the page. Let’s assume you leave this ticked!
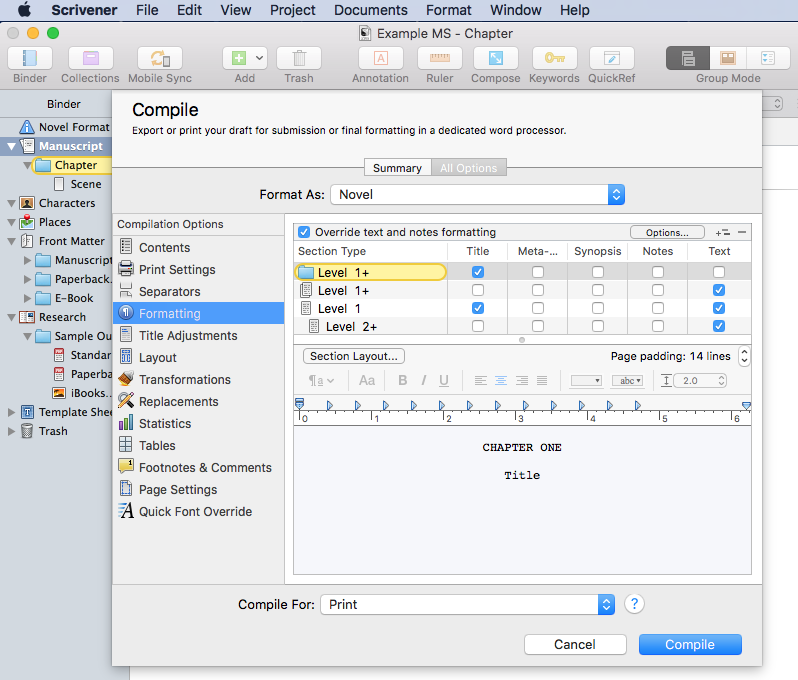
The Section Type column identifies which folders/documents will be affected by the formatting and decision-making on content at this level.
Above, Level 1+ is highlighted in yellow, and in this example, it’s the chapter folder. (Ignore the other Level 1 entries for now!)
Below, Level 2+ is the Scene level.
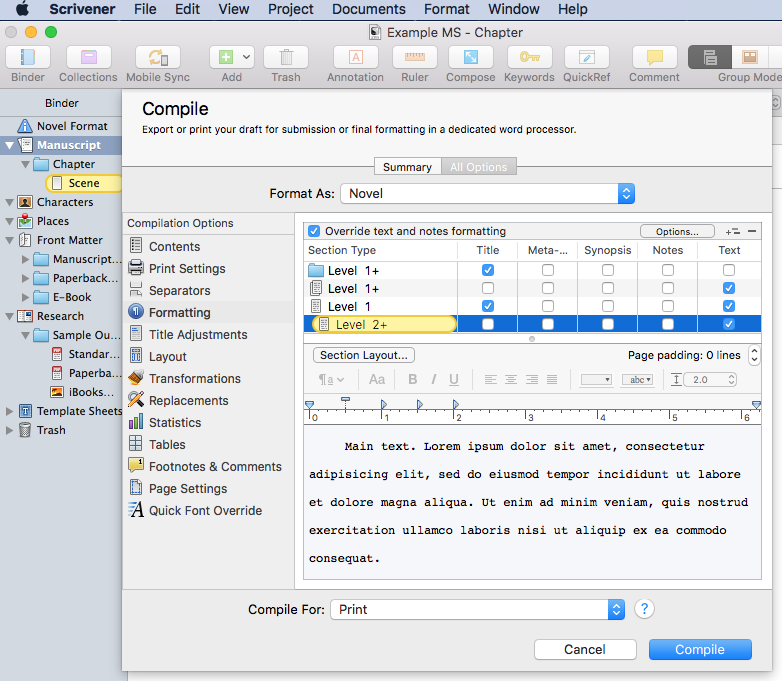
Notice the illustrative text shown below the ruler in both cases.
- For Level 1+, the previous blog post in the Formatting series addressed how to control, for example, chapter numbering.
- At Level 2+, similar controls apply, but it’s more likely you are formatting the text via the formatting bar and deciding indents and tabs, all of which was explained in an earlier posting in the Formatting series.
Then to the right of the section type column, there are five columns of checkboxes:
- Title
- Meta-…
- Synopsis
- Notes
- Text
Ticking a particular box for a given level results in that element being included in the compiled manuscript. It’s as simple as that!
In the next post in the Formatting series, I look at how you might be more creative with the Structure and Content Table.
The ScrivenerVirgin blog is a journey of discovery:
a step-by-step exploration of how Scrivener can change how a writer writes.
To subscribe to this blog, click here.
Also … check out the Scrivener Tips
on my ScrivenerVirgin Facebook page.
No Comments