

DIY Book Formatting with Scrivener: FrontMatter and EndMatter
The previous five blogposts focused on the body of your book.
- DIY Book Formatting with Scrivener: An Introduction
- DIY Book Formatting with Scrivener: Page Settings
- DIY Book Formatting with Scrivener: Body Text 1
- DIY Book Formatting with Scrivener: Body Text 2
- DIY Book Formatting with Scrivener: Headings, Headers and Footers
In this post, we look at what goes before (FrontMatter which Scrivener puts in the Front Matter folder) and after (EndMatter which Scrivener calls Back Matter).
With Scrivener, including both sections is straightforward: you tick a box (or two) when you reach this Compile screen.
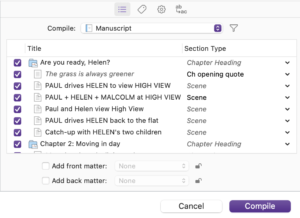
Let’s start with Front Matter folder. When you click on the ‘Add front matter’ box, you then need to specify where Scrivener can find your frontmatter. It should be in your Binder …
FrontMatter in the Binder
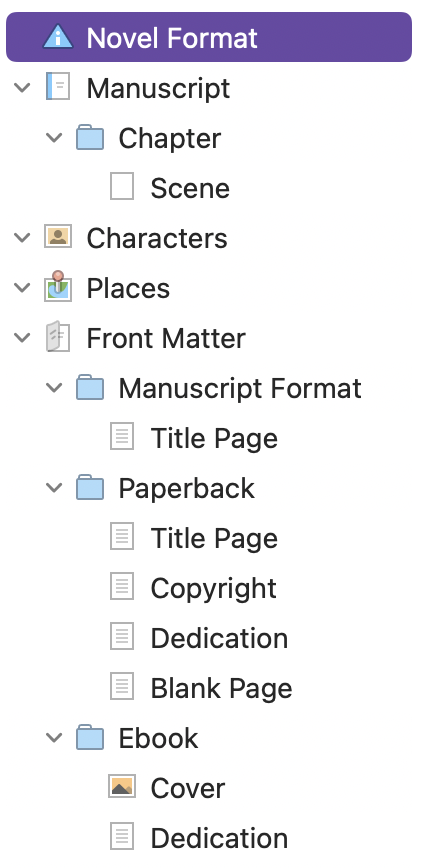
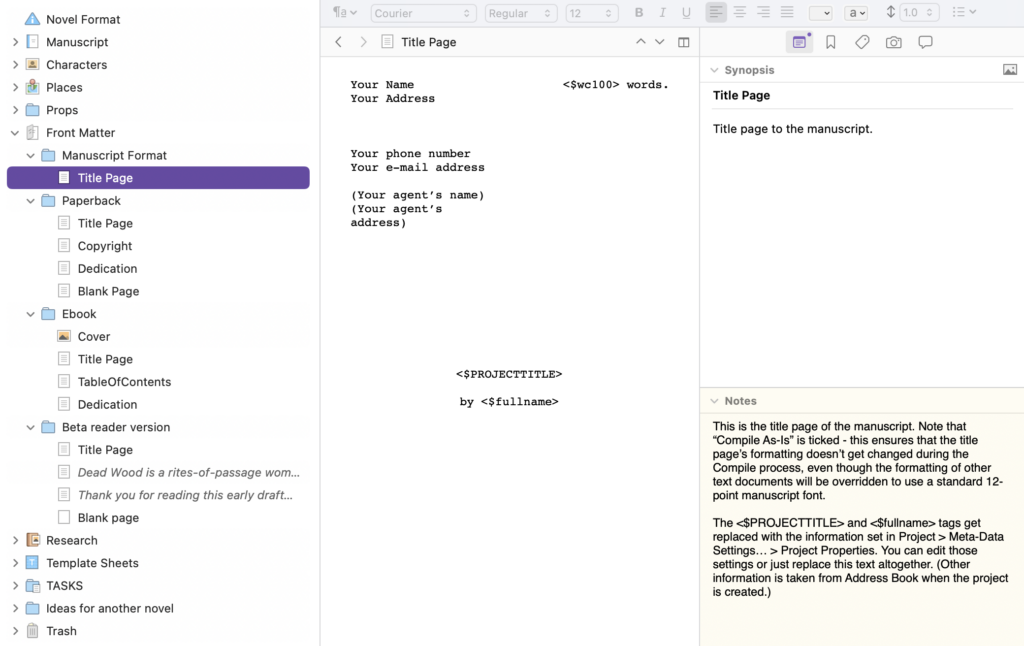
When you set up the project from one of Scrivener’s template’s, most likely, it included a Front Matter section.
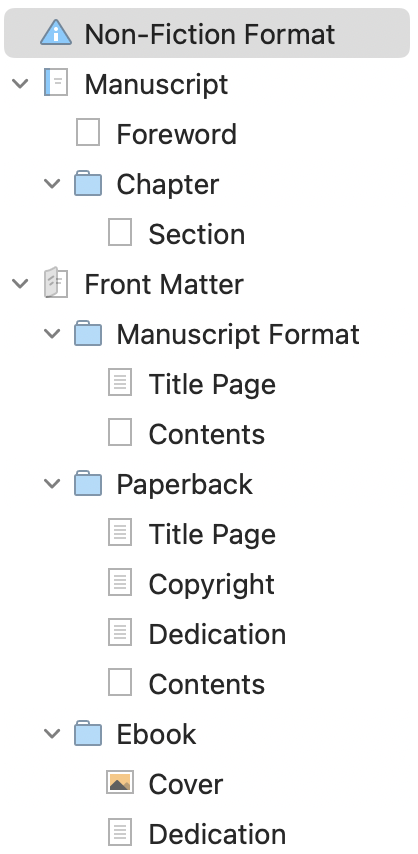
This is how it looks in the Novel Format template. Notice that there are three options:
- A manuscript format
- A paperback format
- An ebook format
In each of these folders are the pages one might ordinarily expect to see in these output forms. Below, I’ll go into more detail as to what appears where and why … but, for now, just be reassured that Scrivener provides something that will work without you having to do too much tweaking.
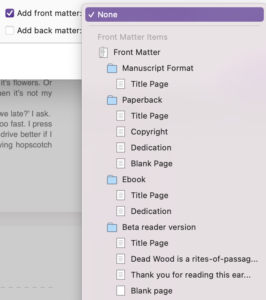
So, when it’s time to compile, the question you’re asking yourself is: which of these three output forms is the one for me this time?
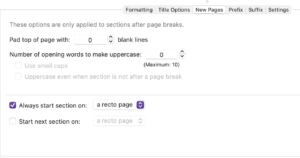
For my novel Dead Wood, I created a fourth folder in my Front Matter folder and called it Beta reader version. This allowed me to write a message to my beta readers as part of the material that was compiled. You might ask why I include a blank page as my fourth page in the Beta reader version – it’s so the manuscript starts on a recto page.
Recto and verso
Two terms you need to know: ‘recto’ and ‘verso’. The pages of a book have two sides. As you lay a book flat, the page on the right is the ‘front’ of that sheet of paper. That’s called the recto. The page of the left is the reverse of that sheet of paper. It’s called the verso.
FrontMatter for other templates
Other templates provide alternative frontmatter content.
In the non-fiction version, the Binder is similar to the Novel Template but:
- There’s a Foreword ahead of the first chapter. This is part of the body of your book, rather than part of the frontmatter.
- Within the chapter, there’s a document called Section, rather than Scene. This is simply because, in non-fiction books, chapters tend to have sections rather than scenes. Makes sense?
In the Front Matter folders, again it’s similar, with just one difference: There are no Contents pages in the Novel template; there is one in the Non-Fiction template.
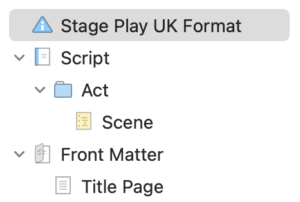
In the Stage Play UK Format, the Front Matter contains a single page: the Title Page.
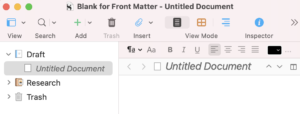
In the Blank template, there is no Front Matter or Back Matter material.
So, when starting a new project, while it’s not the end of the world to choose the ‘wrong’ template, it will save you time to choose one that has the Front Matter and/or Back Matter folders to suit what you think you’ll be needing. If you fail to choose such a template and then realise later, drag such folders from another project, or create them in the Binder for yourself.
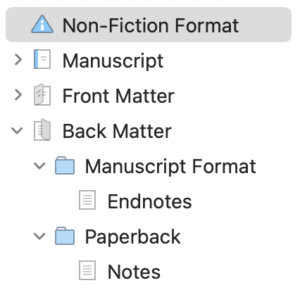
EndMatter
Scrivener provides a Back Matter folder in the non-fiction template, but not in other templates. This is because you probably don’t need endmatter for novels and plays.
This doesn’t mean you can’t have material after the end of your novel.
- In my library’s copy of Elizabeth Strout’s Oh William!, she has an Acknowledgement section in the endmatter.
- In my library’s copy of Clare Mackintosh’s After The End, as well as a page plus of Acknowledgements, there’s an Author’s Note section and then a page which describes Clare’s work to date and lists how the reader can find out more about her.
- In my library’s copy of Beth Underdown’s The Witch Finder’s Sister, there’s an Author’s Note, a Glossary and then Acknowledgements.
The method for including endmatter is the same as with frontmatter. Tick the box and direct Scrivener to the appropriate folder in your Binder.
Are Scrivener’s Front / Back Matter folders essential?
No. If, up to now, you’ve been blissfully unaware of these folders, you can just as easily set up your Binder to include all the material you want in your book.
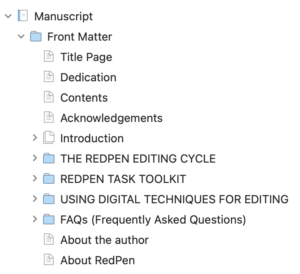
I discovered Scrivener in 2015, starting blogging about it that September and this is the Binder for my first Scrivener project, published in 2016: Editing the RedPen Way: 10 steps to successful self editing.
Looking at it now, it seems I probably moved Scrivener’s Front Matter folder within my Manuscript Folder, not realising that I could just tick a box once it was time to compile.
And I included two extra documents which are effectively my endmatter: ‘About the author’ and ‘About RedPen’.
When I examine the Compile route, I see that I didn’t have section layouts defined … so I was definitely winging it at this stage of my Scrivener journey. And yet I managed to produce an ebook …!
But … I would recommend you let Scrivener guide you as to what to include, and let Scrivener make the inclusion of frontmatter and endmatter be just two ticks away.
Why?
Because … there are different requirements for front and endmatter according to the output route: manuscript, paperback or ebook, or any other route you define, like mine for my beta readers. Having more than one option for both available in the Binder, and only deciding when you compile, makes a lot of sense.
Also, if you look at those pages, you’ll find Scrivener is providing guidance on what should be included, and uses placeholders so you need type information only the once.
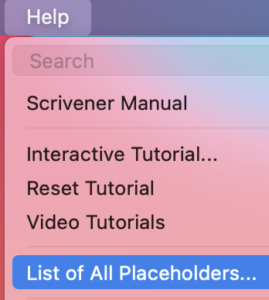
The list of all placeholders is available from the Help menu.
- The Title Page for the Manuscript format uses placeholders <$wc100>, <$PROJECTTITLE> and <$fullname>.
- The Title Page for the paperback uses <$PROJECTTITLE> and <$author>.
It’s interesting that one uses <$fullname> and the other uses <$author>. Both result in the same output. Perhaps a writer doesn’t feel like an author until they’ve published the manuscript?

The data to replace these placeholders when you compile can be specified in Compile.
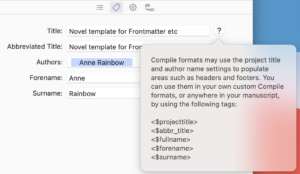
If you don’t specify Title and Abbreviated Title, Scrivener uses the filename of the project.
What should you include in your FrontMatter and EndMatter?
It’s up to you! But there are some conventions and, if you want your book to look professionally produced, it pays to pay attention to them.
Look at other books, similar to the one you’re producing, and learn from them. There’s a standard order for what’s included (if it’s included at all).
FrontMatter options
- Recto: The Half Title page states your book’s title. Can be omitted.
- Recto: The Title page includes the book’s title, subtitle, and author name.
- Verso: The Copyright includes the copyright information for your book. There is standard text to use. Look at what other writers include.
- Recto: The Reviews page shares reviews or praise for your book.
- Verso: The Dedication page lists those people to whom you are dedicating this book
- Recto: The Table of Contents page – this usually only lists material from here on
- Recto: The Preface
- Recto: The Acknowledgments page although these might be included in endmatter instead.
- Recto: The Prologue
- Recto: The Introduction
Since most ‘sections’ in the front/end matter start on a recto, you might need to insert blank pages, and/or specify that for the section layout FrontMatter.
We already discussed headers and footers in the previous blog but, as a reminder, in the front matter page numbers tend only to be used if you have lots of pages. And, to make it clear this is frontmatter, rather than the body of your book, Roman numbering (i, ii, iii, iv, …) is used (if at all).
EndMatter options
When considering what to include in your endmatter, look at other books, similar to the one you’re producing, and learn from them. As with frontmatter, there’s a standard order for what’s included (if it’s included at all).
- Recto: The Bibliography and Reference
- Recto: Bio
- Recto: Index
But … as illustrated above, authors can include other material as endmatter, such as Acknowledgements, Author’s Notes, and a Glossary.
And, page numbering for endmatter is either not included or just continued from the page numbering of the body of the book.
If you are producing an eBook, a link to your website, social media platforms, and maybe an online store where other books written by you can be purchased should certainly be included somewhere.
Questions about Scrivener?
Need a helping hand with Scrivener tools? Want a demo? Book your own Simply Scrivener Special session with me, at a time to suit you.
And, if you need a steer on self-editing, check out my RedPen Editing courses. Join RedPen Editing and enjoy a 5-day editing taster course for free.
The ScrivenerVirgin blog is a journey of discovery:
a step-by-step exploration of how Scrivener can change how a writer writes.
To subscribe to this blog, click here.
Also … check out the Scrivener Tips
on my ScrivenerVirgin Facebook page.
Pingback:Scrivener Advent Calendar: R is for ... - ScrivenerVirgin
18 December 2024 at 11:02Pingback:Scrivener Advent Calendar: F is for ... - ScrivenerVirgin
18 December 2024 at 06:47Yukari
29 March 2023 at 15:04Hello. I am trying to find out if there is an easy, quick way to do typesetting on scrivener, or if there’s an “auto-configure” typesetting button that I haven’t found yet. (To be more specific, I’m looking for a way to have every line end on the same space at the end of the book like traditional publishing does, instead of the natural waveform the end of paragraphs tend to have when you don’t do anything to them.)
Any info would be great!
Thank you.
Anne Rainbow
29 March 2023 at 15:12The ‘waveform’ is called ‘ragged right’ and happens when you’ve applied Left Justification to a paragraph. To achieve a straight edge on the right (as well as the left) you need to select Full Justification. Read this blog post https://www.scrivenervirgin.com/2022/11/diy-book-formatting-scrivener-body-text/