

The Scrivener Mindset: Formatting via Compile
achieved 
Formatting via Compile – the final frontier
I explained in this blog post how formatting can be controlled at three levels.
- For all projects
- For this project
- For this document
However, this formatting effort simply determines how your text looks in the Editing pane. What’s more important is how your material will be formatted on output. That’s achieved by formatting via Compile – for which you need your section types, your section layouts.
Formatting via Compile – decision time
Before you can start tweaking the settings, you need an idea of how you want the output to look. This will also depend on your output route.
 Electronic forms such as ebooks are not ‘paged’ so you don’t need to include page numbers and, since the reader decides on the size and style of the font, you needn’t worry about that either.
- Electronic forms, such as PDF, and paper-based forms are paged. You need to confirm/specify the page size, the margin settings and you ought to include page numbers.
Whatever your output, there are also many other decisions to be made.
- Vertical white space: the space above chapter headings (called padding), and the space between paragraphs (called leading)
- Horizontal white space: margin sizes, any indentation, justification, …
- Headers and footers
- Font styles and relative sizes of headings and text
- Special effects (bold, underline, italic, capitalising the opening words, …)
The process is then simple. For every entry in the left hand pane – Section Layouts, Separators, Text Layout, etc, etc – tick or untick, or make a selection, or type an entry to specify your requirements.
In this post and the next, I go through all the options (!) but would suggest you adopt this approach.
- Accept Scrivener’s defaults, create an output, look at it and then, and only then, start tweaking the settings.
- Only tweak one setting at a time. It is a process of trial and error. You will make mistakes. The setting might not produce the effect you expected. So, don’t save the change until you’ve seen the output and are happy with it.
- Each time you make a successful tweak, congratulate yourself. Take a break. This process requires a clear head, not a frazzled one.
Ready? Let’s walk through the process …
Step-by-step approach to formatting via Compile
For each section type, once you’ve assigned a section layout, you can then accept Scrivener’s default, or set the formatting to suit yourself.
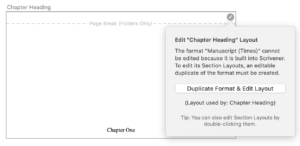
I wanted to start by formatting the Chapter Heading section type that I had assigned to the Chapter Heading section layout …
But as soon as you click on the pencil icon for one of Scrivener default section layouts, you’ll be prompted to create a duplicate – you cannot amend the default project layout!
And if you click on the cog wheel, the edit option is greyed out. 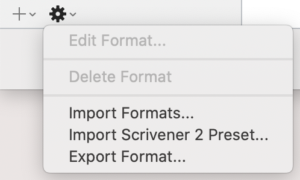
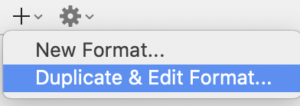
Whereas, clicking on the + invites you to ‘Duplicate and Edit Format’.
Whichever route you try to take, you need to accept Scrivener’s directions!
I’d started with Scrivener’s default ‘Manuscript (Times)’ and – once I’d selected the ‘duplicate’ route – entered the name DEMO Manuscript (Times). The next hurdle was deciding whether I wanted this to be one of My Formats (available for all my projects) or as a Project format (only available for this project)
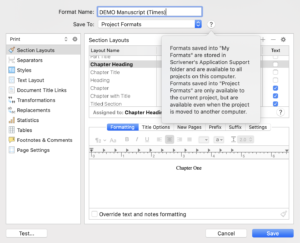
Whichever you choose – My Formats / Project Formats – if you change your mind, you can create a duplicate of it and opt for the other: Project Formats / My Formats.
Having done that, you are then faced with a plethora of decisions! Let’s consider all the options …
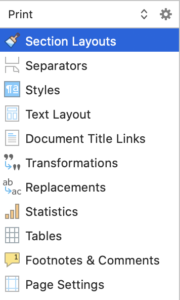
Formatting via Compile – the left hand pane entries
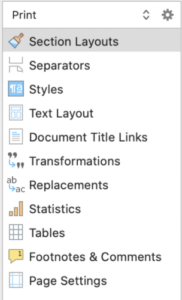
Depending on the output route you chose, the left hand pane presents a list of topics, each of which leads to controls for you to set.
For this blog post, I’ve opted for Print and Scrivener has presented 11 topics for me to consider. If you were to choose a different output route, you’d see other topics, those relevant to your choice.
In the next blog post, I will concentrate on the most important topic: Section Layouts tab (the top entry).
In this post, though, we’ll whistle through the other ten.
Note that these settings apply to all section types – Scrivener applies them globally to your manuscript.
Separators
You have the option to include some text, or special characters, or a line space between consecutive documents/folders. This is in addition to whatever you typed in the Binder (your headings) and whatever you typed into the Editing pane (your text). This additional material is called a separator.
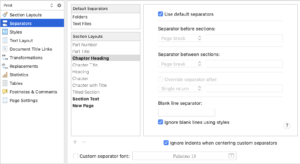
You can specify the separators according the type (folder or document) or according to the section types. As I mentioned above, unless you have a burning desire for something different, go with the defaults to start with. You can get clever later …
[You might ask: what about if the separator is a blank line and it happens between pages? The reader won’t spot it! See the Text Layout tab below for how to ‘solve’ this problem.]
Styles
One of the beauties of Scrivener is that you can set styles while you are writing/editing so that the text in the Editing pane reassures you of how the material will look when it’s output. But you can also opt for a different look when it’s time to output.
(And you can, by setting up additional project formats, have more than one ‘look’. More on that in a later blog post.)
If you decide not to use any of Scrivener default styles, and don’t set up any named styles of your own, you can ignore the Styles tab.
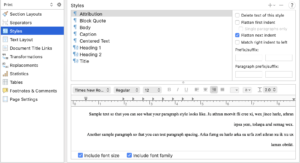
I recommend though that you – when you are feeling strong – venture into setting up at least two essential styles. You’ll then need this pane to pull in your named styles and tweak them if you wish. Literature & Latte’s video (6 mins in) explains how.
Text Layout
This pane offers a mish-mash of options. The default is no ticks … before you tick anything, make sure you understand what effect it will have. (This advice applies to all settings on all panes!)
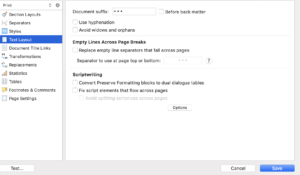
I recommend you consult the Scrivener manual (section 24.6 pages 641-45) as this pane offers different options depending on your output: PDF/print, word processing, web pages, ebooks, and scriptwriting.
Document Title Links
This pane only appears if you have set up at least one section type to have a title prefix or suffix.
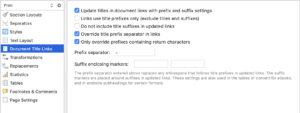
The options (ticked or unticked) then affect what will appear in any links to these titles, eg in your table of contents or if you cross refer to them within your text. Section 24.8 of the Scrivener manual spells out the various options.
Transformations
This pane instructs Scrivener via simple rules to transform your text in some way. This can be useful if you need to submit your manuscript to a recipient who stipulates a rule (like underline for text that needs to be italicised). Rather than ‘fix’ your manuscript for that one recipient, you can use the relevant Transformation option instead.
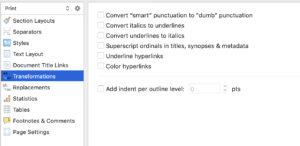
This is explained in detail in the Scrivener manual section 24.13 (page 653).
Replacements is another of those panes which you’re unlikely to need, but it’s there and the Scrivener manual explains how it might prove useful in section 24.15 (page 657). Ditto for Statistics (see Scrivener manual section 24.16 – page 657) and Tables (see Scrivener manual section 24.17/18 – pages 658-59) but check them out and see what they do for yourself?
Footnotes & Comments
If you use footnotes/endnotes at all, this pane lets you determine where they appear and how they are numbered plus a load of other stuff!
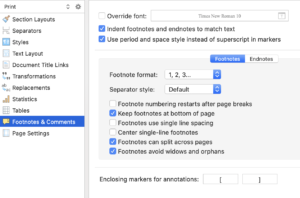
There are two panes within the body of the pane: one for Footnotes as seen above, and the other is for endnotes. I explain footnotes and endnotes in this blog post.
You’ll notice that although the pane title is Footnotes & Comments, there seems to be no mention of comments. You can though choose the enclosing marks for annotations though (last item in the pane).
Comments only appear within this pane if you have selected an output route where Comments need a setting. This is true when you output to .DOCX and you have a choice on how the comments will appear in the Word document as shown below.
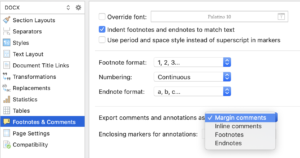
As ever, Scrivener only reveals the options that are pertinent to the route you have chosen. So, although it might look like you have millions of decisions to make, at least it’s only those which matter!
(See the Scrivener manual section 24.19 pages 659-67 for the full story.)
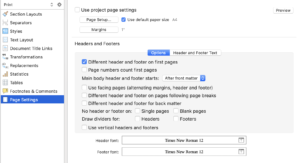
Page Settings
The Page Settings pane has three parts to it. At the top, you control the page size.
If, like me, you have one printer and you’ve set up the paper size through File / Page Setup, and, for this project format, you are printing on that printer, you can tick the box labelled ‘Use project page settings’.
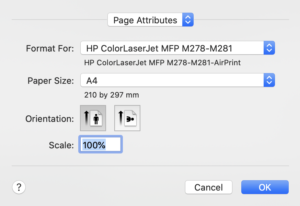
Easy!
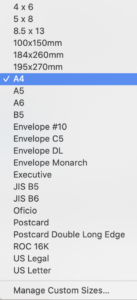
If you are outputting to paperback though, this is where you will specify the page size. Scrivener provide a long list of options from which to choose. One of them should work for you, or you can customise the page …
Note: If you are outputting to ebook, the Page Settings entry does not appear in the list to the left (because ebooks don’t have page sizes!), but there are other options for you to consider instead: CSS, HTML Settings.
Once you’ve completed that top area, the bottom area has two tabs: ‘Options’ and ‘Header and Footer Text.
As a writer, you may never have imagined how many options there are when presenting headers and footers. The Options pane presents these choices as a series of tick boxes and these are explained in detail in the Scrivener manual (section 24.20.5 starting on page 669).
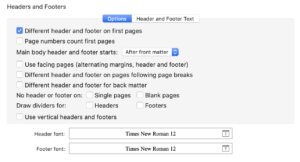
The Header and Footer pane then offers six fields in which you can specify what you’d like to see in the header/footer areas.
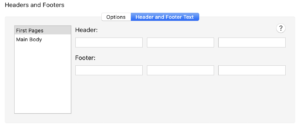
I explain what you might type in these fields in this blog post.
And that’s the whistle stop tour of formatting via Compile over. Next time, I’ll focus on that important first entry: Section Layouts.
Questions? Need a helping hand? Want a demo?
To watch me go through the process of formatting via Compile or to ask any questions, book a Simply Scrivener Special.
To help me prepare, you could also complete this short questionnaire.
The ScrivenerVirgin blog is a journey of discovery:
a step-by-step exploration of how Scrivener can change how a writer writes.
To subscribe to this blog, click here.
Also … check out the Scrivener Tips
on my ScrivenerVirgin Facebook page.
Louise Kingston
14 July 2023 at 12:50SO helpful and timely for me today.
Thanks, also for the references to the manual.
Anne Rainbow
14 July 2023 at 13:14You are welcome Louise. Onwards and upwards!
Pingback:Exploring Scrivener Compile: Simplifying the Compile Feature - Lancy McCall
26 April 2022 at 21:46