

Scrivener for novelists
Scrivener is a great tool for novelists
Scrivener is also a great tool for all kinds of writers.
- In this blog, I focus on novelists.
- In subsequent posts, I address the needs of memoir writers, essayists, short story writers, poets, non-fiction writers.
The tools – the Scrivener features – I use for novel writing have all been the topics in previous blogposts. This post provides an overview of my novel writing toolkit; and the links will take you to more detailed information on each tool.
Novel preparation
 Before I write the first word of a new novel, a lot of preparation happens.
- Preliminary thoughts surface in my mind, usually when I walking or showering – or asleep.
- I have a notebook in which I scribble ideas.
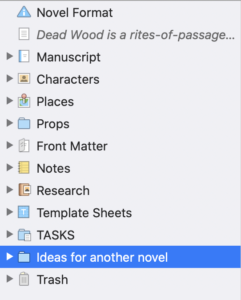
To stop me being distracted by fresh ideas while I’m working on my current work-in-progress, I have a folder in the Binder – Ideas for another novel – where I allow myself a few minutes to make notes – and get straight back to that WIP.
Setting up a new project
Once I have an idea I decide to pursue, I set up a new project. The only ‘question’ I need to ask myself is whether this is a straightforward novel, or will it need parts.
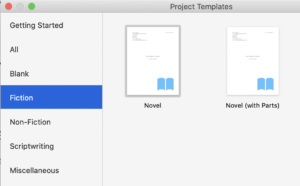
It doesn’t matter if, later, I change my mind. But, if I can choose the best template from day one, I’ll save time later. For more details on choosing the best template, click here.
Choosing a title
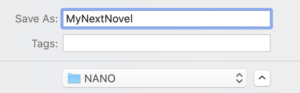
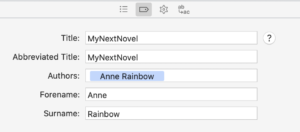
As soon as I’ve specified the default template, Scrivener wants to know the name of my project.
- If I have a title already, I go with that.
- If not, I don’t sweat over this. Any project filename will do at this stage.
Later, much later, when it’s time to compile my manuscript, I can replace the filename with a title that better fits my material. This is achieved in a Compile tab in which the project metadata is defined.
For more details on project metadata, click here.
Creating marketing blurb
 Yes, I know the manuscript hasn’t been written yet, but one of the first things I do is to create a folder called My Story in which, as the work progresses, I store various ‘treatments’.
Why do I do this?
At the very beginning, all I have is an idea. The My Story folder helps me to capture my initial thoughts while they are fresh in my mind, before I begin writing for real.
In the Why am I writing this? document, I answer these questions:
- What is it about?
- Why is that important?
- Why is that important to me?
- Why should I be the one writing this story?
- What impact do I want this story to have on the readers?
This is essentially my motivation. If, at any time, I wonder why I ever started this novel, I go to this document and remind myself.
Character development
I’m a planner and I write character driven stories. You may not be a planner; you may be writing plot driven stories. (For more information on plotters versus pantsers, read this post.)
So, although character development might not be your top priority, at some point, you will need to pin down your characters.
For this activity, Scrivener provides a character sketch template. You can adapt this template to suit your own preferences, to include the kinds of information you want to record about each character.
- Open the Scrivener template.
- Make whatever changes you want to make.
- Use Save as Template to create a new template – one that suits you.
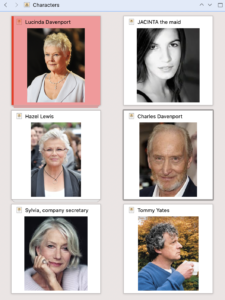
To help me visualise my characters, I search out actors (or friends) who look like how I imagine my cast – if ever the book were to be turned into a film! This is my imaginary cast for Lucinda’s Legacy. The images are dragged into the Inspector.
Settings and props
Scrivener provides a default template for settings too. You can use theirs, or customise to create your own version if you wish.
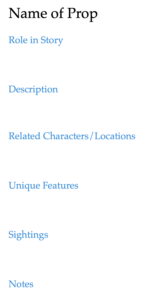
I’ve also created a Prop Sketch template. For me, props have as important a role as characters and settings – and I need to keep track of them.
Research
By now, I have a good grip on my characters, my settings and the beginning of a props list. If I’ve not been tempted already, I then focus on research.
I have a few friends who provide expert advice.
- Frank, a retired policeman who used to provide all the background information about how missing persons and dead bodies are processed. More recently, he has introduced me to a younger serving officer who I can call on for current procedures.
- A solicitor … very useful!
- A medical doctor … willing to talk about causes of death, drugs, etc
- Friends who play golf – for my Dead Wood novel …
- and so on.
The information I glean from them goes into my EXPERT ADVICE folder, within the Research folder.
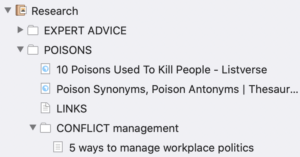
I also Google the theme of my novel, or topics I raise in the story. I also have one document for links. That’s because importing Internet pages adds to the project file size. Collecting links to relevant pages is less expensive on space.
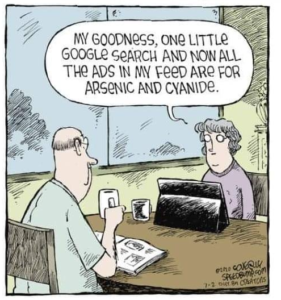
Be aware that, as you trawl the Internet, you leave a trail of cookies. To avoid having your Facebook feed flooded with adverts related to your topic of interest, set up a separate email address for such research and/or use an incognito window on your browser for your research investigations.
Corkboard planning
I use the Corkboard rather than the Outliner to plot my story; I explain why and how here.
Several tools serve me well at this stage.
- While I am creating new scenes, I use split panes so that I have my various sketches (character, setting and prop) on one side and the Corkboard on the other.
- Having created a new card (scene), I use the Inspector to write the synopsis for that scene. I also start applying metadata such as Label, and setting up my keywords.
- I use a date/time custom metadata field to add a date/time to each scene and thus create a time line.
- Scrivener 3’s threaded Corkboard helps me to see how I’ve intertwined different points of view.
- I use Compile to produce a printed version of my synopses, and, from this, I can check my plot.
Writing
The Editing pane is where I type my manuscript. There is an option to go into Composition mode, but I’m not distracted by having the full Scrivener interface. Each to their own, and good on Literature & Latte in providing alternatives to suit all shades of author.
However, I do set up my writing space so that I have everything I like to use to hand: Binder, Editing pane, Inspector.
While writing, I use a host of Scrivener features.
- I use annotations if I am writing at speed and a thought occurs to me which I need to investigate later. If I have more time – and this is more likely while I am editing – I leave myself messages using the Comments feature.
- I set myself word count targets and can see my progress in the Outliner view.
- The Status field helps me to keep track of my progress for each scene.
Scrivener also offers a Page View, which I don’t feel the need to use, but I know it’s appreciated by writers who prefer a WYSIWYG interface.
Editing
I use a different interface when I’m editing.
I need to ‘see’ my manuscript from all angles and Scrivener provides a comprehensive toolkit for editors.
- Collections – providing a subset of your manuscript, allowing you to focus on relevant documents rather than trawling through the entire manuscript
- Metadata – essential for checking continuity
And I have a number of editing strategies. My first fix is explained here.
When it’s time to polish every word, the Linguistic Focus tool is useful.
 Reviewing / Publishing
Before I share anything with anyone, to make sure my manuscript is ‘clean’, I use Scrivener’s Text Tidying tools. I also set up named styles for a professional layout.
I then export sections of my manuscript for writing friends who offer to provide feedback. I record my progress using a checkbox custom metadata field and I look at the Outliner to see which reviewers have which chapters.
Scrivener provides options for all manner of exporting. I use several routes.
- Word for reviewers during the development stage
- PDFs for beta readers and for publication on paper
- ebooks for beta readers
- Kindle for publication
My Editing the RedPen Way: 10 steps to successful self-editing has been republished several times – each time for the same (amended) manuscript.
Marketing
I already have my My Story folder in the Research folder. I revisit this and, having completed my manuscript, I polish my treatments so that they reflect the finished product rather than what I had envisaged when I first began. Then, if/when I’m contacted by someone who will help me to promote my book, I already have a blurb that might suit them. A tweak of the treatment which is almost the required length is all that’s needed.
How other novelists use Scrivener
Over the past few years, several guest bloggers have shared how they use Scrivener to write their novels. Click on these novelists’ names to discover more about them; then click on their most recent blog appearance to find out what they liked best about Scrivener.
Denise Brixey Erin Mcintyre Lauren Lee Merewether Jerry Nelson
Phil Hurst Rachel Hobbs Rosemary Kind Toni Crowe
Questions? Need a helping hand? Want a demo?
To watch me demonstrating the various features mentioned in this blogpost or to ask any questions about the features that serve novelists so well, book a Simply Scrivener Special.
To help me to prepare, you could also complete this short questionnaire.
The ScrivenerVirgin blog is a journey of discovery:
a step-by-step exploration of how Scrivener can change how a writer writes.
To subscribe to this blog, click here.
Also … check out the Scrivener Tips
on my ScrivenerVirgin Facebook page.
Pingback:Scrivener Advent Calendar: N is for ... - ScrivenerVirgin
18 December 2024 at 06:42